This document is a user manual for the Gprinter GP-1224T / GP-1225T and GP-1234T / GP-1235T series of Thermal Transfer Barcode Printers.
Function Description
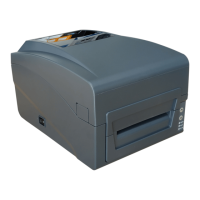
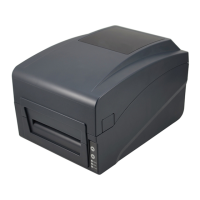
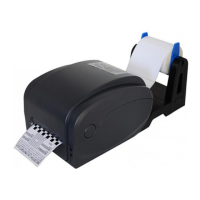
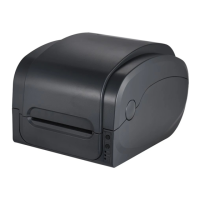
The Gprinter GP-1224T / GP-1225T and GP-1234T / GP-1235T series are direct thermal and thermal transfer label printers designed for real-time and batch label printing. These printers are equipped with two sets of gear-driven motors, allowing them to handle 300-meter long ribbons and large label rolls. The internal volume can accommodate a 5-inch Outer Diameter (OD) paper roll, and with an external paper holder, an 8.4-inch OD industrial-grade label roll can be installed.
The printers support both direct thermal and thermal transfer printing modes, offering versatility with various printing materials such as thermal paper, plain paper, coated paper, silver paper, and plastic paper. They come with standard serial, parallel, USB, and Ethernet connection ports.
Built-in features include common 1D and 2D barcode fonts, support for four-direction printing (0, 90, 180, 270 degrees), and character enlargement from 1 to 10 times. The printers also include five different size bitmap fonts, OCR-A, and OCR-B fonts. With print resolutions of 203dpi/300dpi, these printers are positioned as a strong choice in their class.
The product is classified as a Class A product, suitable for Non-Tropic regions. Users are advised that it may cause radio interference in certain environments and may need to take preventive measures.
Application Fields:
- Manufacturing & Warehousing logistic industry: Product labeling and marking, warehouse management labels, category marking labels, operation instruction marking labels, distributing instruction marking labels.
- Healthcare: Patient marking, medicine marking, specimen marking.
- Parcel Post: Mailing labels.
- Office & Studio: Retail, price label marking, product item marking, jewelry product marking.
Important Technical Specifications
Models: GP-1224T/GP-1225T and GP-1234T/GP-1235T
Standard Equipment:
- Ribbon printing and Thermal printing capabilities.
- ABS plastic housing.
- Gap sensor and Ribbon sensor.
- Print head open sensor.
- USB 2.0 (full speed) Communication interface.
- 2 MB SDRAM Memory and 2 MB FLASH Memory.
- Paper key and LED indicating lamp.
- Built-in 8-dot matrix font (English numbers).
- Characters and barcodes can be printed in four rotation directions (0, 90, 180, 270 degrees).
- Built-in simplified Chinese, traditional, and Korean fonts for programming.
- Ability to print text, barcodes, and pictures.
- Supported 1D Barcodes: Code 39, Code 93, ITF, EAN 128, Code 128 subsets A, B, C, Codabar, EAN-8, EAN-13, UPC-A, UPC-E, EAN and UPC 2(5) digits add-on, MSI, MSIC, PLESSEY, CPOST, ITF 14, EAN 14.
- Supported 2D Barcodes: QR code.
- Supported Picture Formats: BMP, PCX.
Optional Accessories:
- External support for GP-1224T / GP-1234T, GP-1225T / GP-1235T standard.
General Specifications:
- Printer Size: 210(W) X 175(H) X 278(D) mm.
- Printer Weight: 2.09 KG.
- Power Supply: Built-in voltage automatic switching power supply.
- Input: AC 100-240V.
- Output: DC 24V 2A.
- Work Environment: 5~45℃ (41~104°F), 25~85% Dampness.
- Storage Environment: -10~50℃ (-10~140°F), 10~90% Dampness.
Print Specifications:
- Print Head:
- GP-1224T/GP-1225T: 203 dots/inch (8 dots/mm).
- GP-1234T/GP-1235T: 300 dots/inch (12 dots/mm).
- Print Mode: Thermal Transfer / Direct thermal.
- Dot Size (width X length):
- GP-1224T/GP-1225T: 0.125x0.125mm (1mm = 8dots).
- GP-1234T/GP-1235T: 0.083X0.083mm (1mm = 12dots).
- Print Speed (inches per second):
- GP-1224T/GP-1225T: 2~6 inch/s.
- GP-1234T/GP-1235T: 1~5 inch/s.
- Maximum Print Width: 108mm (4.25").
- Maximum Print Length: 2286 mm (90").
- Pulse Excitation: 1X10⁸ pulses.
- Heat Sensitive Piece (wear): 50km.
Ribbon Specifications:
- Ribbon Diameter: Max. 67 mm.
- Ribbon Length: 300 m.
- Ribbon Axis Size: 1 inch (25.4 mm).
- Ribbon Width: Max. 110mm, Min. 30 mm.
- Ribbon Winding Form: The outer coil type.
Paper Size Specifications:
- Maximum Capacity of Internal Paper Roll Diameter: 127 mm (5") OD.
- Paper Type: Continuous paper, gap of paper, paper folding, punched paper.
- Paper Winding Form: Print out of plane roll / print surface involute.
- Width of the Paper (tag + bottom paper): Max. 120mm (4.72"), Min. 20 mm (0.78").
- Thickness of the Paper (tag + bottom paper): Max. 0.254 mm (10 mil), Min. 0.06 mm (2.36 mil).
- Roll Axis Size: 25.4 mm~38 mm (1"~1.5").
- Label Length: 10~2286mm (0.39"~90").
- Note: If the tag length is less than 25.4mm (1"), it is recommended to use a perforated line in the gap on the label paper for easier tearing.
- Paper Height Gap Spacing: Min. 2 mm (0.09").
Usage Features
Installation:
- Place the printer on a stable surface.
- Ensure the printer is turned off before plugging in the power cable.
- Connect the serial, USB, Parallel, or Ethernet cable to the printer and PC.
- Connect the power plug to the power supply socket.
Ribbon Installation:
- Open the printer top cover by pressing two buttons on the left and right sides.
- If using a new ribbon without an attached paper tube, insert an empty paper tube into the ribbon take-up hub.
- Install the ribbon take-up hub (with or without paper tube) onto the printer from left to right.
- Press the push button to open the print head.
- Insert the black ribbon supply hub into the new ribbon, then install the ribbon and supply hub from left to right.
- Adjust the big blue wheel to ensure the ribbon touches the take-up hub flatly and smoothly without wrinkles.
- Close the print head by pressing the two arrow locations, ensuring both sides are correctly closed for good print quality.
Paper Installation:
- Open the printer top cover.
- Insert the media roll spindle into the media roll.
- Place the media roll onto the printer, adjusting its position to be in the center of the media roll spindle.
- Press the push button to open the print head.
- Install the label paper as shown in the manual.
- Close the print head by pressing the two arrow locations, ensuring both sides are correctly closed for good print quality.
- Close the printer top cover.
LED Indicator Functions:
The printer has three LED indicators (ON LINE, ERROR, RIBBON) and two buttons (FEED, PAUSE) that enable various functions.
Direct Thermal Printing Method LED Status:
- Power on, Error off: Printer powered on, normal printing status.
- Power flashes every 640ms, Error off: Printer is paused.
- Power off, Error on for 80ms then off for 160ms (beeping): Printer cover is opened.
- Power off, Error on for 500ms then off for 6s: Label gap detection error.
- Power off, Error flashes every 160ms (twice), then off for 320ms (beeping): Paper out.
- Power off, Error flashes every 160ms (thrice), then off for 320ms (beeping): Black mark detection error.
- Error flashes every 160ms: Printer overheated protection mode activated. The printer CPU will recheck print head temperature after 1 minute. Normal operation resumes when temperature returns to normal.
- Note: Beeper function can be enabled via DIP switch settings.
Thermal Transfer Printing Method LED Status:
- Ribbon indicator on: Ribbon installed successfully.
- Ribbon indicator flashes every 300ms (beeper sounds every 2.4s): Ribbon improperly installed (no ribbon, ribbon end, or broken ribbon).
- Note: Beeper function can be enabled via DIP switch settings.
Button Functions:
- Feed: When the printer is ready (blue LED fixed), clicking the FEED button feeds a label paper from the front end.
- Print Job Timeout: During printing, clicking the PAUSE button suspends the print job. The power indicator will flash blue. Clicking the button again resumes the print job.
Start Functions (Six Power-up Functions):
These functions are accessed by pressing and holding a button while turning on the printer.
- Self-test page:
- Turn off the printer.
- Ensure paper roll is correctly installed and top cover is closed.
- Press and hold the FEED button and turn on the printer. Release FEED button after the self-test page prints. This checks if the printing function is normal.
- Print DIP Switch page:
- Turn off the printer.
- Ensure paper roll is correctly installed and top cover is closed.
- Press and hold the PAUSE button and turn on the printer. Release PAUSE button after paper feeds. This prints the DIP switch page.
- Debugging Mode:
- Turn off the printer.
- Ensure paper roll is correctly installed and top cover is closed.
- Press and hold PAUSE and FEED buttons and turn on the printer. When both Power (blue) and Error (red) indicators are on, release PAUSE and FEED buttons. The printer enters Debugging Mode, printing "NOW IN DUMP MODE".
- In this mode, all received label data is printed in machine code (hexadecimal values on the left, ASCII characters on the right). This is for debugging programs. Turning the printer off and on again returns it to normal printing mode.
- Skip AUTO.BAS program:
- If an AUTO.BAS file is saved in flash and runs automatically on power-up, this function skips it.
- Press and hold PAUSE and FEED buttons, then turn on the printer. When Power (blue) is off and Error (red) is on, release the buttons. The printer will skip AUTO.BAS and the Power indicator will turn on.
- Printer Initialization:
- Turn off the printer.
- Press and hold PAUSE and FEED buttons, then turn on the printer. When Power (blue) is on and Error (red) is off, release the buttons. All data in printer DRAM will be cleared, and printer settings will be restored to factory default. The power indicator will then be on, and the printer will be in ready status.
- Note: Factory default settings do not include ribbon settings.
- Ribbon Detection:
- When the printer powers on, or is in thermal transfer printing mode, it automatically detects ribbon status (installed, end, or broken).
- After ribbon detection, the printer is set to thermal transfer printing mode. If no ribbon is detected, the system defaults to direct thermal printing mode.
Default Settings after Initialization:
- Speed: 4 inch/sec (101.6mm/sec), 203dpi/300dpi.
- Density: 10.
- Gap: 0mm.
- Direction: Printing content placed on page from top to bottom.
- Reference: Top left corner from printing direction.
- SHIFT: 0.
- OFFSET: 0.
- SET TEAR: ON.
- SET HEAD (Cover open detect): ON.
- Set PRINTKEY: OFF.
- SET REPRINT: OFF.
- SET KEY1 (FEED): ON.
- SET KEY2 (PAUSE): ON.
- CLEAR RAM: CLEAR.
- CLEAR FLASH: NOT CLEAR.
Troubleshooting (Common Problems and Solutions):
- Power indicator not "ON":
- Possible Reasons: Plug to AC outlet and printer not well connected, printer power not turned on, print head not well closed.
- Solutions: Check power connector and AC outlet, turn on power switch, close print head by pressing the whole print head mechanism (or 2 arrow locations).
- Not printing:
- Possible Reasons: Ribbon end, ribbon improperly installed, label paper end, label paper improperly installed, gap sensor detection error, label paper jammed inside printer, serial cable improperly connected, Ethernet cable improperly connected, USB cable improperly connected, ribbon non-standard, ribbon printing side wrong installed, print head not clean, print density setting wrong, print head cable not well connected, step motor cable not well connected, command setting wrong.
- Solutions: Change new ribbon/label paper, refer to installation steps, adjust paper specification, clear jammed paper, check cable pin configuration/baud rate/new cable, check RJ-45 LED indicator/printer IP/new Ethernet cable, check USB cable/new cable, check ribbon model/specification, re-install ribbon, clean print head, suggest density set to 7, re-connect print head/step motor cable, check PRINT/CRLF command at end of printing file.
- Not good printing quality:
- Possible Reasons: Ribbon and label improperly installed, too much dust or adhesive on print head, print head damaged.
- Solutions: Re-install ribbon and/or label, clean print head, take self-test page to check if print head needs changing.
- Data miss printing in one or two sides:
- Possible Reason: Label paper size wrong setting.
- Solution: Check if label size is set correctly and matches your label paper.
- Ribbon wrinkle:
- Possible Reasons: Print head unbalanced stress, ribbon & label improperly installed, label feeding not smoothly.
- Solutions: Reset label print density, adjust paper width fixing stand to fit label paper size.
- Printing not stable:
- Possible Reason: Printer in HEX Dump mode or RS-232 setting wrong.
- Solutions: Restart printer and leave Dump Mode, or reset RS-232 PARAMETER.
Maintenance Features
To ensure printing quality and extend the printer's lifespan, regular cleaning is recommended.
Recommended Cleaning Materials:
- Cotton swab
- Lint-free cloth
- Vacuum / Blower brush
- 100% ethanol
Cleaning Process:
- Print Head:
- Turn off the printer.
- Allow the print head to cool for at least one minute.
- Use a cotton swab and 100% ethanol to clean the print head surface.
- Cleaning Frequency: When changing new label paper.
- Rubber Roller:
- Turn off the printer.
- Rotate the platen roller and use a cotton swab with 100% ethanol to clean it.
- Cleaning Frequency: When changing new label paper.
- Paper Tear Bar:
- Use a cotton swab and 100% ethanol to clean.
- Cleaning Frequency: When necessary.
- Sensor:
- Use an air brush or vacuum to clean dust off the sensor.
- Cleaning Frequency: Monthly.
- Inner Side of Printer:
- Use an air brush or vacuum to clean the dust.
- Cleaning Frequency: When necessary.
Important Maintenance Notes:
- Always turn off the printer power before cleaning.
- Do not touch the print head with your fingers.
- Use 100% ethanol; do not use medical alcohol to avoid damage to the print head.