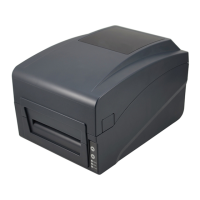
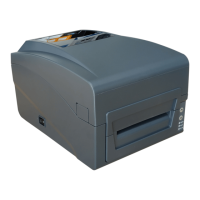
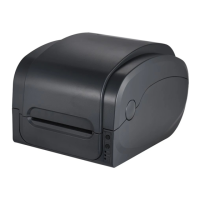
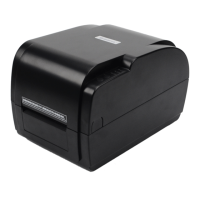
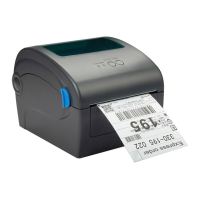
This document is the User's Manual for the GP-1225Z and GP-1235Z Thermal Transfer Barcode Printers, manufactured by Gainscha (Hong Kong) International Limited. It provides comprehensive information on the printer's features, installation, operation, troubleshooting, and maintenance.
The GP-1225Z and GP-1235Z series printers are designed for both direct thermal and thermal transfer label printing, offering versatility for various printing materials such as thermal paper, plain paper, coated paper, silver paper, and plastic paper. These printers are equipped with two sets of gear to drive the motor, allowing them to handle 300-meter long ribbons and large label rolls. The internal volume accommodates a 5-inch Outer Diameter (OD) paper roll, and with an external paper holder, they can support an 8.4-inch OD industrial-grade label roll.
Function Description:
The primary function of these devices is real-time and batch label printing. They come with standard serial, parallel, USB, and Ethernet connection ports, making them adaptable to various system setups. Built-in common 1D and 2D barcode fonts are supported, along with the capability for 4-direction printing (0, 90, 180, 270 degrees). Characters can be enlarged from 1 to 10 times. The printers also include five different sizes of bitmap fonts, OCR-A, and OCR-B fonts, and offer higher print resolutions of 203dpi/300dpi, making them suitable for a wide range of labeling needs.
Application Fields:
These printers are versatile and can be used across multiple industries:
- Manufacturing & Warehousing Logistic Industry: Ideal for product labeling and marking, warehouse management labels, category marking labels, operation instruction marking labels, and distributing instruction marking labels.
- Healthcare: Suitable for patient marking, medicine marking, and specimen marking.
- Parcel Post: Used for mailing labels.
- Office & Studio: General office labeling needs.
- Retail: Perfect for price label marking, product item marking, and jewelry product marking.
Usage Features:
The manual details the process of setting up and operating the printer.
- Installation: The printer should be placed on a stable surface. Users need to connect the appropriate interface cable (serial, USB, Parallel, or Ethernet) to both the printer and the PC, then connect the power plug. It is crucial to ensure the printer's power is off before plugging in the power cable.
- Ribbon Installation: The process involves opening the top cover, installing the empty paper tube onto the ribbon take-up hub, and then installing the ribbon and supply hub. For new ribbons, users may need to roll the ribbon onto an empty paper tube and adjust the blue wheel to ensure the ribbon lies flat and smooth. The print head should be closed correctly to ensure good print quality.
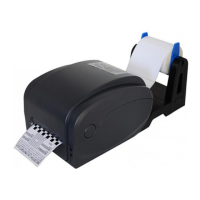
- Paper Installation: Similar to ribbon installation, the top cover is opened, the media roll spindle is inserted into the media roll, and the roll is placed onto the printer, centered on the spindle. The print head is then opened, the label is installed as shown in the diagrams, and the print head and top cover are closed.
- LED Indicator Functions: The printer features three LED indicators (ON LINE, ERROR, RIBBON) and two buttons (FEED, PAUSE). These indicators provide status updates:
- Normal Printing: Power indicator is on, Error indicator is off.
- Paused: Power indicator flashes, Error indicator is off.
- Printer Cover Open: Power indicator is off, Error indicator flashes briefly, and the printer beeps.
- Label Gap Detection Error: Power indicator is off, Error indicator flashes for a longer duration.
- Paper Out: Power indicator is off, Error indicator flashes.
- Black Mark Detection Error: Power indicator is off, Error indicator flashes.
- Overheated Protection: Error indicator flashes, and the printer temporarily stops printing to cool down.
- Ribbon Installed Successfully: Ribbon indicator is on.
- Ribbon Improperly Installed/End/Broken: Ribbon indicator flashes, and the printer beeps.
- Button Functions:
- Feed: When the printer is ready, clicking the FEED button advances a label.
- Print Job Timeout (Pause): During printing, clicking the PAUSE button suspends the print job. Clicking it again resumes printing.
- Start Functions (Power-up Functions): These functions are accessed by holding specific buttons during power-on:
- Self-test page: Hold FEED button while powering on. This prints a self-test page to verify basic printing functionality.
- Print DIP Switch page: Hold PAUSE button while powering on. This prints the DIP switch settings.
- Debugging Mode: Hold both PAUSE and FEED buttons while powering on. This mode prints all received label data in machine code (hexadecimal and ASCII), useful for debugging.
- Skip AUTO.BAS program: Hold PAUSE and FEED buttons while powering on until the Power indicator is off and Error indicator is on, then release. This skips any auto-run program stored in flash memory.
- Printer Initialization: Hold PAUSE and FEED buttons while powering on until the Power indicator is on and Error indicator is off, then release. This clears all data in printer DRAM and restores factory default settings (excluding ribbon settings).
- Ribbon Detection: When the printer powers on or is in thermal transfer mode, it automatically detects ribbon status (installed, end, or broken) and adjusts printing mode accordingly (thermal transfer or direct thermal).
Troubleshooting:
The manual provides a comprehensive troubleshooting guide for common issues:
- Power Indicator not "ON": Check power connections, ensure the printer is turned on, and verify the print head is properly closed.
- Not Printing: Check for ribbon end, improper ribbon installation, label paper end, improper label paper installation, gap sensor detection errors, or jammed paper. For connectivity issues, verify serial, Ethernet, or USB cable connections and settings (baud rate, IP address).
- Not Good Printing Quality: Issues can stem from incorrect ribbon printing side, dirty print head, wrong print density settings, loose print head or step motor cables, incorrect command settings, improperly installed ribbon/label, dust/adhesive on the print head, or a damaged print head.
- Data Miss Printing (one or two sides): Check for incorrect label paper size settings.
- Ribbon Wrinkle: May be caused by unbalanced print head stress, improper ribbon/label installation, or uneven label feeding.
- Printing Not Stable: Could be due to the printer being in HEX Dump mode or incorrect RS-232 settings.
Maintenance Features:
To ensure optimal printing quality and extend the printer's lifespan, regular cleaning is recommended.
- Cleaning Materials: Users should use a cotton swab, lint-free cloth, vacuum/blower brush, and 100% ethanol.
- Cleaning Process:
- Print Head: Turn off the printer, allow the print head to cool, then clean the surface with a cotton swab and 100% ethanol. This should be done when changing new label paper.
- Rubber Roller: Turn off the printer, rotate the platen roller, and clean it with a cotton swab and 100% ethanol. Clean when changing new label paper.
- Paper Tear Bar: Clean with a cotton swab and 100% ethanol as necessary.
- Sensor: Use an air brush or vacuum to clean dust from the sensor monthly.
- Inner Side of Printer: Use an air brush or vacuum to clean dust as necessary.
- Important Notes for Cleaning: Always turn off the printer power before cleaning. Avoid touching the print head with bare hands. Use only 100% ethanol; do not use medical alcohol to prevent damage to the print head.
The manual concludes with a warning about copyright and the manufacturer's right to modify the product without notice.