hole;
8. Take the exhaust rocker arm and
valve rocker arm shaft respectively, and
assemble them at the position of the
cylinder head exhaust rocker arm shaft
hole;
9. Use a flat-blade screwdriver to
turn the rocker arm shaft of the intake and
exhaust rocker arm to align the threaded
hole of the rocker arm shaft with the
position of the smooth hole of the
dependent cylinder head.
10. Take GB16674 small plate bolts M6×18
and put flat washers on them, assemble them at
the threads of the inlet and outlet rocker arm
shafts, and fasten them.
11. Take the NC250 rocker shaft
positioning bolt M14×1, insert it into
the O-ring, and assemble it at the designated
threaded hole position of the cylinder head.
Notice:
1. When installing the rocker arm shaft, the
side of the rocker arm shaft with the trimmed
edge should face the top of the cylinder head
cover.
2. After the cylinder head cover is installed,
turn the rocker arm. The rocker arm should
rotate flexibly without sticking.
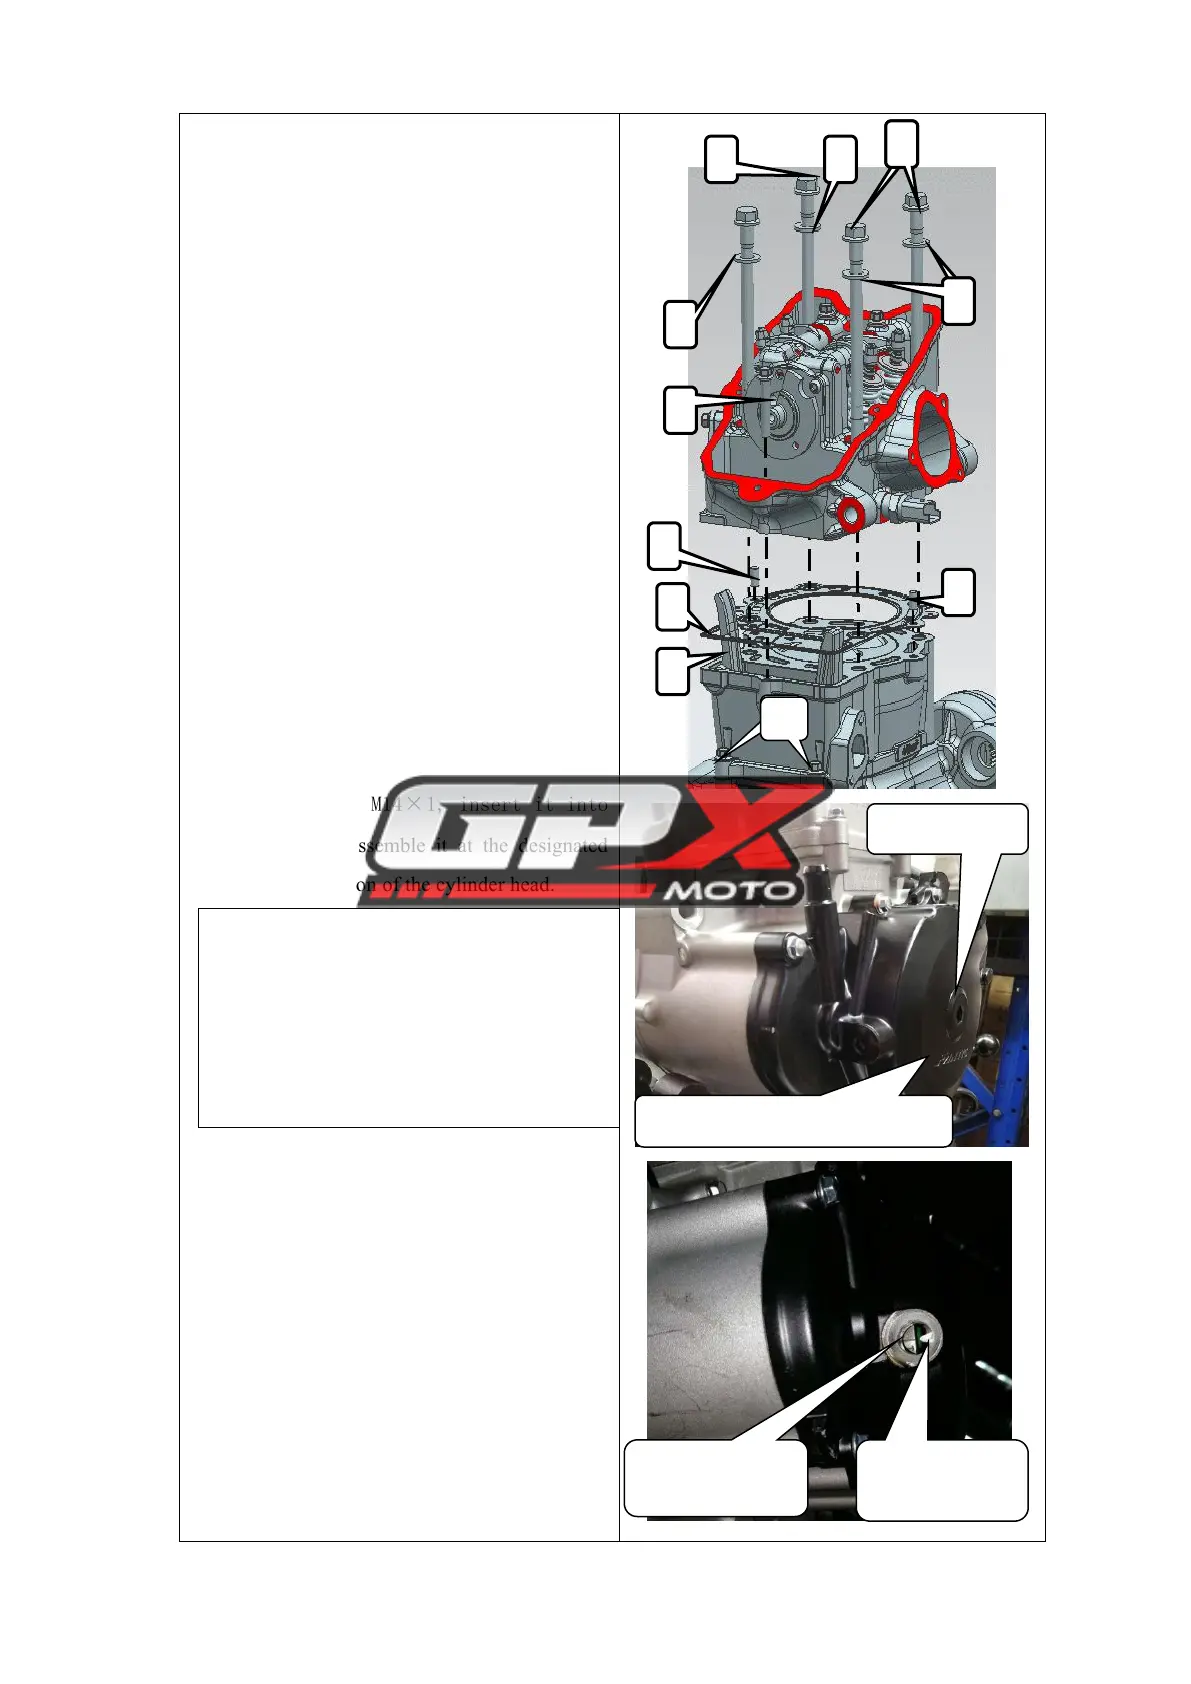
Installation of the cylinder
head
1. Remove the old cylinder head gasket,
install the new cylinder head gasket (2), and then
install the positioning pin (3);
2. Install the cylinder head to the cylinder
block, then put the A and B bolt nut washers (5 )
on the NC450 cylinder stud bolt AB (6 ) , and
then install the NC450 cylinder stud bolt AB