Repair
309577T 17
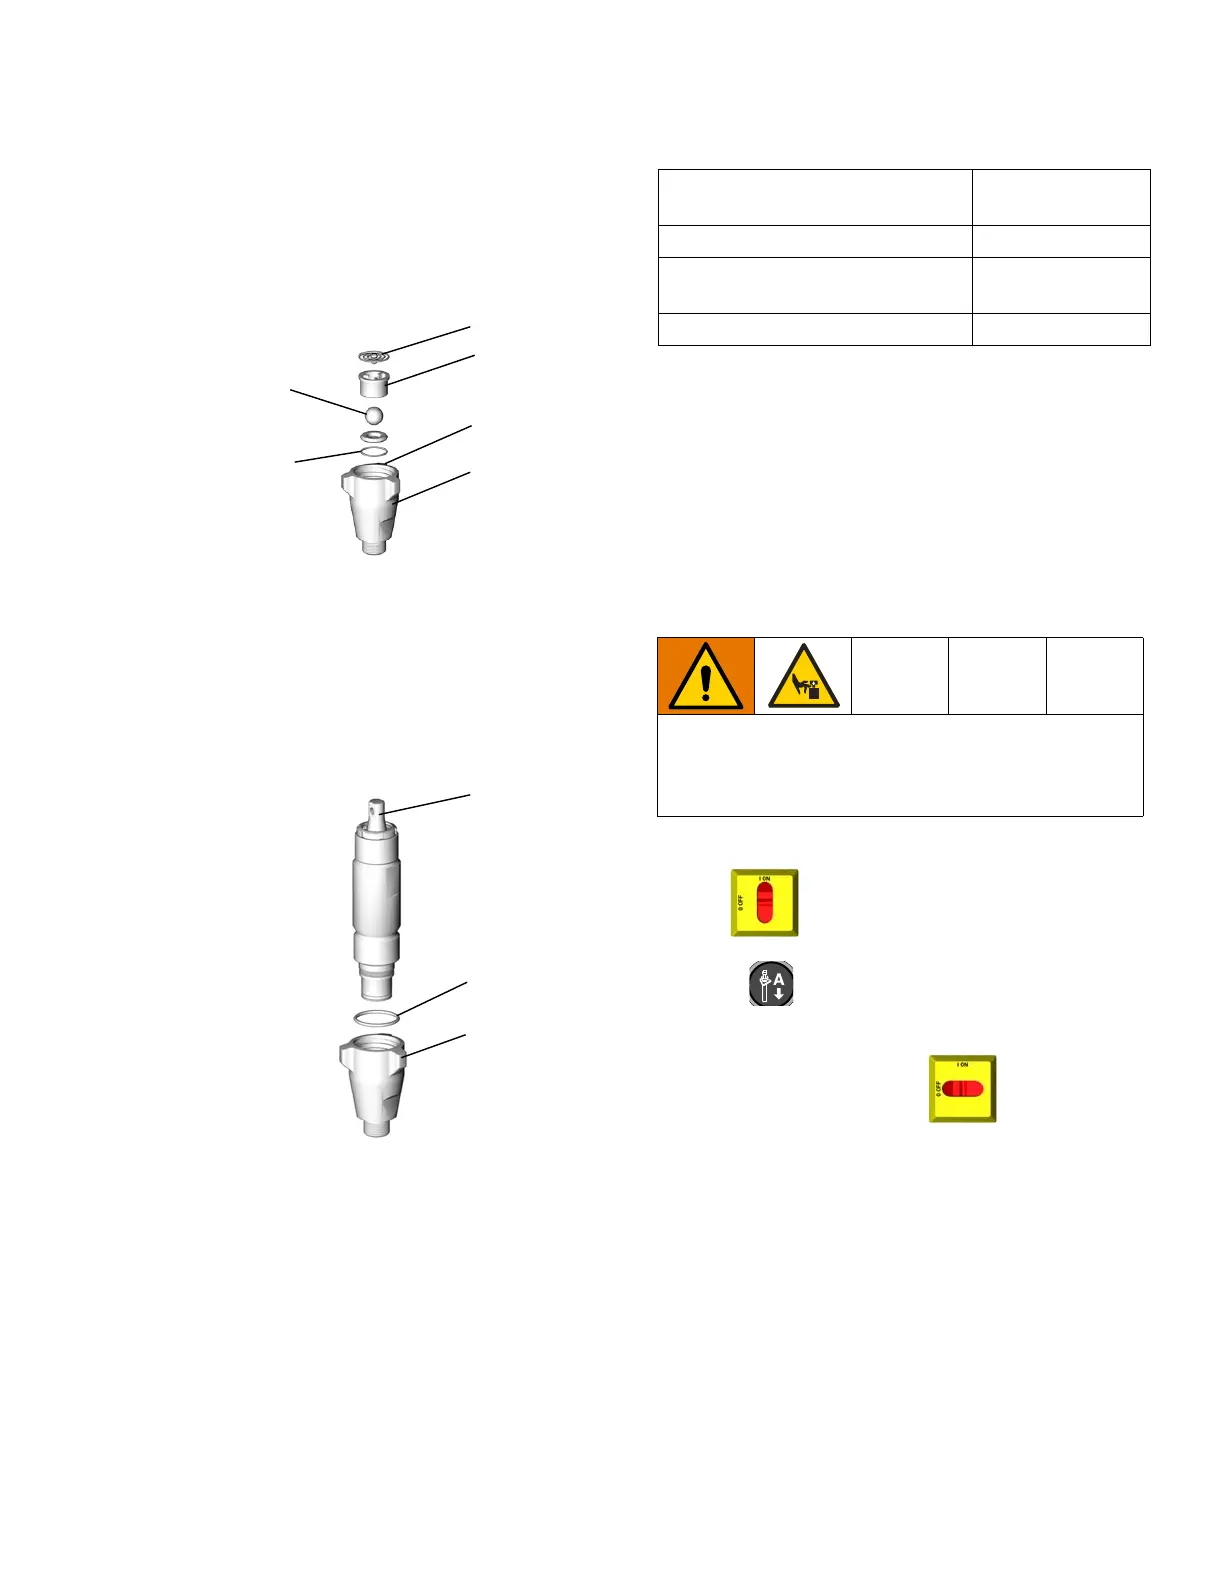
9. Reassemble the intake valve with o-ring (10*), seat
(9), and ball (11*). Install ball guide (12).
Models 246832 and 245972 only: Install spring (8*)
with screw at top.
NOTE: The seat may be flipped over and used on the
other side. Clean the seat thoroughly. No scratches are
permitted on the sealing edge.
10. Replace the o-ring (15*). Install the intake valve.
Torque the housing (5) as follows, or be sure the
intake valve is snug against the cylinder.
11. Tighten the wet-cup.
NOTE: Do not overtighten the wet-cup. The throat u-cup
(20) is not adjustable.
a. Pump A: Wrap the base of the wet-cup (19) with
a rag and tighten securely with channel locks.
b. Pump B: Pump B: Torque the packing nut (19)
to 130-150 in-lb (15-17 N•m).
12. Reconnect the power supply. Turn the main power
ON .
13. Press . The motor will run until the pumps are
at bottom of their strokes, then shut off.
14. Turn the main power OFF . Disconnect the
power supply.
TI2665A
5
*11
9
10*
8*
12
TI2687A
15*
19
5
Model Torque
ft-lb (N•m)
246830 and 245970 65-75 (88-101)
246831, 262647, 245971,
262648, 24Y174, and 24Y175
75-85 (101-114)
246832 and 245972 185-215 (251-291)
Pump rod and connecting rod move during operation.
Moving parts can cause serious injury such as pinch-
ing or amputation. Keep hands and fingers away from
connecting rod during operation.
 Loading...


