Repair
18 309577T
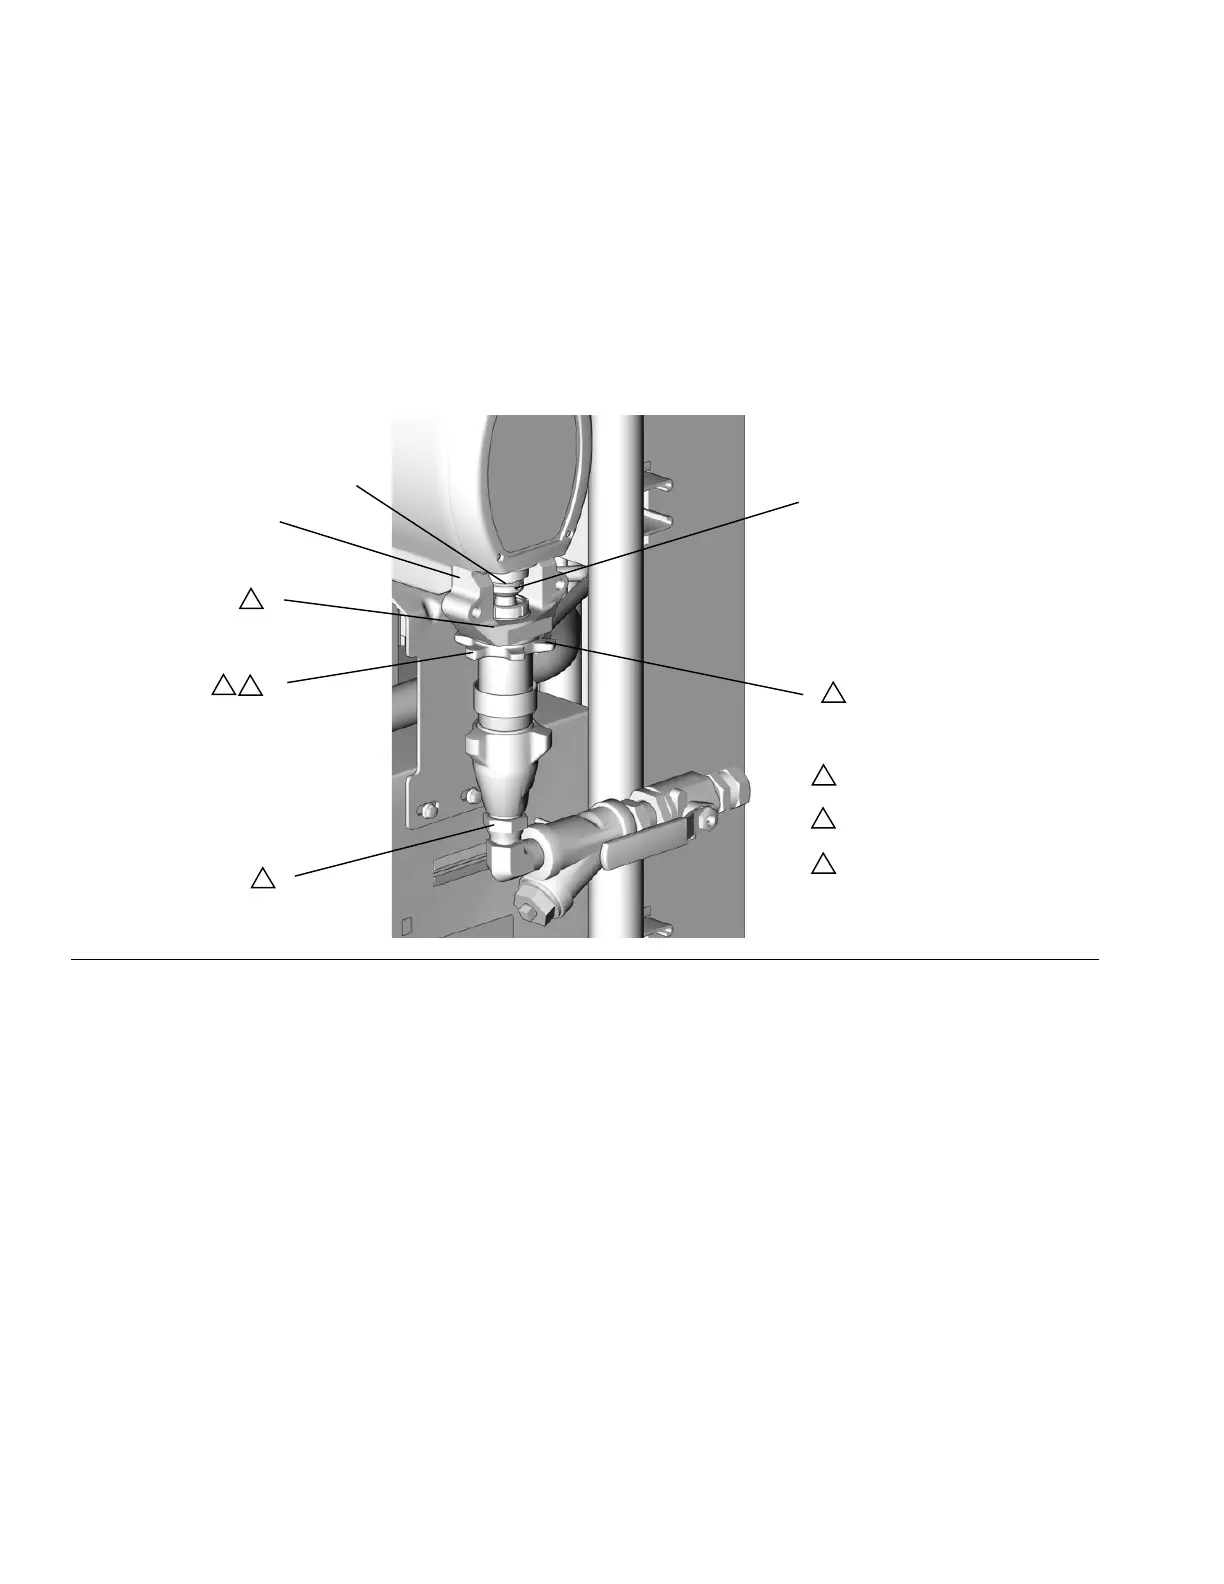
NOTE: Steps 15-18 apply to pump B. See FIG. 3. To
reconnect pump A, go to step 19.
15. Ensure that the star-shaped locknut (G) is screwed
on the pump with the flat side up. Screw the pump
into the bearing housing (M) until the pin holes align.
Push the pin (F) in. Pull the retaining spring (E)
down.
16. Continue screwing the pump into the housing until
the fluid outlet (D) is aligned with the steel tube and
top threads are +/- 1/16 in. (2 mm) of the bearing
face (N).
17. Tighten the star-shaped locknut (G) by hitting firmly
with a non-sparking hammer.
18. Reconnect the fluid inlet (C) and outlet (D).
FIG. 3 Reconnect Pump B
C
D
F
E
G
M
N
1
TI3765a-1
Flat side faces up.
1
Lubricate threads with ISO oil
or grease.
2
2
2
2
3
Pump top threads must be nearly
flush with bearing face (N).
3
 Loading...


