Installation
8 3A9522A
Installation
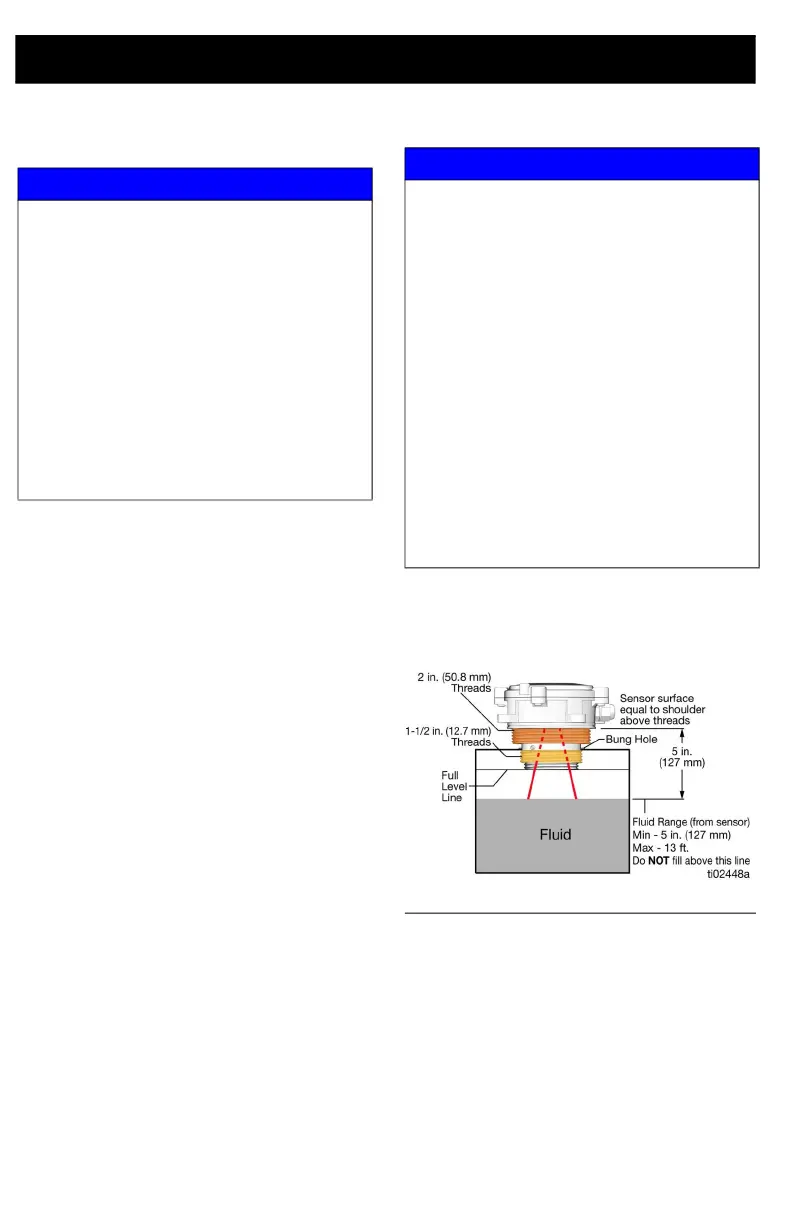
1. Remove the bung fitting and screw in
the TLM, hand-tighten.
• Do not use a wrench, as this may
damage the TLM.
• Do not use thread lock adhesive, as
this may damage the TLM.
2. Mount the TLM as close as possible to
the center of the tank.
3. Do not mount any fittings or T connects
between the TLM and the tank.
NOTICE
Do not over tighten TLM into tank bung!
Over tightening can cause permanent
damage and result in inaccurate readings.
Do not use thread sealant or adhesive!
Many of these products are chemically
incompatible with the PULSE/ABS plastic.
PTFE tape is acceptable.
Do not locate TLM next to the tank wall.
The wall can interfere with the sensor’s 30
degree cone angle.
Do not install the TLM in the tank’s fill
port. Repeated removal of the TLM will
damage the unit and void the warranty.
NOTICE
The TLM will not operate correctly if tilted
more than 2 degrees from the surface of
the tank liquid.
The TLM will not operate correctly if the
TLM is mounted less than 5 in. (127 mm)
from the maximum possible fill height of
the fluid being measured.
The TLM will not read properly if:
• Fluid in the tank is agitated (e.g. filling
a tank with oil or anti-freeze). Take all
TLM readings when the fluid in the
tank is calm.
• The TLM is mounted next to the tank
wall or in a corner.
• If there is any structural bracings or
obstructions between the TLM and
the surface of the fluid in the tank.
FIG. 5
TLM must be mounted within 2 degrees
from perpendicular to the surface of the
fluid.