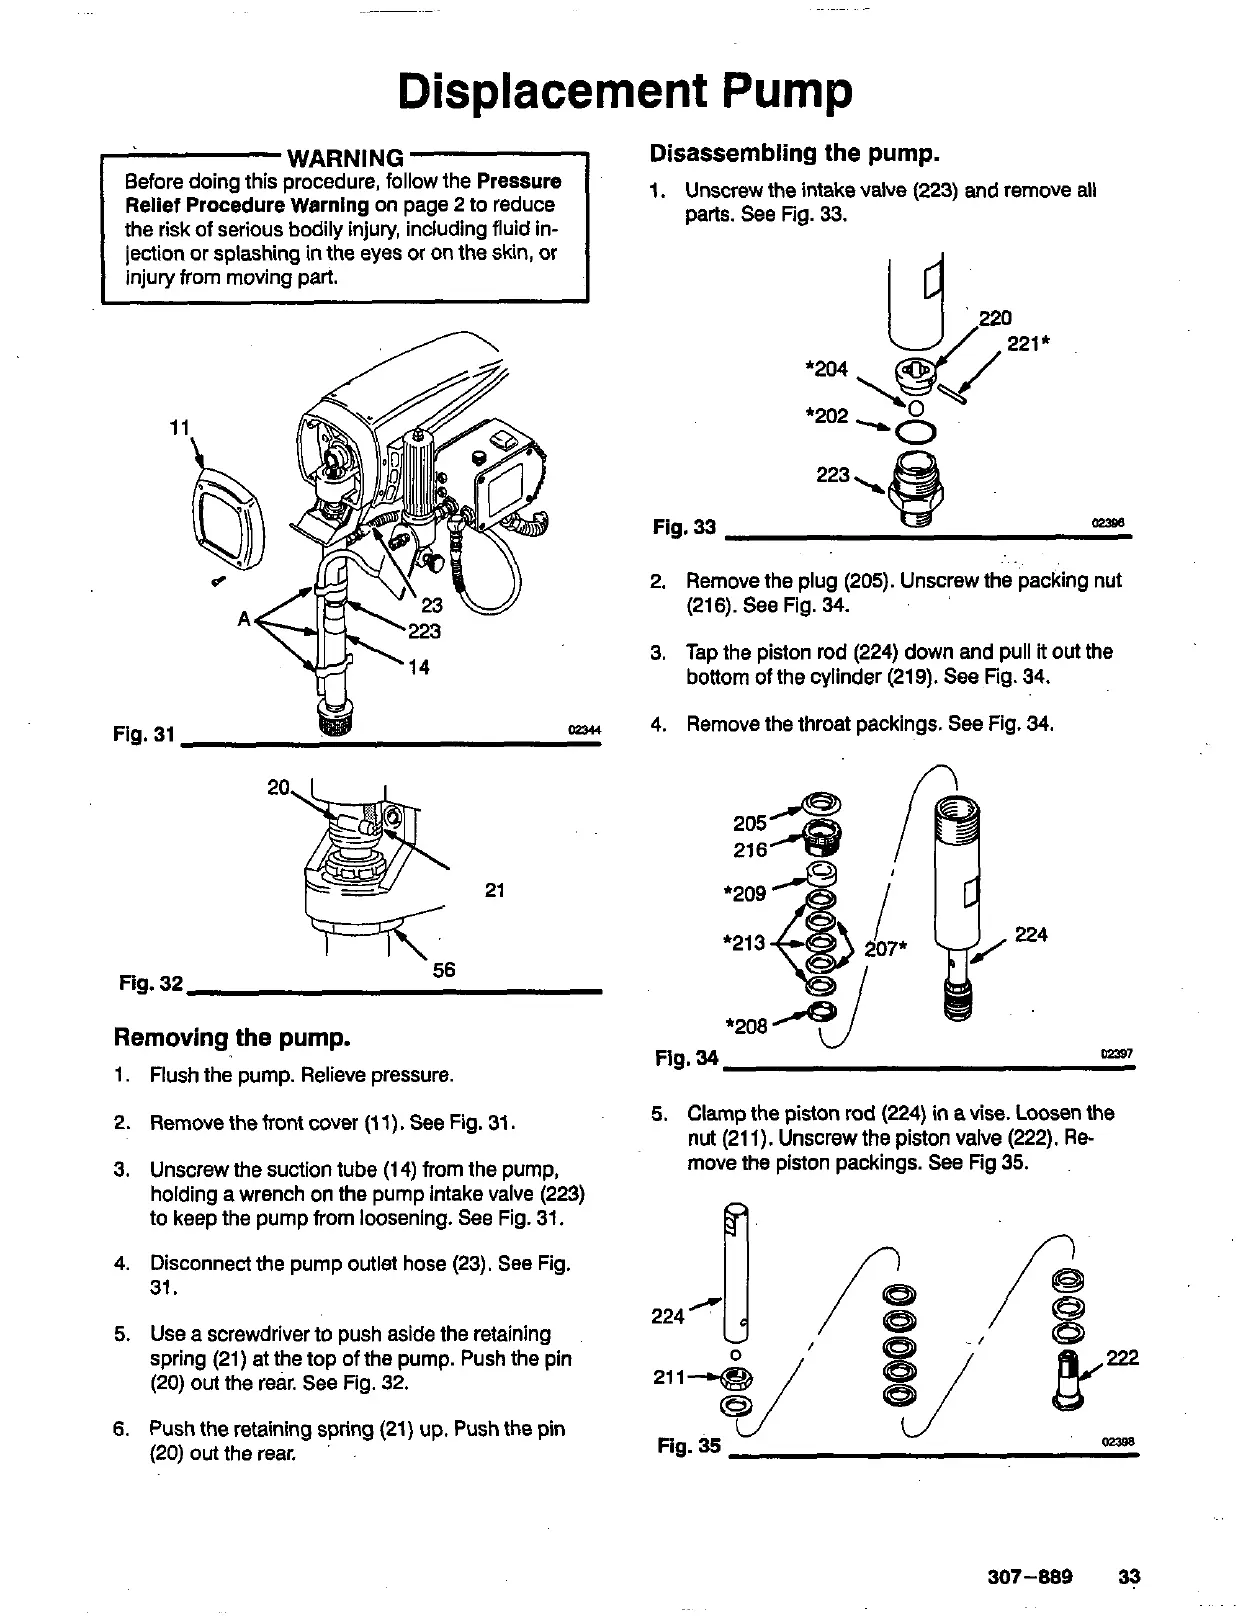
Displacement
Pump
WARNING
Before doing this procedure, follow the Pressure
the risk
of
serious bodily injury, including fluid in-
Relief Procedure Warning on page
2
to reduce
jection or splashing
in
the eyes or on the skin, or
injury from moving part.
11
b
d
Fig.
31
OPU
20
21
1.
2.
3.
4.
5.
6.
Removing the pump.
Flush the pump. Relieve pressure.
Remove the front cover
(1
1).
See Fig.
31.
Unscrew the suction tube
(1
4)
from the pump,
holding a wrench on the pump intake valve
(223)
to keep the pump from loosening. See Fig.
31.
Disconnect the pump outlet hose
(23).
See Fig.
31.
Use a screwdriver to push aside the retaining
spring
(21)
at the top of the pump. Push the pin
(20)
out
the rear. See Fig.
32.
Push the retaining spring
(21)
up. Push the pin
(20)
out
the rear.
’
.
Disassembling the pump.
1.
Unscrew the intake valve
(223)
and remove all
parts. See Fig.
33.
223
,.
Fig.
33
m38(1
2.
Remove the plug
(205).
Unscrew the packing nut
(216).
See Fig.
34.
3.
Tap the piston rod
(224)
down and pull
it
out
the
bottom
of
the cylinder
(219).
See
Fig.
34.
4.
Remove the throat packings. See Fig.
34.
A
224
Fig.
34
m587
5.
Clamp the piston rod
(224)
in
a vise. Loosen the
nut
(21
I).
Unscrew the piston valve
(222).
Re-
move the piston packings. See Fig
35.
307-889
33