Creative Grading Camera Control System User’s Guide (v1.4) 43
Chapter 5 - CGP Operation
The window is shown as long as the Free button is pressed. With the button pressed, adjust
the stick’s position. Use the left assignable rotary to change the Iris Range (upper ring) and Iris
Center (lower ring) value. Release the Free button to activate settings and close the popup
window.
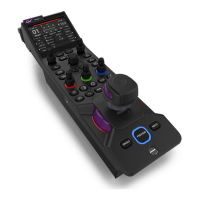
5.1.10 CGA menu shortcut buttons
Push one of these 7 shortcut buttons to directly open a menu on the CGA:
– Light menu
– Contrast menu
– Color menu
– Enhance menu
– Automatics menu
– Home menu
– Diagnostics menu
Push the shortcut button repeatedly to navigate through the submenus on the CGA.
5.1.11 RGB grading rotaries
These three stacked rotary controls vary RGB gain levels (upper rotary) and R,G and B black
levels (lower rotary). The lower rotary can also be set to RGB Flare controls in the “CGP
Settings” on page 48.
5.1.12 Left function buttons
CGP settings button
Push the CGP Settings button to open the CGP Settings menu. Refer to “CGP Settings” on
page 48 for more information about the CGP Settings.
Test signal button
Push the Test Signal button to switch on the colour bar signal of the connected camera. Push
again to select a sawtooth test signal. The button is highlighted when a test signal is on.