27 / 44
16570.16572_Alpha150Q/170Q/220Q_V1
‖ If required, you can achieve the same effect with a corre-
spondingly long-lasting stopover on a suitable surface.
5. Move the throttle / pitch control stick to idle position.
This is usually the "back" end point.
6. Deactivate the Motor Stop function.
The propellers start to rotate at low speed.
7. Carefully move the throttle / pitch stick forward until the copter
is about one meter high and hold it at that height.
‖ Initially, move the control sticks slightly so that you have
enough time to familiarize yourself with the copter's reac-
tions.
‖ If, especially when hovering, the copter always drifts in a cer-
tain direction, compensate the movement by tapping the cor-
responding trim button in the opposite direction. Alterna-
tively, you can land and move the battery in the opposite
direction.
8. After landing, first activate the motor stop function, then first put
the transmitter away and take the copter in hand to stake out the
battery.
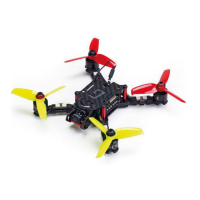
Camera function
With the exception of the 3D copter included in the set No. 16570.
HoTT, all other copter models have a factory-ready built-in micro-cam-
era and a video transmitter. The transmission of the camera image
begins with the connection of a battery to the copter. Then, if nec-
essary, scan the transmission channel of the copter on the video
goggle or on the video monitor.
The copter-side video channel switching is described in the next sec-
tion under "Special functions on channel 6".
To align the camera unscrew the fixing screws of the red spacer and
loosen the camera; the spacer is then to move appropriately to align
the camera as desired. Finally, tighten all four screws again.
For sharpness adjustment loosen the ribbed ring on the camera
optics; turn this accordingly and finally secure the position found by
tightening the knurled ring again.