45
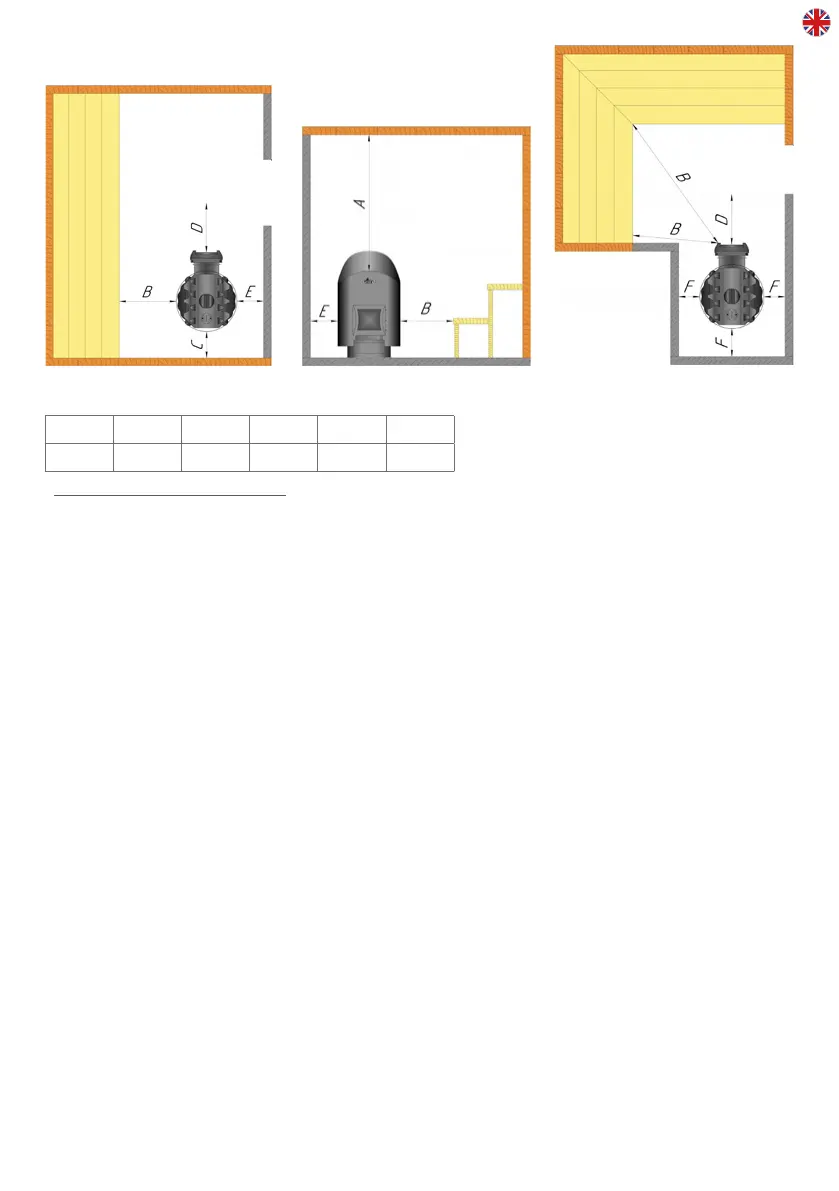
Table 2. Safety distances
A min. B min. C min. D min. E F
1000 500 500 800 50 100
Note: dimensions are in millimeters.
3.2. Heater installation
IMPORTANT! Ensure proper oor levelling for the heater installaon; possible slants of the
heater and the chimney are precluded.
3.2.1. Stone chimney connecon
The diameter of hole for connecon to the chimney stack shall be about 20 mm larger than
the diameter of the heang ue outlet pipe, so the opmum clearance around the pipe is
about 10 mm.
If the designed pipe inlet to the stone chimney is at 90°, it is recommended to make the
inner edges of the chimney stack bore round (Figure 5) in order to reduce the resistance for
ue gas passage.
If you plan to use a heater rack, for example, then take into account the height of the heater
together with the rack when preparing the hole.
Procedure:
1. Install the heater on the place of permanent operaon.
2. Install a water tank, if any. Keep in mind the requirements of its operaons manual.
3. A valve can be installed on the connecng pipe, if addional adjustment of dra is
necessary. Install, if any.
4. Insert the connecng pipe into the stone chimney. Do not push the connecng pipe too
deep into the stone chimney, as you can block it.
5. Connect the heater with the pipe inserted into the stone chimney.
6. Ensure that all the pipe connecons and the heater connecon are reliable.
7. Seal the gap between the pipe and the wall using non-combusble mineral wool, for
example.
8. Make sure that the air-ght seal is good. Add mineral wool, if necessary.
Figure 4.
Safety distances