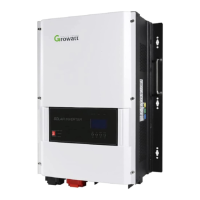
Lithium Battery Connection
If choosing lithium battery for SPF 6000 ES PLUS, you are allowed to use the lithium battery only which we have
configured. There're two connectors on the lithium battery, RJ45 port of BMS and power cable.
Please follow below steps to implement lithium battery connection:
1. Assemble battery ring terminal based on recommended battery cable and terminal size (same as Lead acid, see
section Lead-acid Battery connection for details) .
2. Frist,pass the battery cable through the protective shell,and then insert the ring terminal of battery cable flatly
into battery connector of inverter and make sure the bolts are tightened with torque of 2Nm. Make sure polarity at
both the battery and the inverter/charge is correctly connected and ring terminals are tightly screwed to the battery
terminals.Last,insert the protective shell.
3. Connect the end of RJ45 of battery to BMS communication port(RS485 or CAN) of inverter.
4. The other end of RJ45 insert to battery communication port(RS485 or CAN).
Note: If choosing lithium battery, make sure to connect the BMS communication cable between the battery and the
inverter. You need to choose battery type as “lithium battery”.
Lithium battery communication and setting
In order to communicate with battery BMS, you should set the battery type to “LI” in Program 5. Then the LCD will
switch to Program 36, which is to set the protocol type. There are several protocols in the inverter. Please get
instruction from Growatt to choose which protocol to match the BMS.
1. Connect the end of RJ45 of battery to BMS communication port of inverter
Make sure the lithium battery BMS port connects to the inverter is Pin to Pin, the inverter BMS port pin and RS485
port pin assignment shown as below:
 Loading...
