English (GB)
19
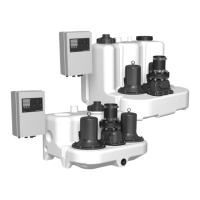
5.2.3 Internal layout of LC 221
Figure 13 shows the internal layout of LC 221.
Fig. 13 Internal layout of LC 221
TM05 3597 1612 / TM05 3719 1712
Note: Cable connections for pos. 8-15:
Use a cable tie if leads protrude more than 20 mm
from the cable sheath.
20 7
7
>20
Pos. Description Comments Terminal designation
1 Terminals for power supply PE, N, L3, L2, L1
2 Terminals for connecting pump 1 PE, N, W1, V1, U1
3 Terminals for connecting pump 2 PE, N, W2, V2, U2
4 Terminals for thermal switch, pump 1 T1, T2
5 Terminals for thermal switch, pump 2 T1, T2
6 Terminals for external alarm 230 V 11, 12
7 Terminals for external reset 230 V 13, 14
8 Terminals for common fault
Potential-free changeover
contacts NO/NC with max.
250 V / 2 A.
Attention: Connect these
terminals to supply network
potential or low voltage but do
not mix the two.
X11
9 Terminals for high water-level alarm X10
10 Terminals for failure, pump 2 X9
11 Terminals for failure, pump 1 X8
12 Terminals for operation, pump 2 X7
13 Terminals for operation, pump 1 X6
14 Terminals for level switches Digital 81-88
14.1
Terminals for additional high water-level alarm
(inside the tank)
Digital 81, 82
15 Terminals for analogue sensor 0-5 V or 4-20 mA 91 (GND), 92 (Signal), 93 (12 V)
16 Service connector to PC Tool -
17 Connector for GENIbus interface module -
18 Control circuit fuse
Fine-wire fuse:
100 mA / 20 mm x ∅5
-
19 Piezoresistive pressure sensor module 0-5 V -
20 DIP switches (not in use for this application) -
21 Connector for battery, 9 V (accessory) -
 Loading...