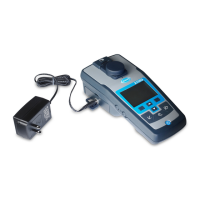
Print stored data
All data can be sent to a printer. The PD-24 Citizen Printer is compatible
with the meter and is FCC Part 15B, Class B compliant. Other printers
may not be compatible.
Printer setup
Refer to the documentation supplied with the printer to select the USB
interface.
Print data
1. Turn off the meter. Install the USB+Power/USB module to the meter
and to AC power.
2. Connect the printer to the USB+Power/USB module with the USB
cable supplied with the printer and the special USB cable adapter
supplied with the module.
3. Connect the printer to power and turn the printer on.
4. Push the ON/OFF key to turn the meter on. The meter automatically
detects when the printer is installed.
Note: 2100Q: After a reading is taken, the data is automatically transferred to
the printer when the Auto-print data is selected.
5. 2100Q: Push DATA MANAGEMENT>Send Data Log
.
6. DR 1900: Push SETTINGS>Data Management>Print Data.
7. Select an option.
Option Description
Send Data
Log/Send Data
Data is sent directly to the printer.
Filter Data
(2100Q only)
Select specific data and then press Send Data.
Data type—All Logs (Default setting), Reading Log,
Calibration Log or Verify Cal Log
Time Interval—All Logs (Default setting), Last Reading,
Current day, Current week or Current Month
Sample ID
Operator ID
Note: Sample ID and Operator ID are disabled when no
ID was created.
Update firmware
Locate the firmware upgrade file on the product website. Save the file
from the website to the PC.
1. Connect the USB+Power or USB module to the PC.
2. 2100Q: Copy the update file "UI_TP_TURB.blk" to the USB
+Power/USB module.
3.
DR 1900: Copy the update file "fw_.pzip" and "config_.pzip" to the
USB+Power/USB module folder: "dr1900_update".
4. 2100Q: Unzip the file "Ing.zip" and copy the folder "Ing" to the USB
+Power/USB module.
5. Disconnect the USB+Power/USB module from the PC.
6. Plug the USB+Power/USB module into the meter.
7. 2100Q: Press and hold the POWER key for 4 seconds.
8. DR 1900: Set the power to off. Connect the module to external
power, then set the power to on.
9. The update process starts. The display shows “Updating meter to
<firmware version>”. After this update, the language update starts
automatically. The display shows "Updating files..." and then shows
"Update complete" when the update is done.
10. 2100Q: Press DONE. Select the applicable language.
11. DR 1900: Set the current time.
12. Press OK.
The meter is ready to use.
Connect the USB+Power or USB module to a USB-
Barcode scanner
If a USB-Barcode handset scanner is connected, Sample IDs and
Operator IDs can also be scanned.
1. Connect the USB-Barcode scanner cable to the adapter cable (USB
A receptacle to USB B mini B plug).
2. Connect the adapter cable to the USB+Power/USB module.
English 11

 Loading...