Inhaltsverzeichnis
Benutzeroberfläche und Navigation auf Seite 19 Die Ausgänge konfigurieren auf Seite 27
Inbetriebnahme auf Seite 22 Anzeigen von Daten auf Seite 32
Reagenzien und Standards konfigurieren auf Seite 24 Eine SD-Karte verwenden auf Seite 34
Eine Stichprobe oder einen Standard messen
auf Seite 25
Kalibrierung auf Seite 34
Systemeinrichtung auf Seite 25
Sicherheitshinweise
Allgemeine Sicherheitshinweise, Gefahren- und Warnetikettenbeschreibungen finden Sie im
Installationshandbuch.
Benutzeroberfläche und Navigation
Beschreibung des Tastenfelds
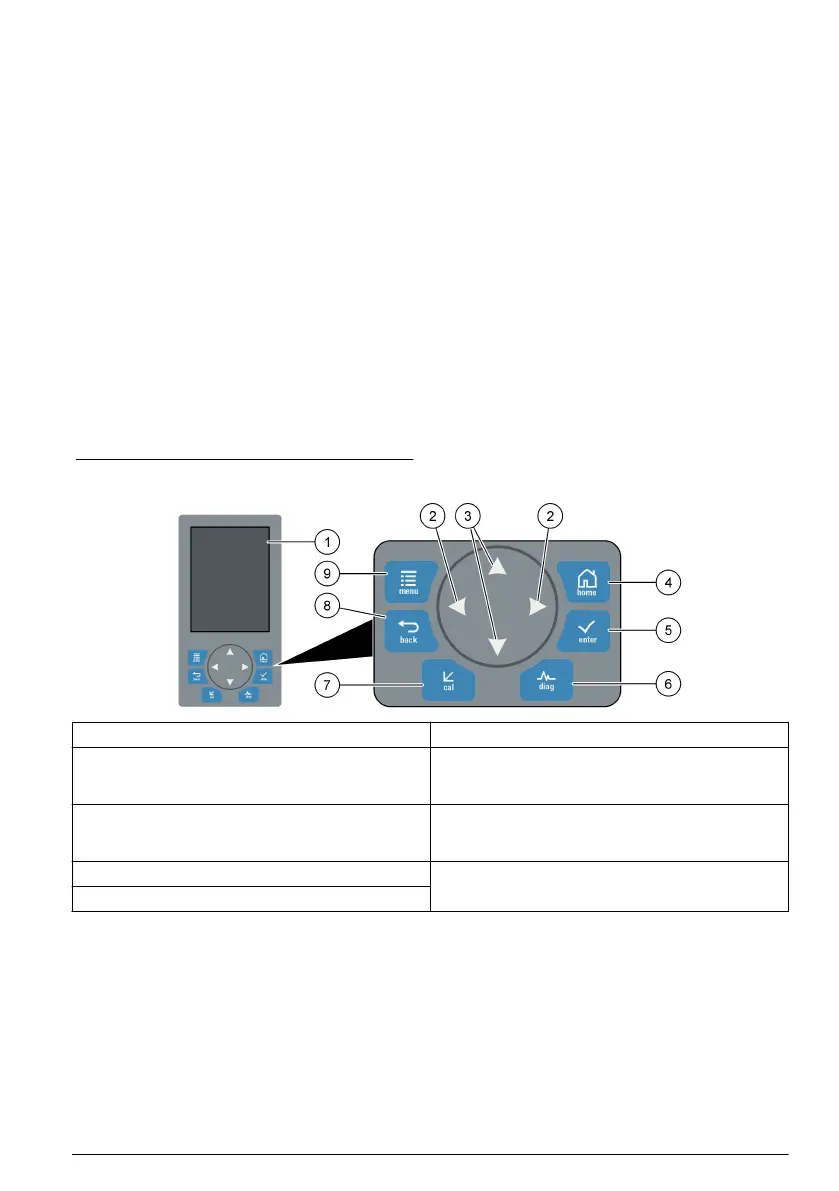
Eine Beschreibung des Tastenfelds und Informationen zur Navigation finden Sie unter Abbildung 1.
Abbildung 1 Beschreibung des Tastenfelds
1 Display 6 Diag: Das MENÜ DIAG/TEST öffnen
2 Navigationstasten RECHTS, LINKS: zwischen
Messanzeigen umschalten, Optionen wählen, in
Dateneingabefeldern navigieren
7 Cal: Das MENÜ KALIBRIERUNG öffnen
3 Navigationstasten NACH OBEN, NACH UNTEN: in
Menüs navigieren, in Messkanälen navigieren,
Zahlen und Buchstaben eingeben
8 Zurück: Zum vorherigen Menü wechseln
4 Home: Zur Hauptmessanzeige wechseln 9 Menü: Optionen im Analysator-Hauptmenü wählen
5 Enter: Bestätigen und Untermenüs öffnen
Anzeigenbeschreibung
Beschreibungen zu den Messanzeigen finden Sie unter Abbildung 2. Beschreibungen zum
Systemstatus finden Sie unter Abbildung 3.
Deutsch
19

 Loading...