N O T I C E
This is only applicable to instruments with two syringes installed.
It is recommended to install the applications (refer to Install the applications on page 30) before
installing the titrant. Applications using titrant from syringe 1 are loaded on line 1 of the home
screen (refer to Home screen on page 25) and applications using titrant from syringe 2 are
loaded on line 2. After the applications are installed, the correct titrant can be connected to the
applicable syringe.
Optional: Fill a desiccant cartridge with an applicable desiccant. Put the desiccant
cartridge into the adapter on the titrant bottle cap. Refer to the illustrated steps that follow,
step 1.
Loosen the tube connector on the bottle cap. Push the inlet tube through the connector.
Make sure that the end of the tube is at the bottom of the bottle. Tighten the connector on
the bottle cap.
Use the same procedure to connect the second titrant bottle if a second syringe is
installed on the instrument.
Refer to the "Application Note" on the USB applications key to identify the correct pump
to connect to the reagent bottle. Refer to the illustrated steps that follow.
3.10 Tidy the work area
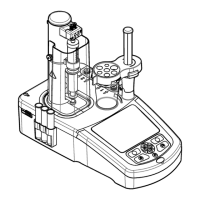
Attach the tubes to the instrument with the clips on the electrovalve and the sensor
holder. Refer to the illustrated steps that follow.
Installation
17
 Loading...

