$
%
#
!
"
"
"
"
"
#
!
#
$
Planer-Thicknesser
A3-26 / A3-31 / A3-41
1. Switch the machine off and ensure that it cannot be
switched on again.
2. Set the gear lever to the “0” setting.
3. Loosen and remove the hex nuts.
Take off the covering lid
4. Unscrew the screw and remove the spring washer.
5. Remove the thrust plate.
6. Replace the friction wheel.
7. Place the thrust plate back on.
8. Screw the spring washer on.
9. reassemble the cover.
! Nuts / Disk spring
" Friction wheel
# Screw / Lock washer
$ Pressure disk
% Gearbox cover
10.3.7 Checking/changing the friction wheel (transmission)
Fig. 10-9: Friction wheel: check/replace
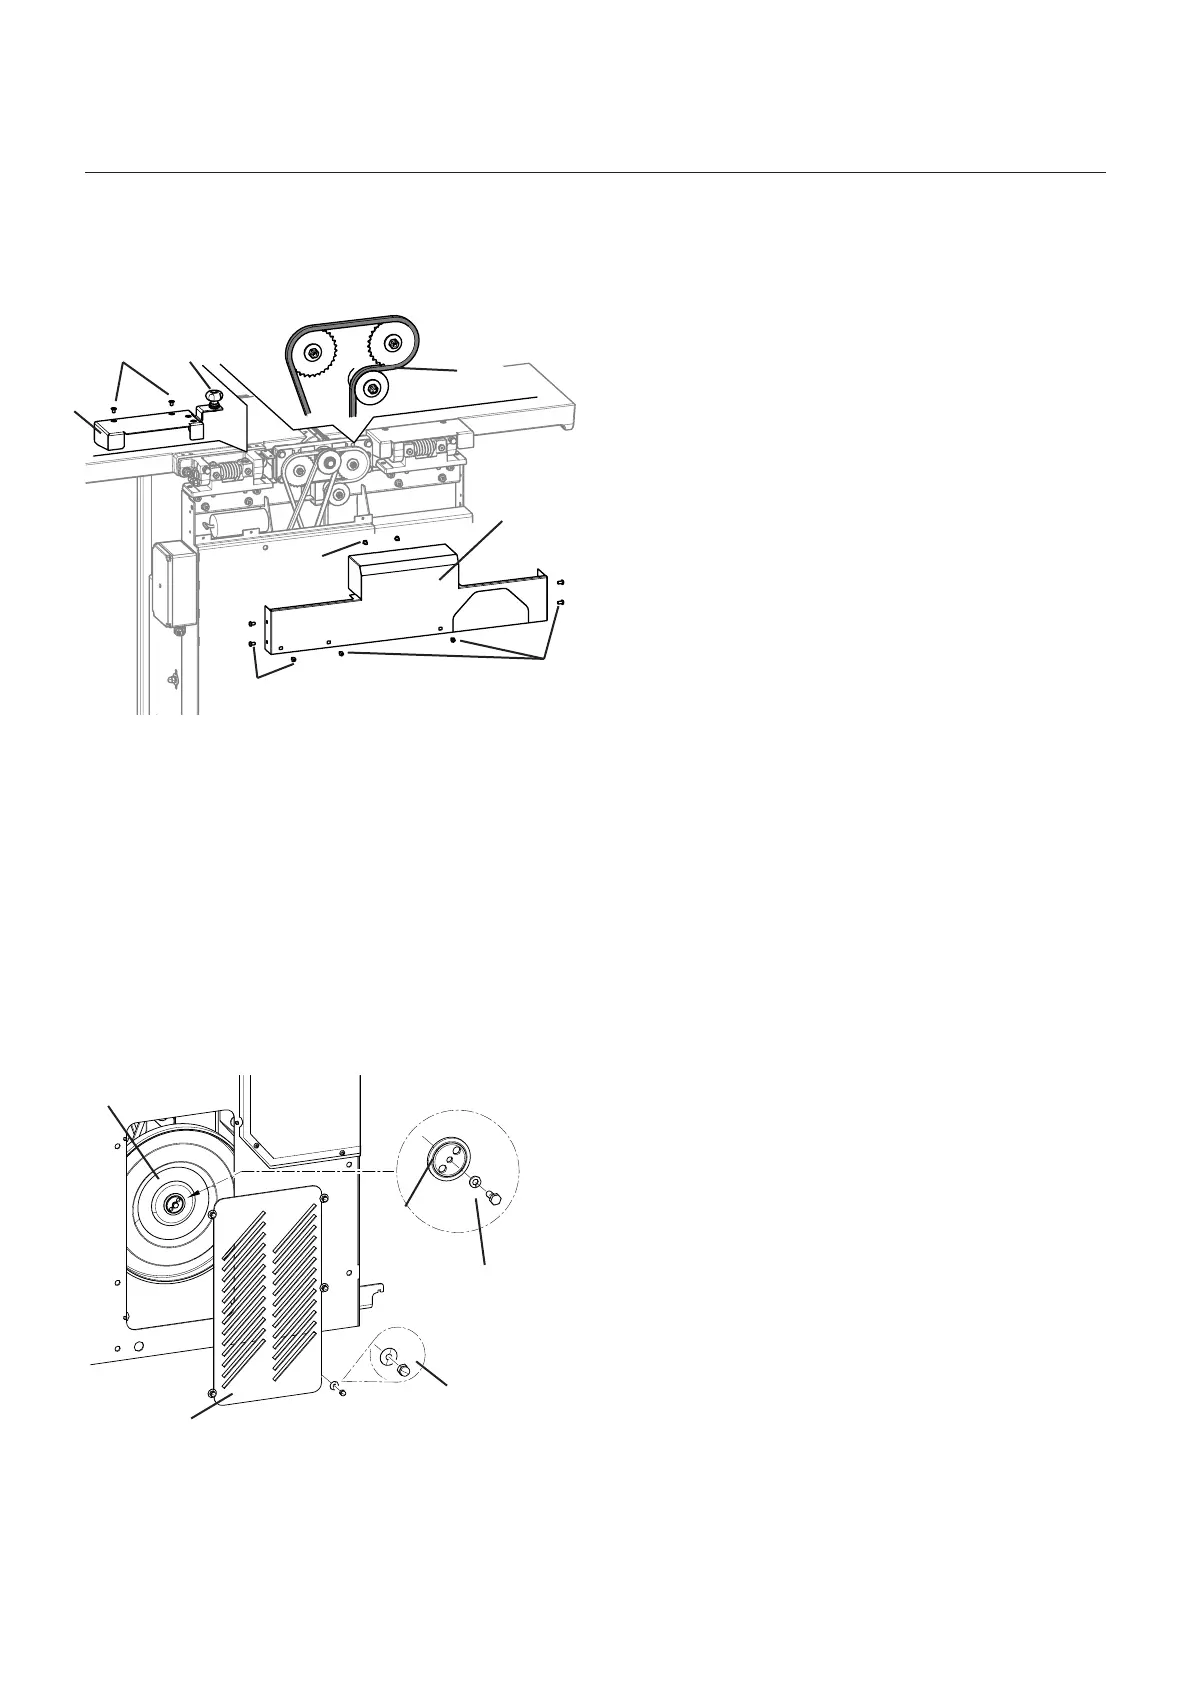
10.3.6 Checking/greasing the chain (transmission)
Fig. 10-8: Checking/greasing the chain (transmission)
1. Before beginning any maintenance work on the
machine, switch it off and secure it against acciden-
tally being switched on again.
2. Set the gear lever to the “0” setting
Remove the thumb nut
Dismantle the planer fence
3. Loosen the screw and take off the covering lid.
4. Check the chain and lubricate with regular machine
grease if necessary.
5. Fit and screw the covering lid back on
! Thumb nut
" Screws
# Cover
$ Chain
Note: The friction wheel is subject to wear.
Should the examination reveal a heavily damaged or worn surface, then the friction wheel must be repla-
ced.
Service