11
Advanced Features
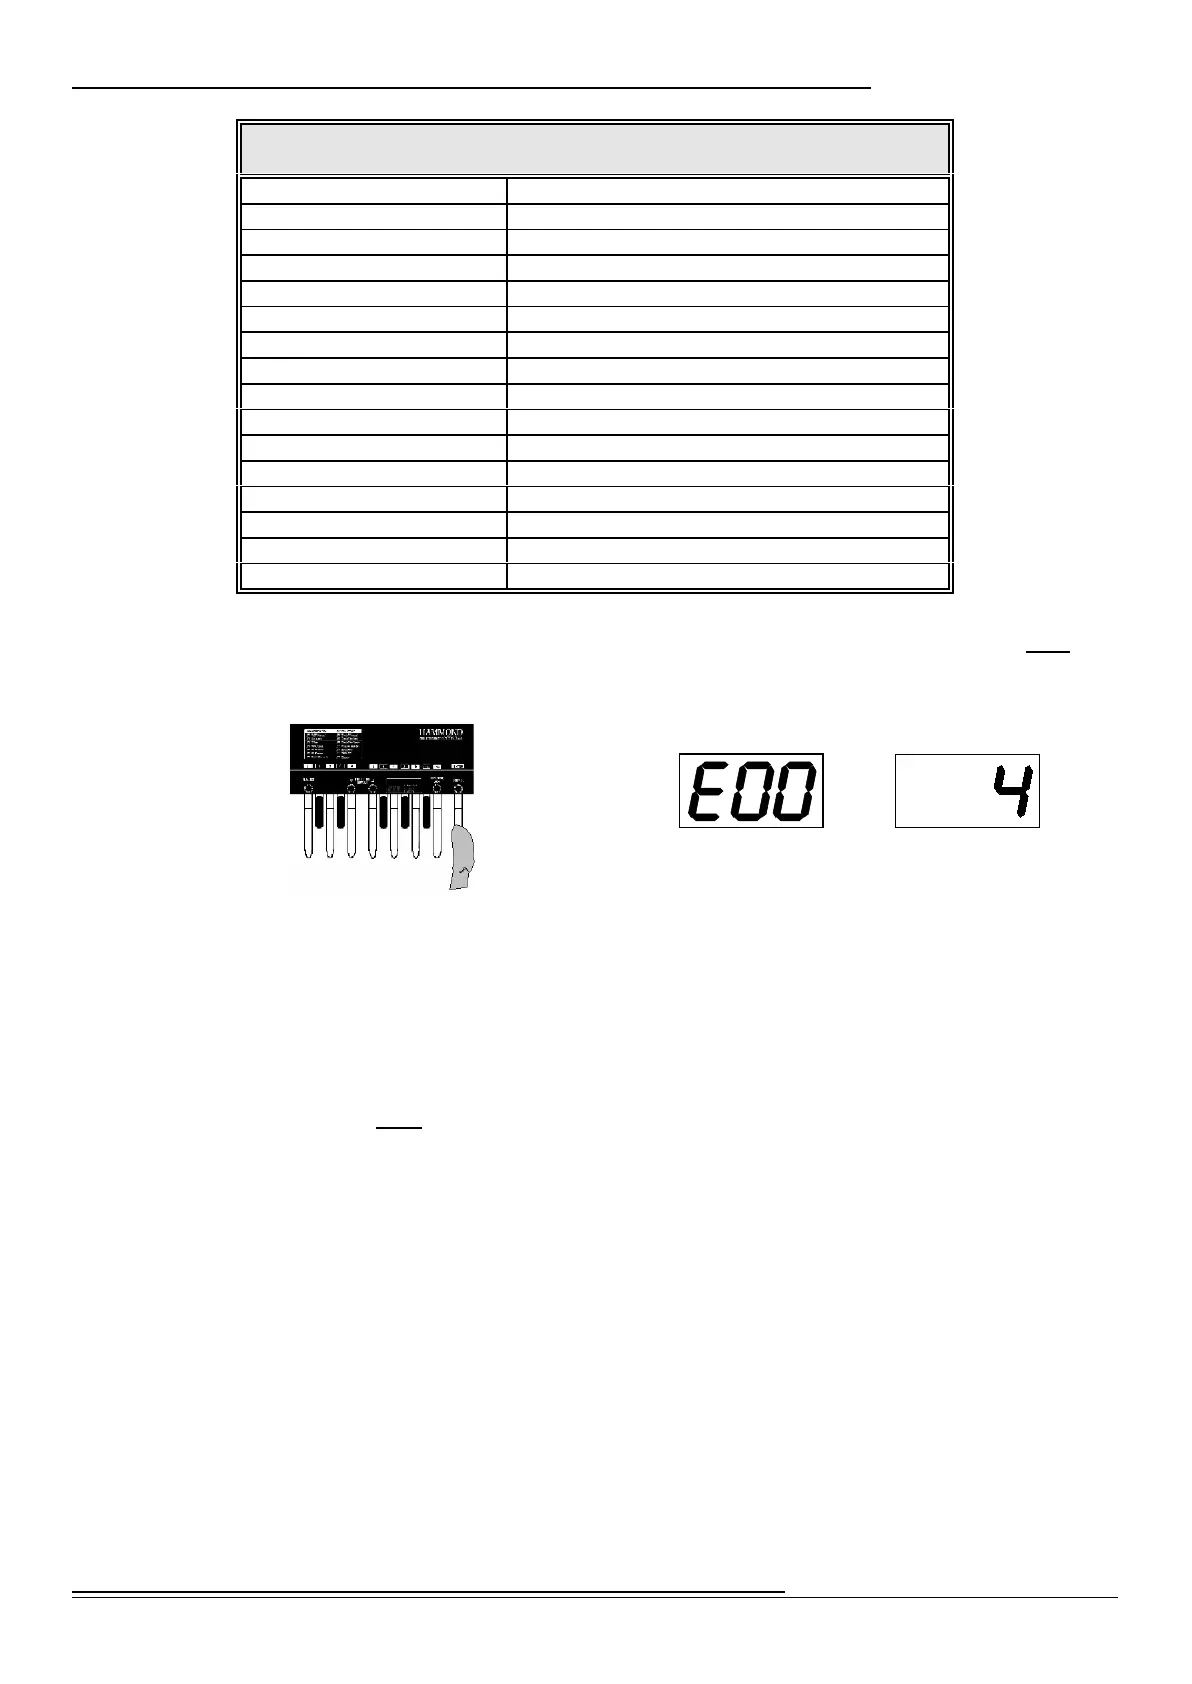
Hammond XPK-100 Quick Features Guide
Current Parameter
Your Selected Value
MIDI CHANNEL OPTIONS
MIDI Channel Number Action
MIDI Channel 1 Press the “Lo C” Pedal
MIDI Channel 2 Press the “C<” Pedal
MIDI Channel 3 Press the “D” Pedal
MIDI Channel 4 Press the “D<” Pedal
MIDI Channel 5 Press the “E” Pedal
MIDI Channel 6 Press the “F” Pedal
MIDI Channel 7 Press the “F<<” Pedal
MIDI Channel 8 Press the “G” Pedal
MIDI Channel 9 Press the “G<<” Pedal
MIDI Channel 10 Press the “A” Pedal
MIDI Channel 11 Press the “Lo C” Pedal, then press the “Lo C” Pedal again.
MIDI Channel 12 Press the “Lo C” Pedal, then press the “C<” Pedal.
MIDI Channel 13 Press the “Lo C” Pedal, then press the “D” Pedal.
MIDI Channel 14 Press the “Lo C” Peda l, then press the “D<” Pedal.
MIDI Channel 15 Press the “Lo C” Peda l, then press the “E” Pedal
MIDI Channel 16 Press the “Lo C” Pedal, then press the “F” Pedal.
4. When you have selected the proper MIDI Channel, then press the Hi “C” Pedal once. The
Information Center Display will show you the current parameter alternating with your
selected value:
5. To exit the EDIT Mode and return to PLAY Mode, press the “Hi C” Pedal again. The XPK-
100 is now transposed to the value you selected.
NOTE: After doing the above, you will notice a small red dot between the first and second characters of the
Information Center Display. This indicates that your new value has not been saved to a Preset. For information
on how to save your settings to a Preset, see page 34.
6. To continue editing, instead of pressing the Hi “C” Pedal, use the PRESET/EDIT Switches
to select the parameter you want to edit. When you are finished editing, press the “Hi
C” Pedal once to return to PLAY Mode. All of your changes will now take effect.
 Loading...