The height of the pre-tension assembly determines
how evenly the bobbin winds top to boom. When
the screw is ghtened or loosened too much it also
causes the pre-tensioner assembly to release the
thread while winding a bobbin. With no pre-tension
on the bobbin it will wind too loose or spongy. Loose
bobbins cause signicant sewing and tension issues.
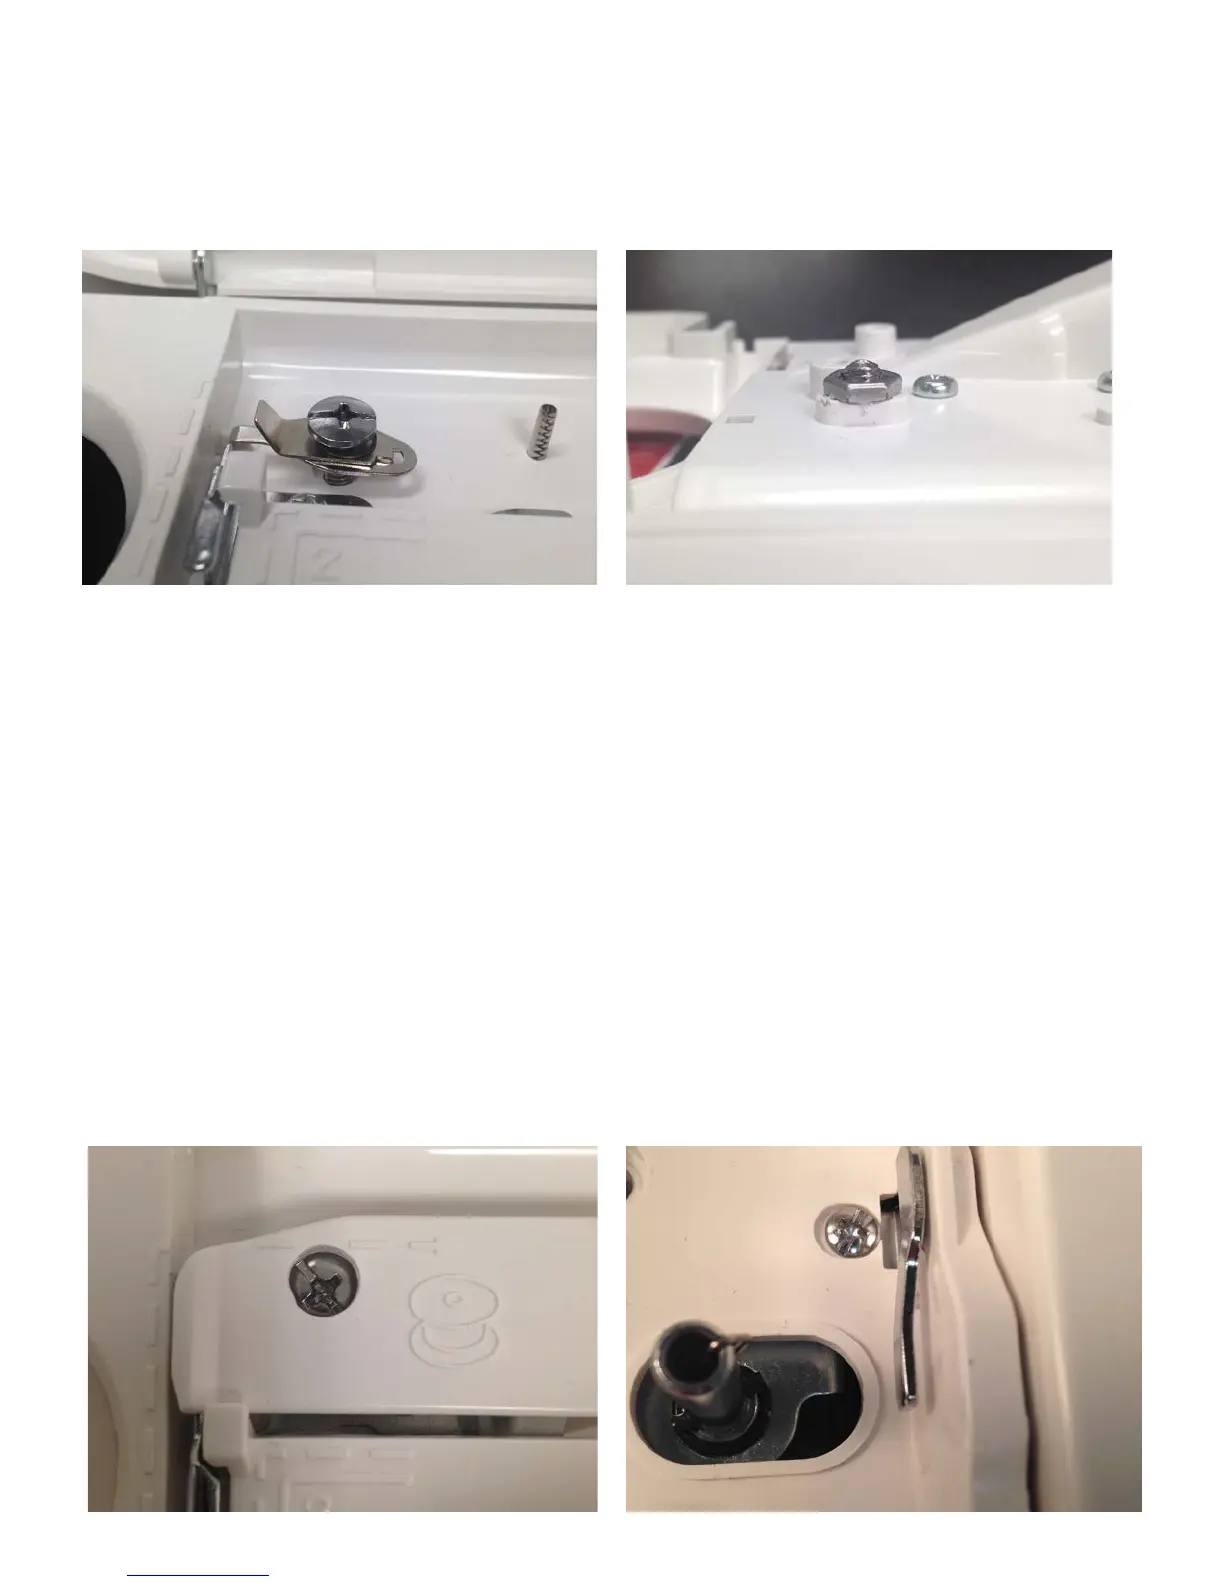
The small screw below right controls the bobbin ll
stopper. If one changes the stopper to the le it
will make the bobbin stop winding sooner, lling the
bobbin less. If it is moved to the right it will allow the
bobbin to winder later lling the bobbin more. This
might be inadvertently changed by someone when
trying to remove the top cover.
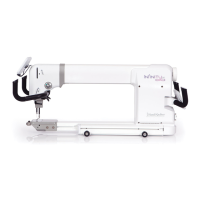
With the machine top cover removed one can see
the pre-tensioner screw lock nut. It should have
about two metal threads showing above the nut as
shown in the image below.
Visual Checks:
By looking at the pre-tension screw one can see if
the screw has been adjusted in/clockwise and is low
in the lile cover over the bobbin winder pre-tension
or out/counterclockwise to be high and pung
pressure up on the cover.
In the correct posion the screw head will be slightly
under the cover and not touching the boom surface
of the cover. It will also not be deep in the hole with
a big gap between the screw head and the cover.
The image below shows the relave posion of the
bobbin winder pre-tension assembly screw. It is just
below the cover, so the cover is not resng on it,
but not too far below. If your screw looks dierent
someone may have inadvertently adjusted it.
The image below shows the bobbin winder pre-
tension without the covers. Under the head of the
screw there is a small spring, the two metal pre-
tensioner plates and an e-clip. The e-clip suspends
the pre-tensioner assembly above the plasc top
cover surface.
 Loading...