13
Required Parts
• Wing panels • Fuselage
• Wing tube • Stabilizer tube
• 1/4-20 x 2" nylon bolt (2)
• 4-40 x 1/2" socket head screw (2)
Step 1
Remove the two 4-40 x1/2" screws securing the hatch
to the fuselage. Remove the hatch and store it in a
safe place until later.
Step 2
Locate the wing tube and carefully slide it into one
wing panel. Slide the wing (with tube) into the wing
tube opening in the fuselage. Make sure the wing
panel alignment pins slide into the holes provided
in the fuselage. Be sure the alignment pins are
secure in the wing halves before installing the wings.
If they are not, remove the pin and apply a small
amount of thin CA into the tube socket and reinstall
the alignment pin.
Step 3
Carefully slide the remaining wing panel onto the
wing tube that projects from the fuselage. The fit may
be tight; use caution when inserting the wing panels
onto the wing tube and fuselage.
Step 4
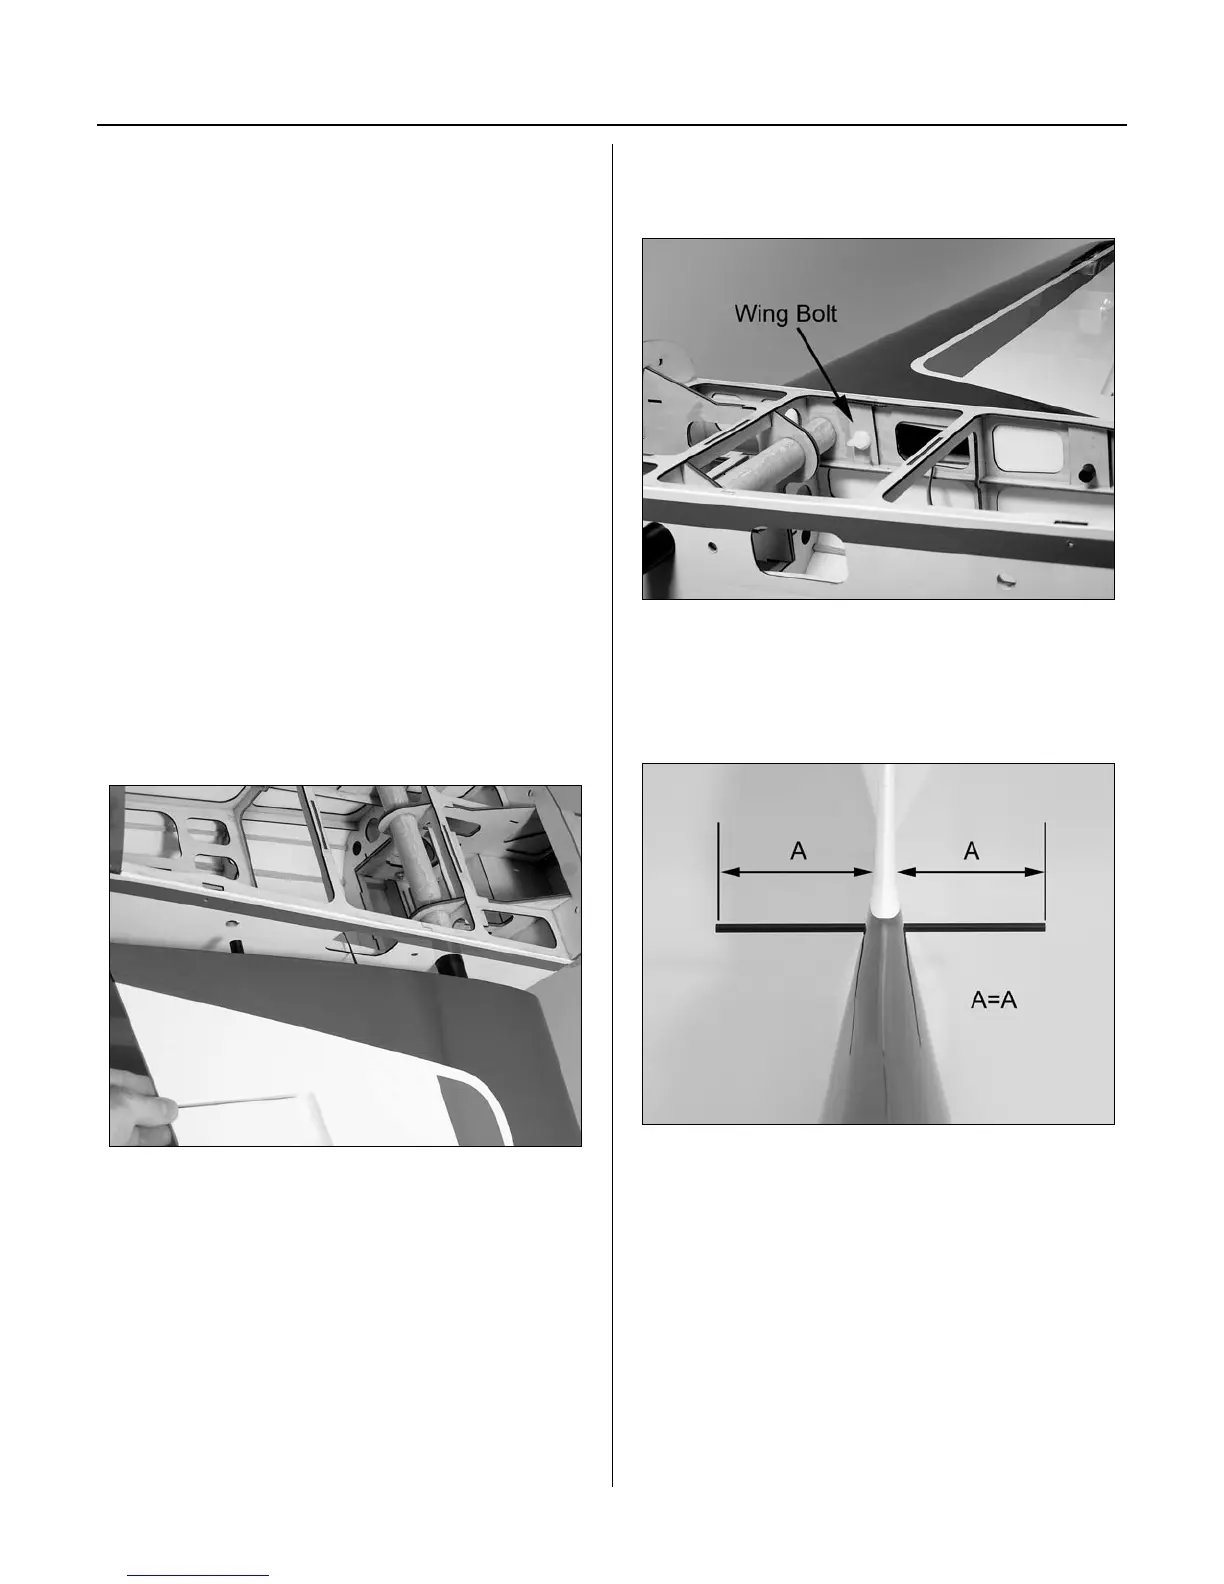
Secure the wing panels using the 1/4-20 x 2" nylon
wing bolts.
Step 5
Insert the stabilizer tube into the aft hole in the
fuselage. Measure the distance of the exposed tube
and adjust until both sides are equal.
Section 4 – Wing and Stabilizer Installation