EasyManuals Logo

Hantek DSO2D10 User Manual

Hantek DSO2D10
72 pages
To Next Page IconTo Next Page
To Previous Page IconTo Previous Page
Page #63 background imageLoading...
Page #63 background image
63 / 72
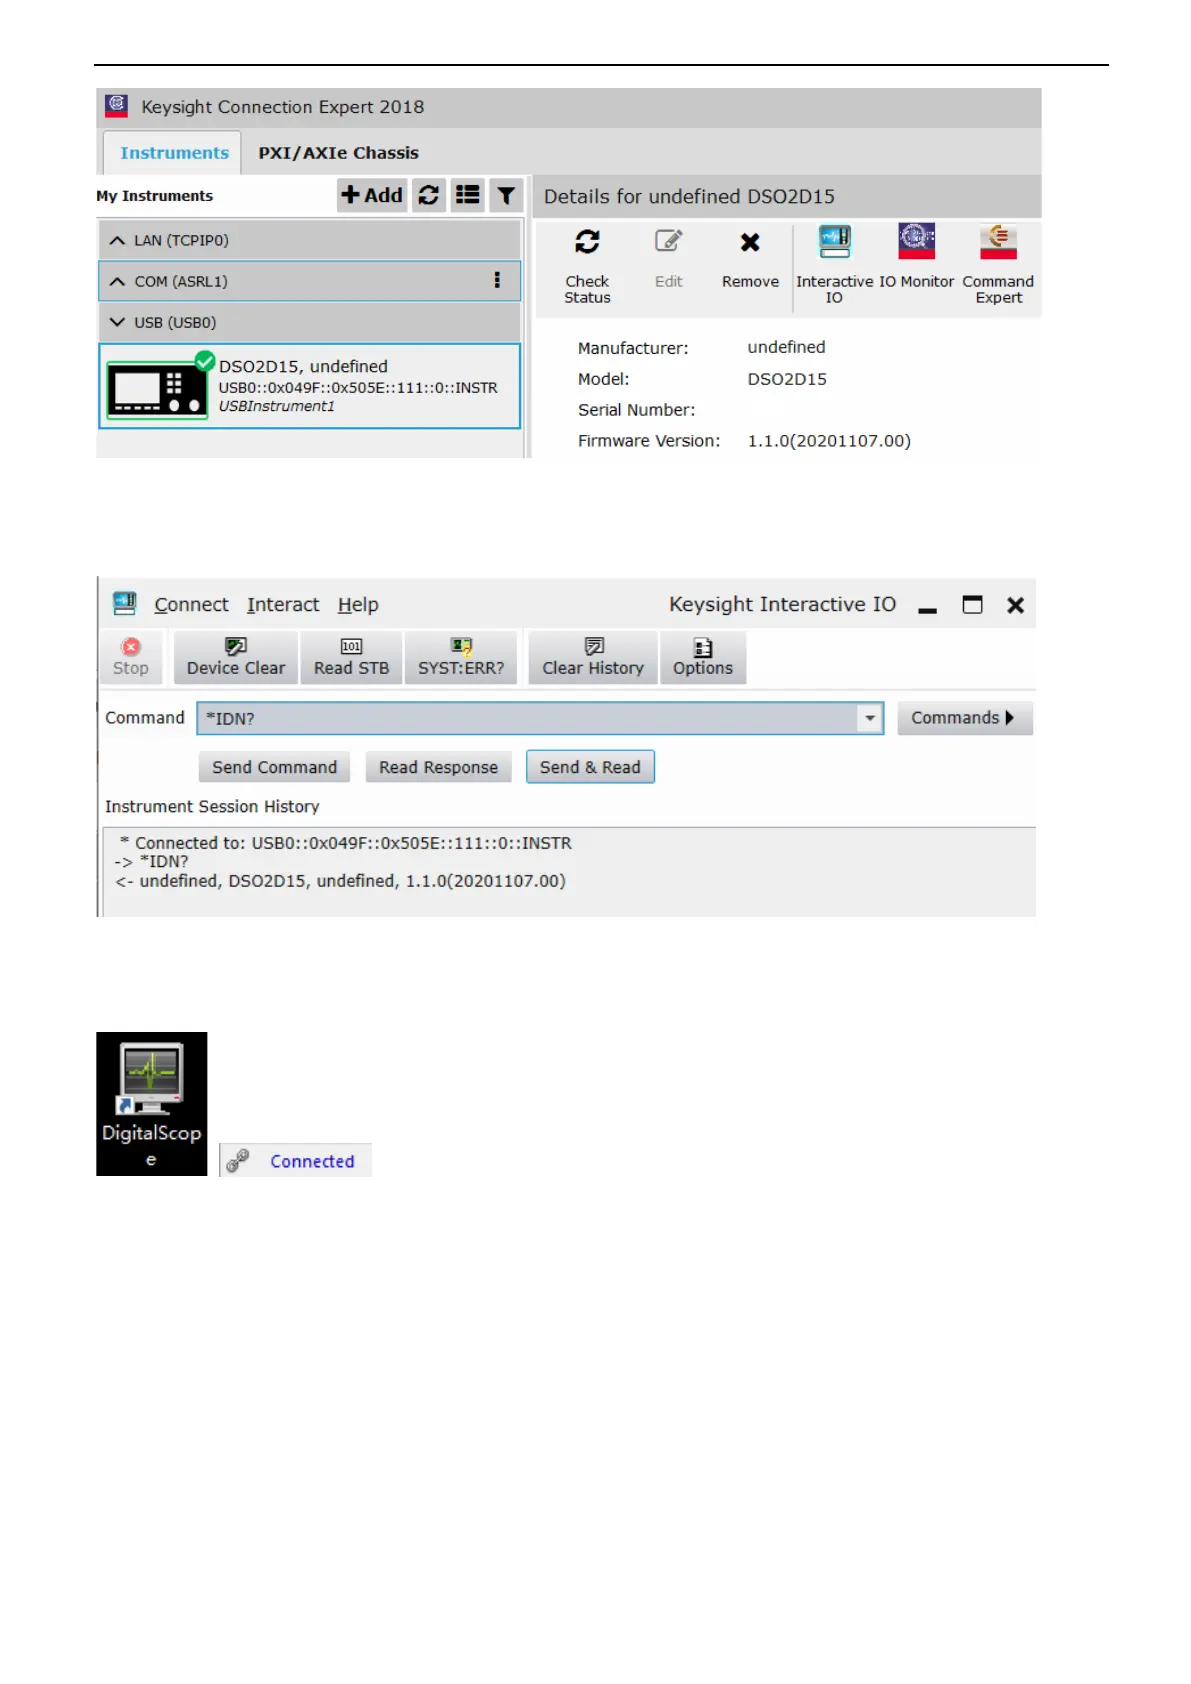
Click "Interactive IO", send an instruction arbitrarily, and the computer and the oscilloscope will
communicate.
Double-click to open the host computer software, and "Connected" is displayed in the lower left corner
of the interface. At this point, the host computer has been connected.
5. Troubleshooting
1. If the oscilloscope does not start up at power on, follow these steps:
1) Check the power cord to verify it has been connected properly;
2) Check the power on/off button to ensure it has been pushed;
3) Then restart the oscilloscope.
Contact your local HANTEK distributor or directly keep touch with HANTEK Technical Support
department if the oscilloscope still can not be turned on normally.

Table of Contents

Questions and Answers:

Question and Answer IconNeed help?

Do you have a question about the Hantek DSO2D10 and is the answer not in the manual?

Hantek DSO2D10 Specifications

General IconGeneral
Bandwidth100 MHz
Channels2
Sample Rate1 GSa/s
Vertical Sensitivity2 mV/div to 10 V/div
Trigger ModesEdge, Pulse, Video, Slope, Alternate
InterfaceUSB Host, USB Device
Math Functions+, -, *, /, FFT
Vertical Resolution8 bits
Display Resolution800 x 480 pixels
Power Supply100-240 V AC, 50/60 Hz
Weight2.5 kg
Display7 inch LCD
Built-in GeneratorYes, 25 MHz
Input Impedance1 MΩ ± 2%

Related product manuals