72618 P/N: 630-00100 Rev E
SL300 • Pinnacle Stair Lift Installation Manual
9
Pinnacle SL300
INSTALLATION PROCEDURES
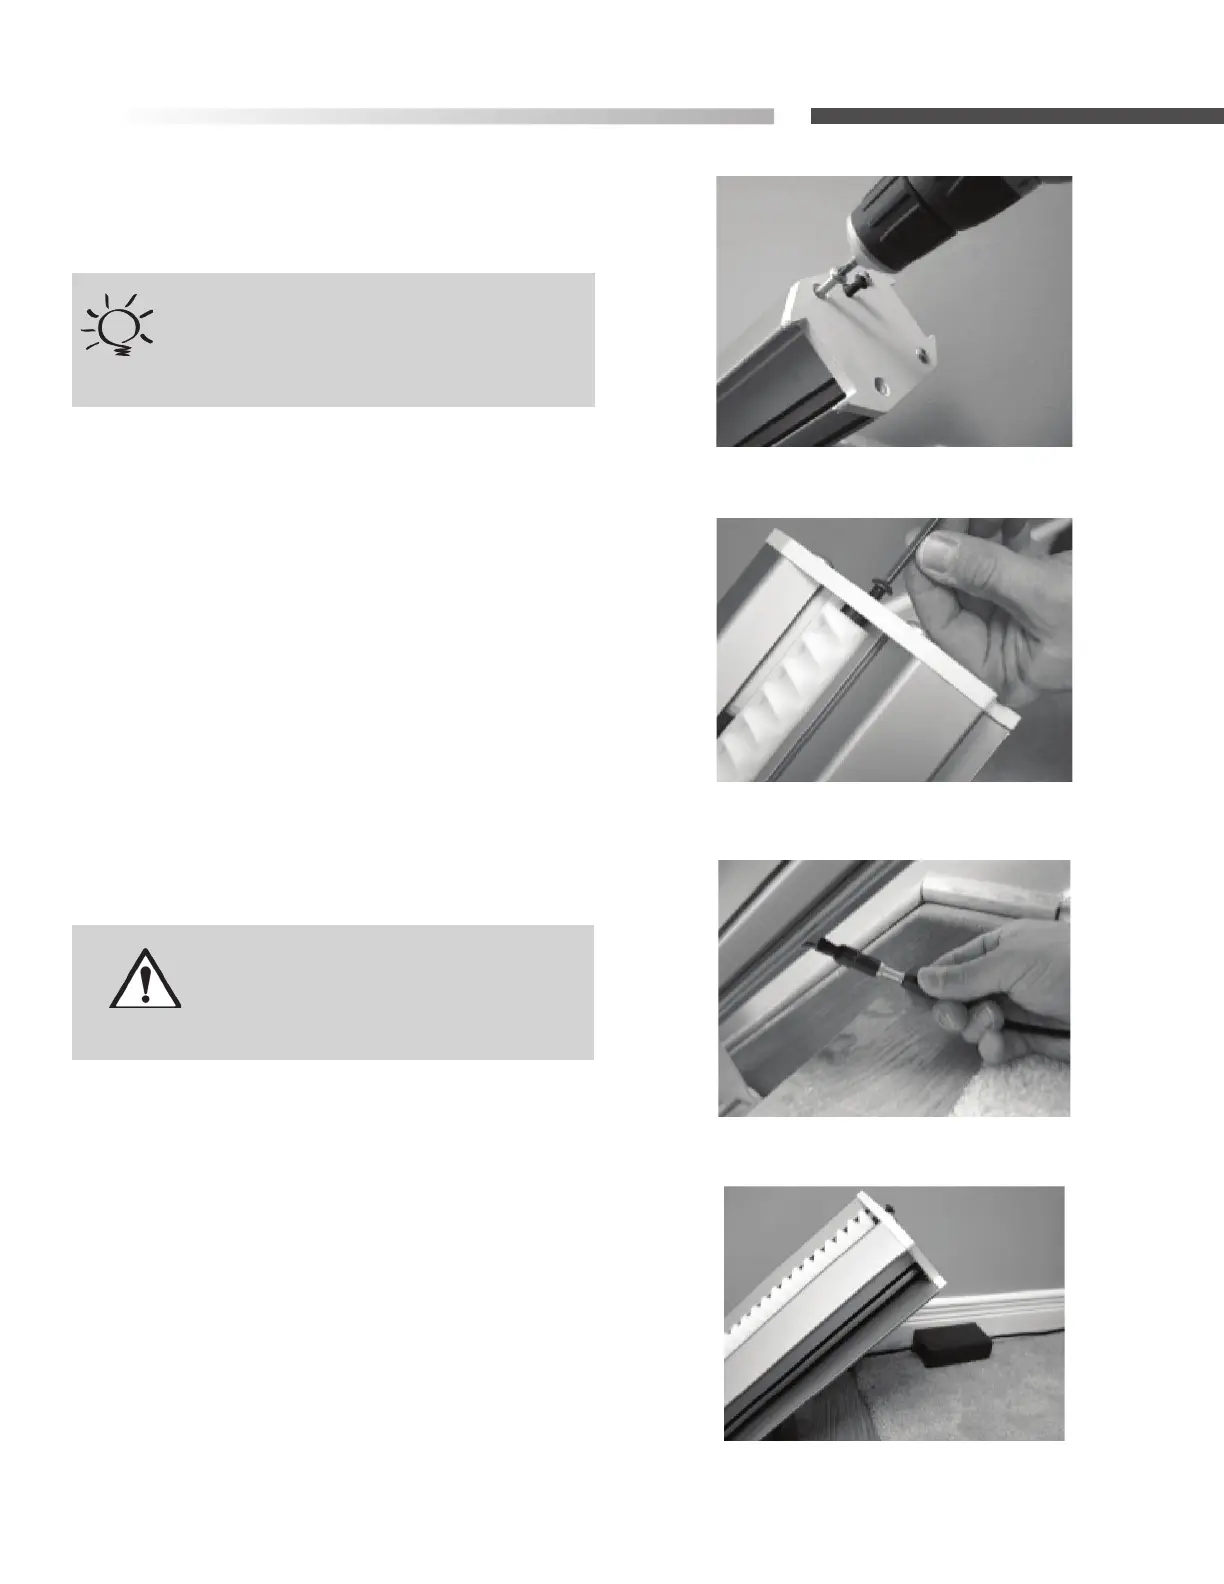
5. Install the end plate to the top of the track with
the four (4) self-cutting Torx screws using the
supplied T30 Torx bit. [Figure 9-1]
Figure 9-1
Figure 9-2
Figure 9-3
Figure 9-4
TIP
Too much torque applied to these screws
may result in damage. Take your time and
apply grease to threads.
6. Install one of the rack pre-compression screws
in the threaded hole in the top plate of the rail, and
tighten it as rmly as possible by hand with a 5/32"
Allen wrench. [Figure 9-2]
There are two (2) kinds of pre-compression screws:
• 3/4" for rails under 12 ft
• 1" for rails over 12 ft
7. Plug in the power supply at either end of the
rail, depending on the closest or most convenient
location of a wall power supply. Minimize wire length
and intrusion. [Figure 9-3 & 9-4]
WARNING
Use care in routing the charger lead.
If possible, secure along or inside wall
to avoid creation of a tripping hazard.