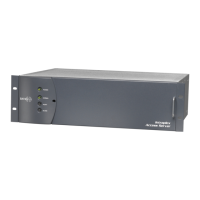
ACS-160 Series & STL-160 Series T1 Mux Installation & Operation 6-Testing & Troubleshooting
Version 2.11, August 2011
6-8 Harris Corporation
Intraplex Products
6.3.5.2 Alarm Conditions
In the factory default setting for most applications (except STL PLUS – Section 6.3.5.3), the ACS-160
signals an ALARM condition when one or more of these events occurs:
● Loss of receive signal (RX IN indicator light is off)
● CPU failed (CPU indicator light on)
● Signal present but out-of-frame (RX IN and FRM indicator light is on)
● No transmit output (TX OUT indicator light is off)
● Alarm at one or more channel modules (Alarm indicator lights on the card(s) in alarm state is on)
The ALARM indicator light also turns on briefly when power is first applied to the system.
6.3.5.3 Studio-Transmitter Link (STL) Alarms
The CM-5RB module has a selectable set of alarm conditions specifically for STL applications. The STL
alarm criteria include changes to these alarms:
● AIS
● TXOUT
● BER
You can change the CM-5RB module from the factory default standard alarms to the STL alarm using
the advanced configuration group (Section 4.3 – CM-5RB Advanced Configuration Group Menu).
For STL alarms, an incoming AIS is an alarm (not an alert) but a TXOUT alarm (T1 transmitter fail) is
an alert (not an alarm). The CM-5RB module has a fixed BER alarm threshold of 10
-3
as measured
over a one second interval.
When the STL alarms are enabled, ISiCL can indicate a bit error alarm condition when responding to
the STATUS? command:
RECEIVING 10^-3 BIT ERROR RATE
To enable the STL alarms, perform these steps:
1. Press down repeatedly on the GROUP switch. As the display changes to read DIAG, hold the switch
down; do not release it.
2. While holding the GROUP switch down (the display must still read DIAG), press up once on the
SET/NEXT switch. The display changes to read FTIM.
3. Release both switches. You are now in the Advanced Configuration Group.
Note: Although you can cycle through the CM-5RB groups by pressing repeatedly either up or
down on the GROUP switch, you can only enter the advanced configuration group by
pressing down on the switch while the display cycles from RVU1 to DIAG. Press on the
GROUP switch again to exit the Advanced Configuration Group.
4. Press down repeatedly on the SET/NEXT switch until the display reads CUST, which is underscored
to indicate an additional subgroup.
5. Press up once on the SET/NEXT switch to display Std, which is the first of three CUST options.
6. Press down once on the SET/NEXT switch to display STL.
7. Press up twice on the SET/NEXT switch. After the first press, the green (top) light blinks,
indicating that a change is about to be made. After the second press, the light turns on
continuously, indicating that the STL alarms are now enabled.
 Loading...