19
There are two ways to make manual white/grey balance set-
tings using a ‘Grey card’ or ‘Qp card’ (supplied). If colour ac-
curacy is not critical, you can use any neutrally coloured area
or surface that you judge to be close to a mid-grey value
(concrete, overcast sky, or even white paper, for example). It
won’t be perfect but just try to ensure that it is as neutral as
possible in colour value.
• Make the first shot a grey card/Qp card close-up and then
make the adjustment in Phocus for the session.
• Use the integral white balance from grey card function to
make an in-camera setting for the session.
White balance settings are mirrored in Phocus when teth-
ered.
WHITE BALANCE SETTING BY USING A ‘GREY CARD’:
MENU > WHITE BALANCE > MANUAL
1. Press MENU.
2. Navigate to White Balance.
3. Navigate to Manual then press again the Navigation button again.
4. Position the central spot in the viewfinder over an area that you consider should
be rendered as neutral in color in the image and make a test capture (ensure the
exposure is approximately correct otherwise you will see a warning message). A
small rectangle appears on the display marking that parti cular area.
5. Press the MENU button to exit the menu system and keep the setting.
Calculations then take place automatically so that the following shots use the
area chosen as the new ‘white balance’ standard. Using this method you can
also read off the screen what the color temperature of the light source has been
judged to be in degrees Kelvin.
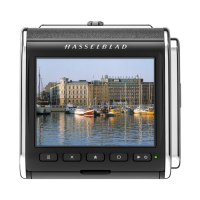
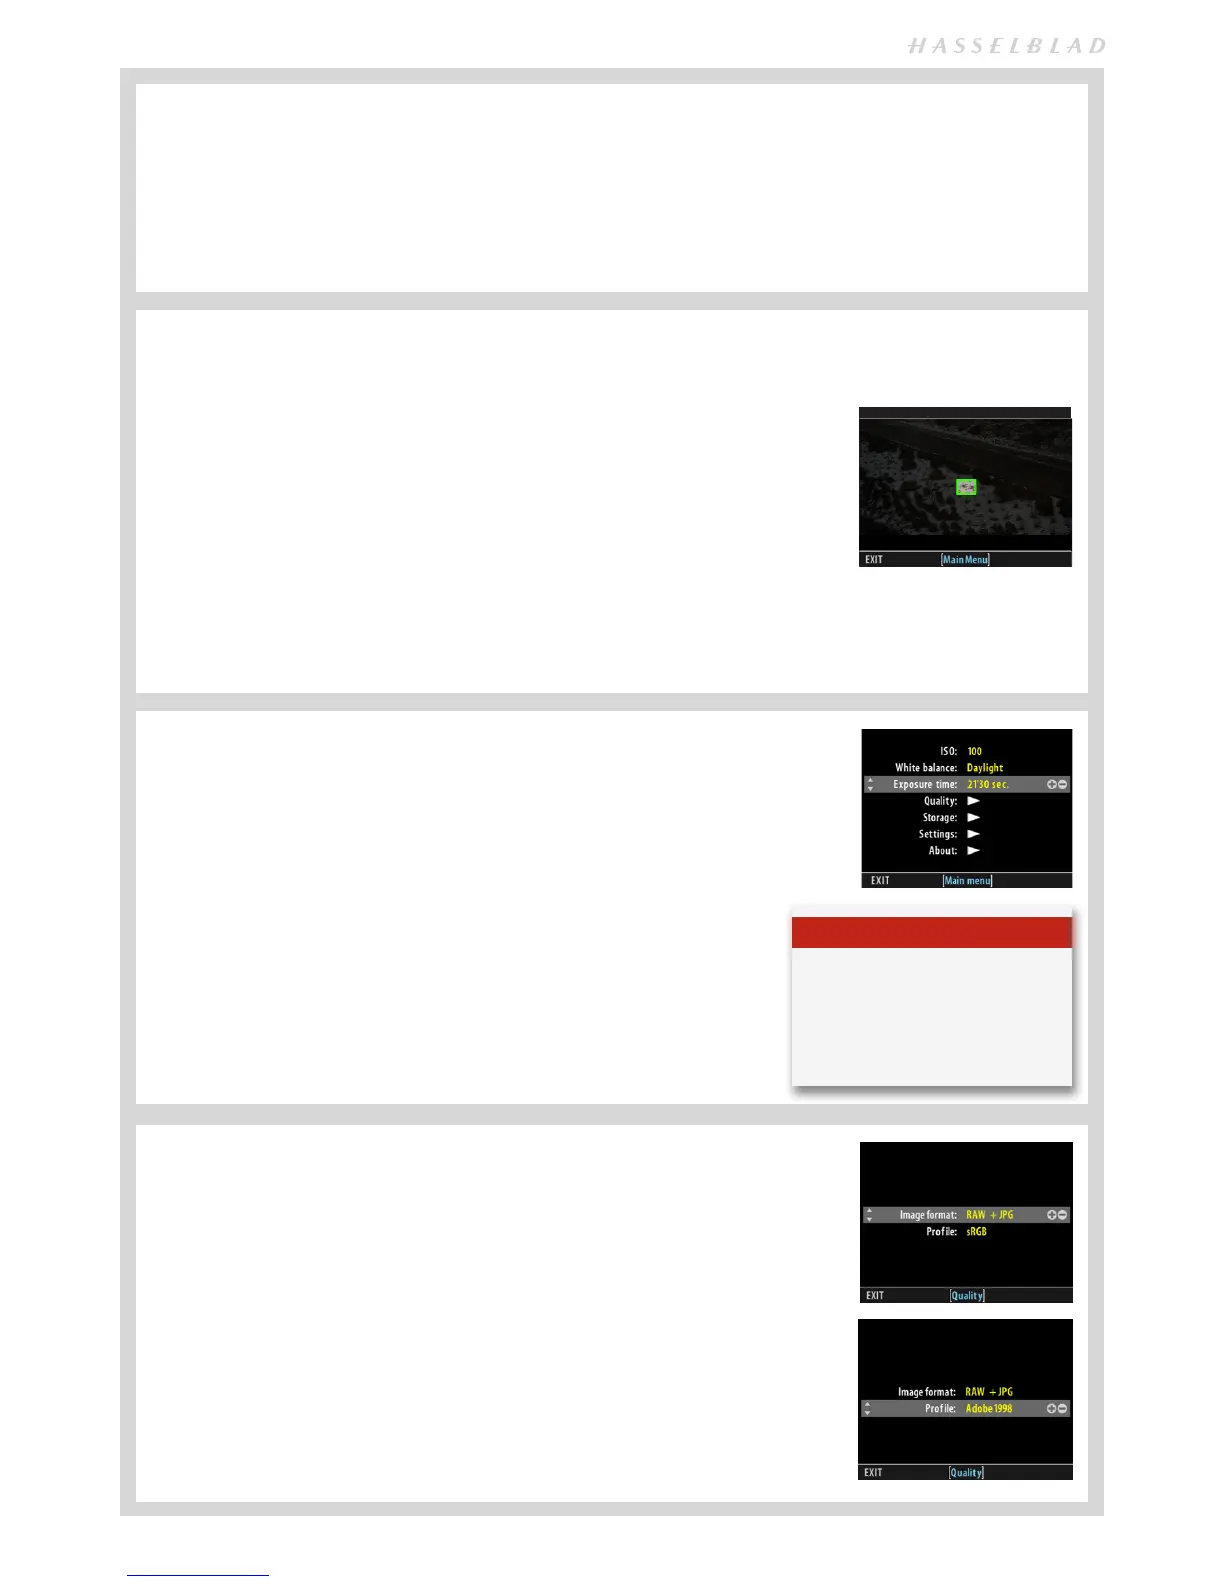
White Balance Shot screen appears
after test capture to illustrate the
area chosen for white balance cal-
culation.
MANUAL WHITE BALANCE ‘GREY CARD’ INCAMERA SETTING:
1. Press MENU.
2. Navigate to EXPOSURE TIME.
3. Press the ZOOM button to step through the settings.
4. Save the chosen selection by pressing EXIT (MENU but-
ton).
Exposure time can also be set on the CFV 50c when tethered,
via Phocus.
EXPOSURE TIME
MENU > EXPOSURE TIME
Exposure time is set in accordance with the already deter-
mined shutter setting. Increments from are 1/8 second or
faster.
QUALITY
MENU > QUALITY
Image format offers a choice between the creation of RAW only files or simultaneous RAW
+ JPEG files from each capture.
Profile offers a choice between an sRGB or an Adobe 1998 profile for JPEG captures.
IMAGE FORMAT SETTING:
1. Press MENU.
2. Navigate to Quality.
3. Navigate to Image Format.
4. Press the ZOOM button – to step through the available options.
5. Save the chosen selection by pressing EXIT (MENU button).
Tip
When changing large differences in
exposure time it is more practical to
use the Flash Sync cable method.
See Camera Connectivity in this
manual.