21
STORAGE
Note
You will always be asked to confirm
each delete operation.
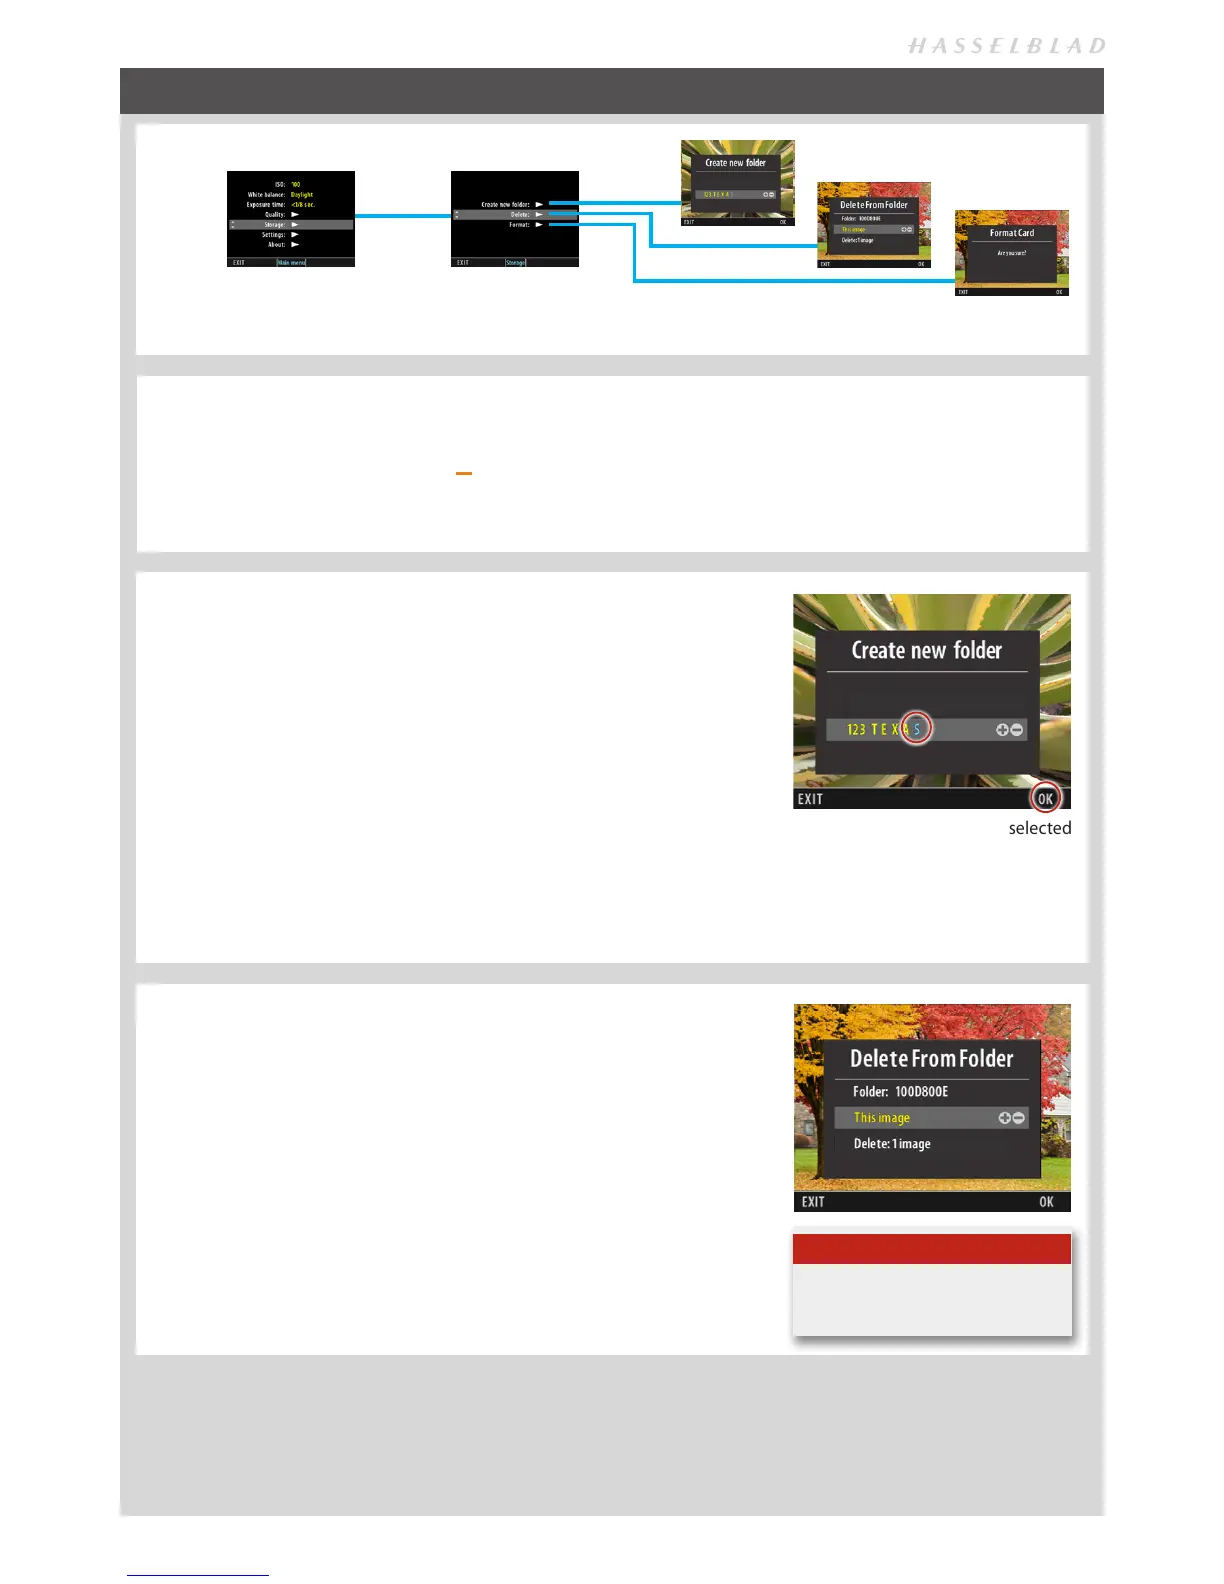
DELETE
MENU > STORAGE > DELETE
Delete allows you to make single or multiple deletes of captures.
1. Browse to image you want to delete
2. Press MENU.
3. Navigate to Storage.
4. Navigate to Delete.
5. Navigate to Delete dialogue.
6. Press the ZOOM button to step through options.
7. Press OK (Display button) to confirm.
You can choose to customise the P button for immeditate access to ‘Delete’.
Storage includes three entries: Create new folder, Delete and Format.
‘CURRENT’ FOLDER SELECTION
You can re-direct new captures to a selected folder for storage instead of the latest folder created.
1. Enter Browse mode
2. Zoom out (use the ZOOM out button
) to reach the Folder View.
3. Navigate to the desired folder (use the Navigator and zoom in) and return to the Standard Preview.
4. In this way, the newly selected folder becomes the ‘current’ folder, so all new captures will now be stored there instead.
CREATE NEW FOLDER
MENU > STORAGE > CREATE NEW FOLDER
All new captures are automatically stored in the current folder until directed
otherwise. A newly created folder automatically becomes the ‘current’ folder.
1. Press MENU.
2. Navigate to STORAGE.
3. Navigate to CREATE NEW FOLDER dialog.
4. The CREATE NEW FOLDER dialog allows folder naming. The first three-
digits are fixed and are automatically incremented for each new folder.
The following five characters can be assigned as follows:
Use the Navigator to select each character in turn. When selected (high-
lighted as blue) use the ZOOM button to select the desired character/digit.
5. Press OK (Display button) to save.
The last character has been selected
and is colored blue to indicate that it
can be changed. Pressing OK saves
the new name and creates the new
folder which now becomes the ‘cur-
rent’ folder.