62
Bracketing setting
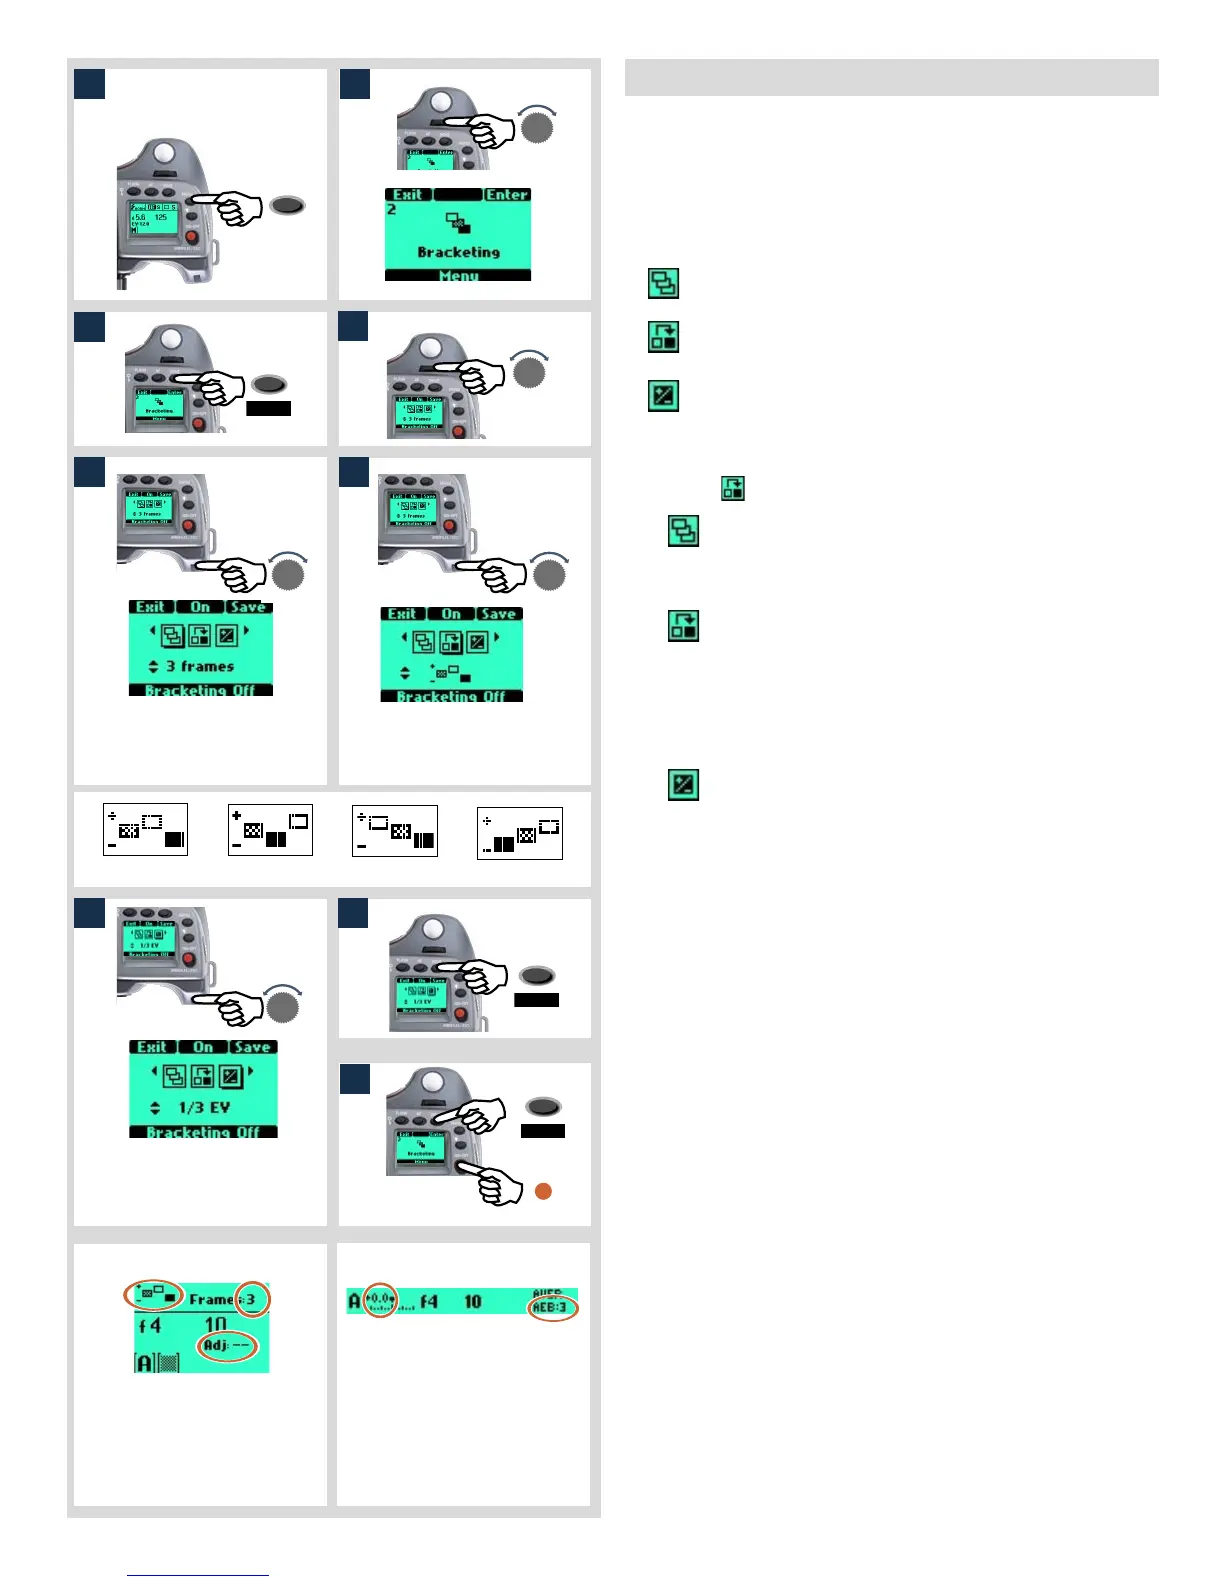
The Bracketing function is set in the following manner:
1) Press the MENU button.
2) Turn the front control wheel until Bracketing appears
3) Press Enter (DRIVE) button on the grip
4) Turn the front control wheel to access the options, that are:
Number of Exposures (the number of exposures
required in the sequence)
Sequence (the sequential order of the over- or
under- exposures)
Step (the amount of EV variation from the standard
exposure setting)
(A drop shadow will be displayed beneath the selected symbol, for
example
)
5) In turn the rear wheel to choose the number of frames
required:
2, 3, or 5.
6) In turn the rear wheel to choose one of four sequences:
A: Standard, Over, Under
B: Standard, Under, Over
C: Over, Standard, Under
D: Under, Standard, Over
7) In turn the rear wheel to choose the amount of EV varia-
tion required:
1, 1/2, 1/3 EV.
8) Press SAVE (DRIVE button) to save the setting.
9) Press ENTER (DRIVE button) again from the Bracketing
screen to activate the function. Press On (AF button). Note
that this now reads Off and the line of text at the bottom of
the screen reads ‘Bracketing on’.
Half-press the shutter release button to standby mode for this
function (press the shutter release button again (full press) for
activation) or full-press the shutter release for immediate acti-
vation.
To escape from this mode press MENU, then Enter (DRIVE
button on the Bracketing screen, then Off (AF button).
Check the lower text-row on the screen for ON or OFF status
The default setting is a shutter speed change in a bracketing
sequence. However, if the camera is set in Manual mode, you can
choose an aperture change instead (Custom Options - Bracket
param. in Manual - 25).
See note at the beginning of this section regarding the difference
between Single and Continuous drive settings. In both cases, the
bracketing function is automatically reset for a new sequence.
A bracketing sequence can be stopped mid-sequence by pressing
the ESC (ON.OFF) button.
As an example, a 5 frame sequence with an EV 1 variation setting at
‘Standard, Over, Under’ would produce: Standard (O EV variation),
+1EV, -1EV, +2EV, -2EV.
6
5
4
3
21
Number of exposures highlighted.
3 frames chosen as option.
Sequence highlighted. ‘Standard,
over, under’ chosen as option.
9
8
7
Step highlighted.
1/3 EV variation chosen as option.
A B C D
Screen after Bracketing setting acti-
vated indicating 3 frames remaining
in a Standard, Over, Under, sequence
with no adjustment to the next frame.
Viewfinder display indicating no
adjustment to next frame and three
frames left in the sequence.
EXAMPLE EXAMPLE
 Loading...