4 Planning and installation – Installing the heating system
37
CONNECTING THE CABLES
1. Route all the cables and sensors to the central module and any
extension module(s).
2. Connect all the cables on the central unit and any extension
module(s).
✎ See “Electrical plans for the HDG log wood boiler”.
✓ The HDG controls unit is now installed.
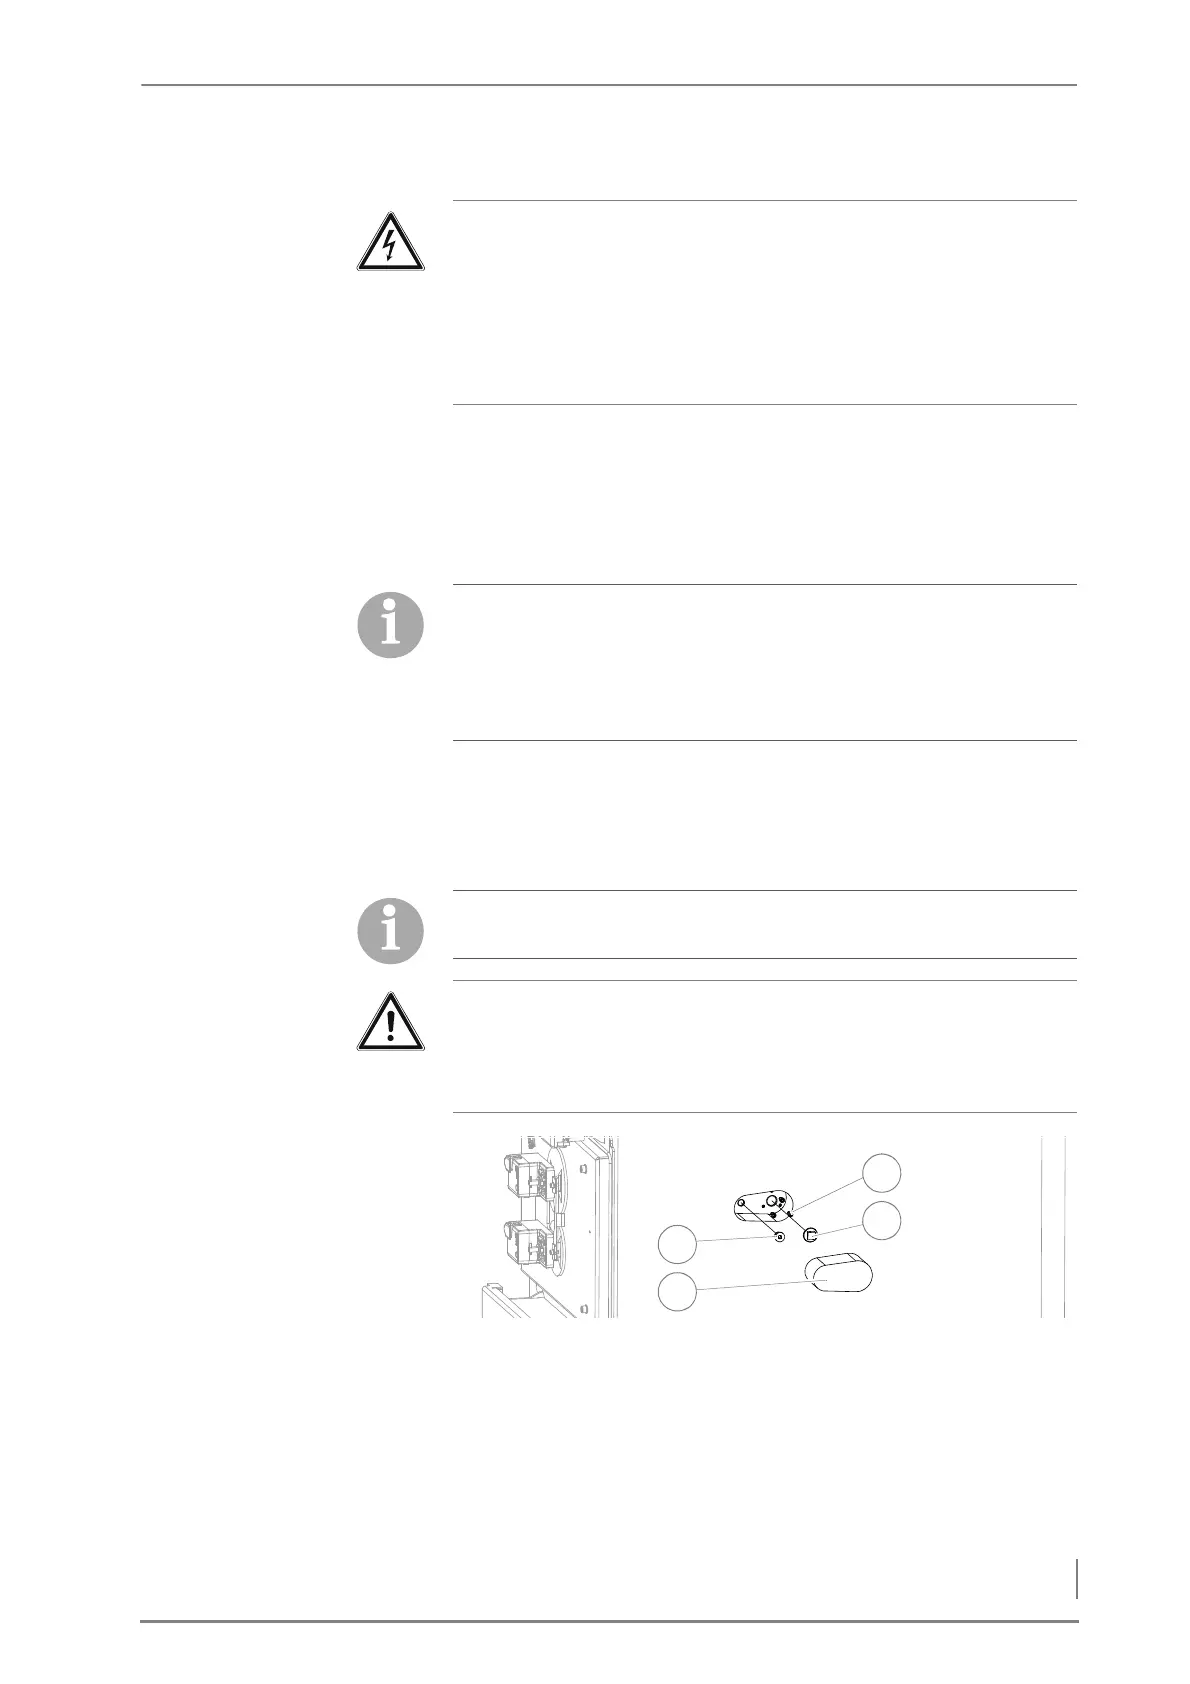
INSTALLING THE AUTOMATIC IGNITION
1. Remove the perforated insulation (2).
2. Remove the M8 hexagon socket screws (SW6) (1).
3. Tighten the three M5 hexagon socket screws (SW4) (4).
4. Remove the dummy plugs (square SW13) (3).
Caution!
Malfunctions due to incorrect cabling
If live cables and sensor cables are installed in the same ducts, it can
cause the sensors to malfunction.
Ensure that the live wires and the sensor cables are installed in
different cable ducts (3).
Please note that here only the assembly of the HDG controls unit is
described.
The remaining electrical installations depend on the hydraulic
system and can be installed based on the specifications for the
respectively selected system.
The HDG automatic ignition is available as an option and not
included in the standard scope of delivery.
Important!
Below, installation of the automatic ignition system is described on
the right boiler side. Installation on the left side of the boiler is
analogous.
Figure 4/12 - Dismantling the cladding and dummy plugs