4 Planning and installation – Installing the heating system
39
13.Run the cable from the differential pressure switch (2) to the
central module and plug it in at slot X34.
✎ Also refer to “Electrical plans for the HDG log wood boiler”.
14.Push the ignition fan (10) into the ignition pipe (11).
15.Run the cable from the ignition fan (10) to the central module and
plug it in at slot X52.
✎ Also refer to “Electrical plans for the HDG log wood boiler”.
✓ The automatic ignition is now installed.
INSTALLING THE AUTOMATIC CLEANING SYSTEM
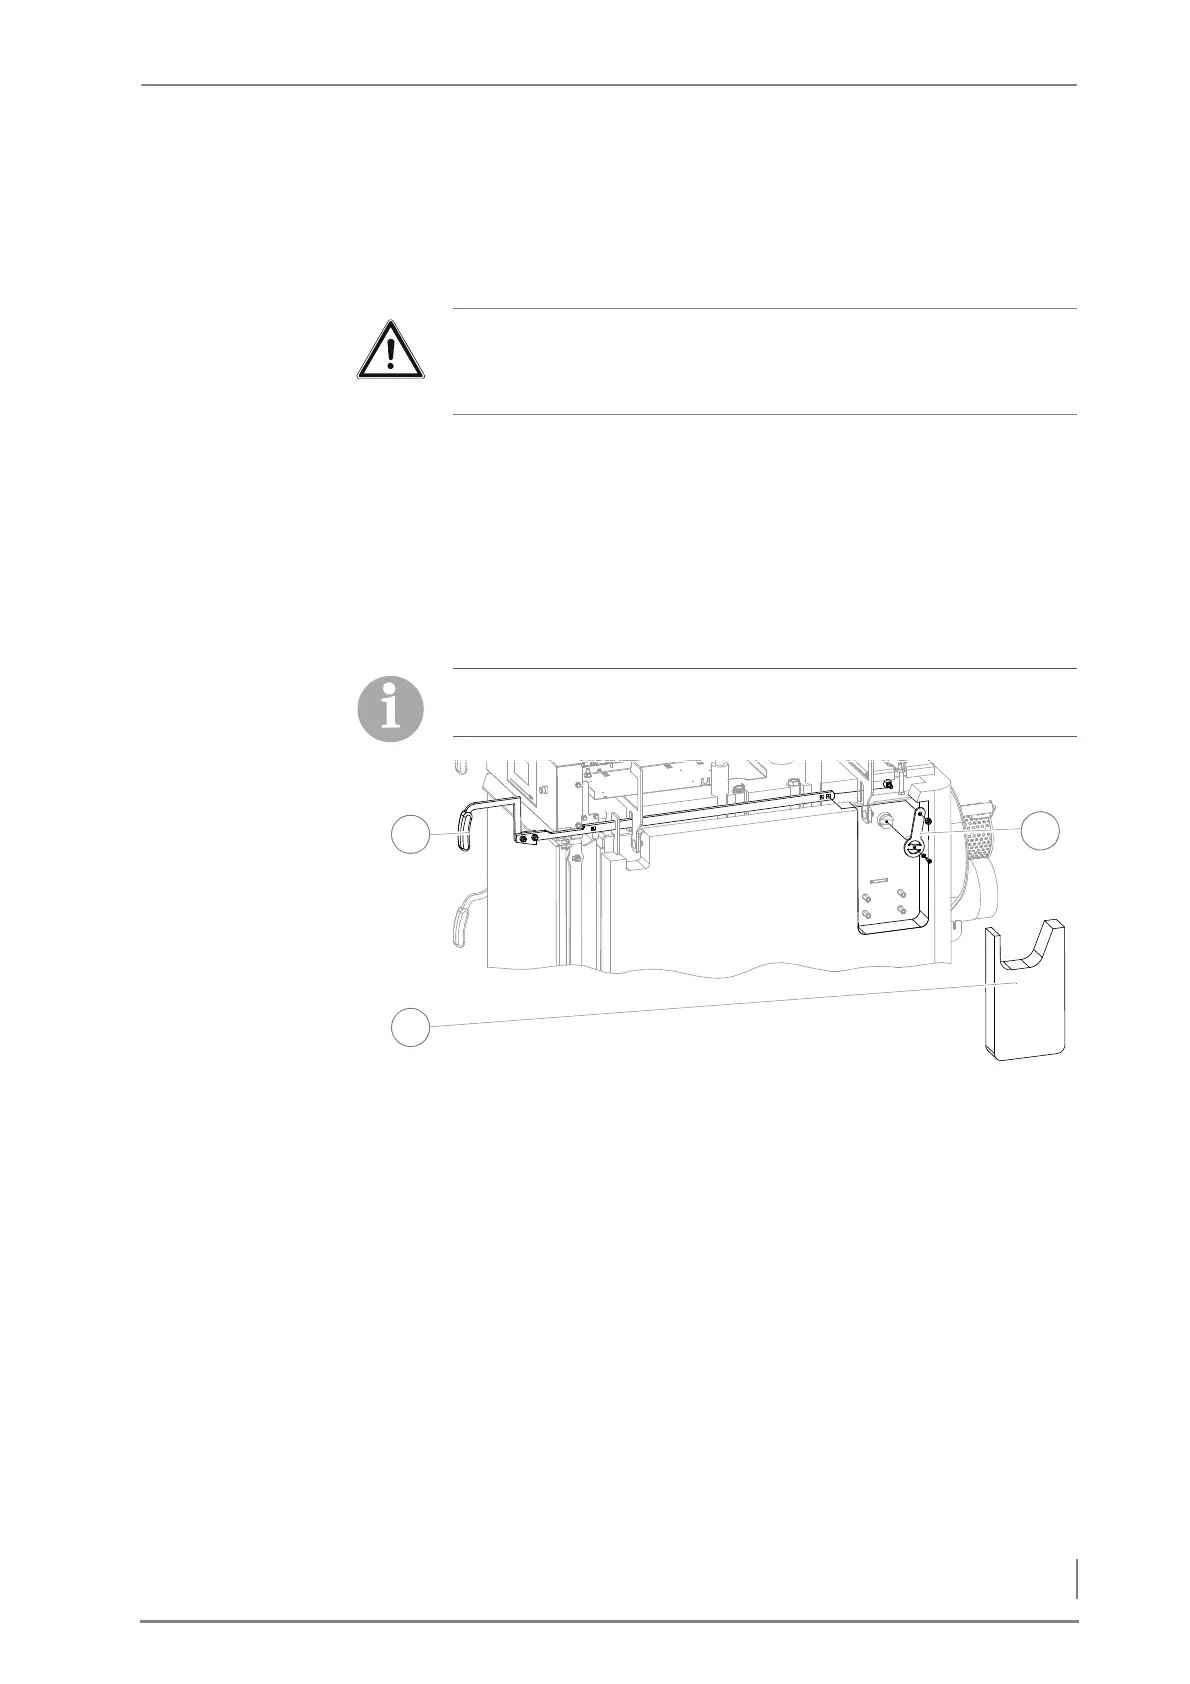
1. Unscrew the M8 nut (SW13) and pull the actuating lever (1) of the
cleaning system forward.
2. Unscrew the M5 hexagon socket screws SW4 and remove the
small lever (3).
3. Remove the perforated insulation (2).
Important!
Make sure that the line from the ignition fan is fitted so that it does
not come into contact with the ignition pipe.
The HDG automatic cleaning system is available as an option and
not included in the standard scope of delivery.
Figure 4/14 - Dismantling the cleaning system lever