7 Cleaning and servicing the heating system – Procedure
70
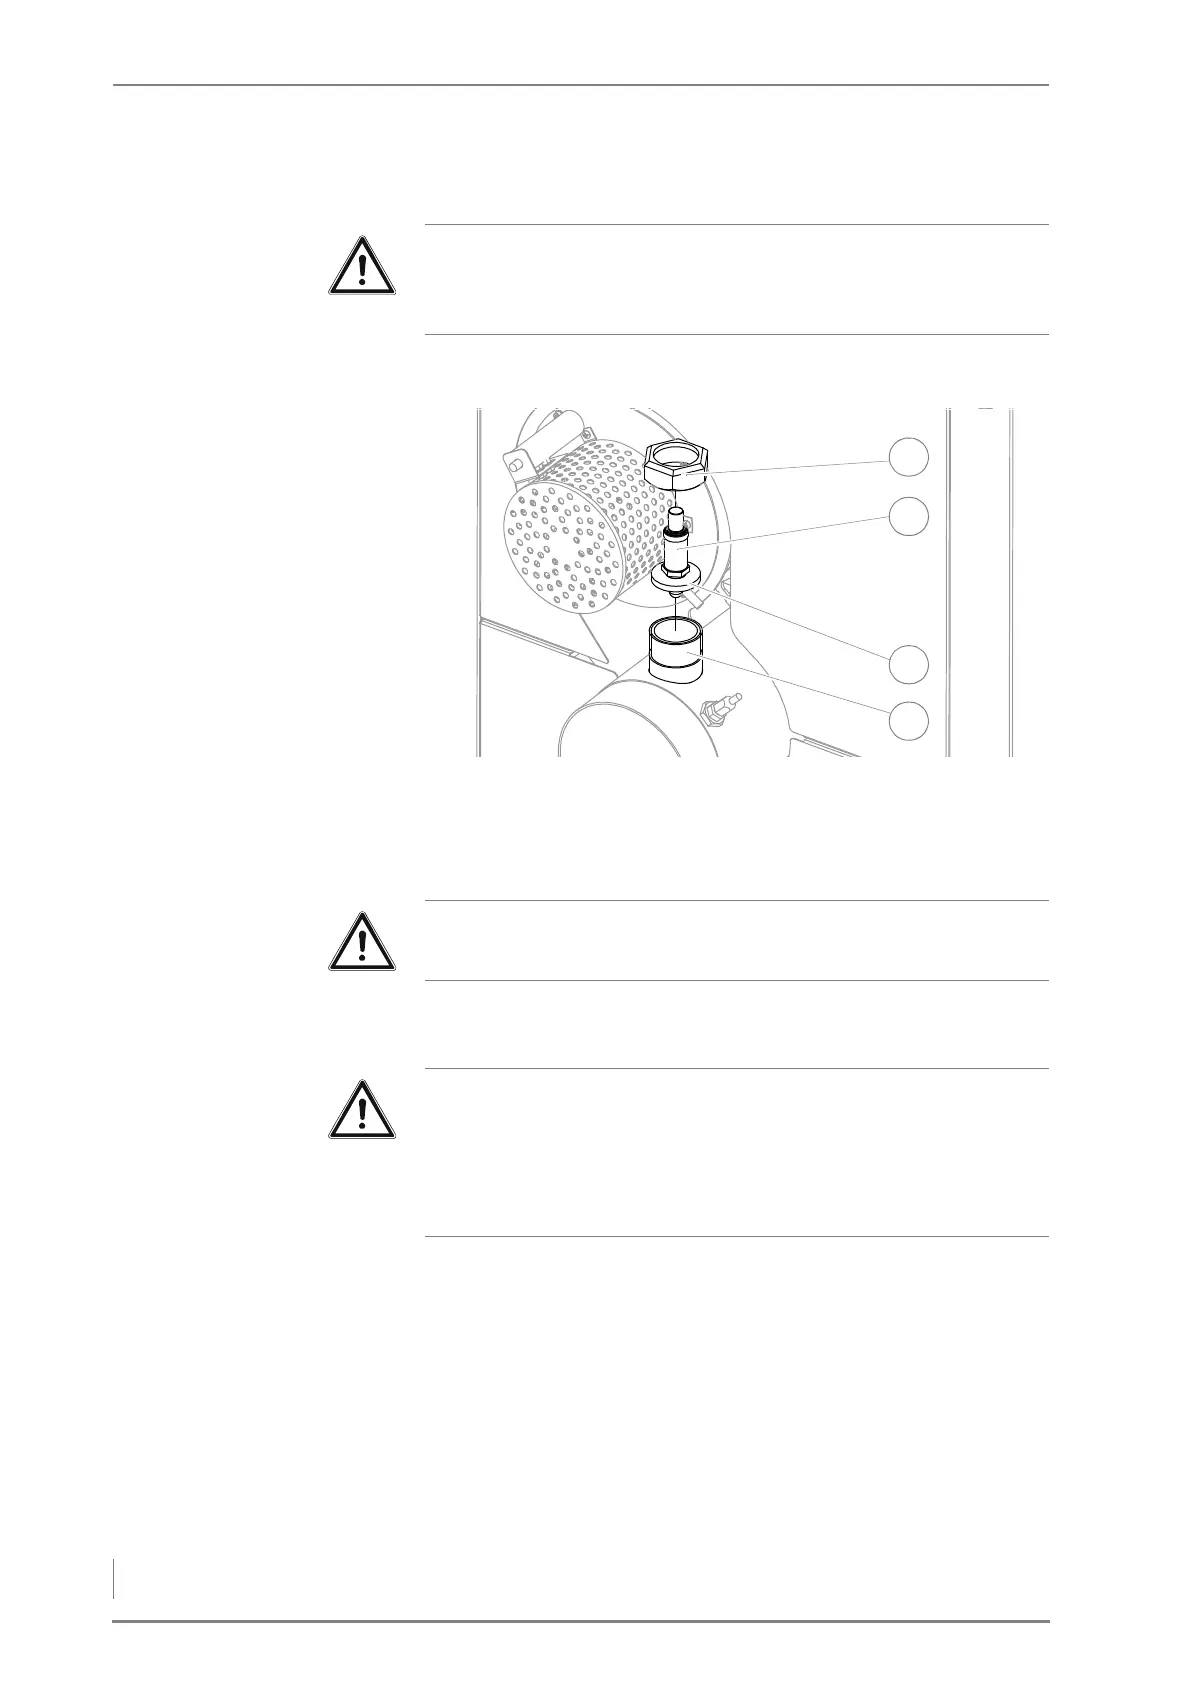
CHECKING AND CLEANING THE LAMBDA SENSOR
1. Allow the fire in the boiler to burn out and cool off.
2. Unscrew the union nut (1) with a pipe wrench.
3. Remove the lambda sensor (2) and the steel washer (3) under it
from the connection nozzle (4) of the flue gas pipe.
4. Clean the lambda sensor (2) with a vacuum cleaner.
5. Clean out any deposits inside the connection nozzle (4).
6. Reinstall the lambda sensor (2) in the reverse sequence.
7. Check the lambda sensor (2) for a secure fit.
8. Carefully tighten the lambda sensor (2) with a 22 mm spanner.
✓ The lambda sensor has been checked and cleaned.
Important!
✎ Observe the “Generally applicable safety instructions” in this
section.
Figure 7/4 - Cleaning the lambda sensor
Important!
Steel bristles will damage the lambda sensor.
Important!
When reinstalling the lambda sensor, make sure its seal is intact.
Use a pipe wrench to tighten the union nut. Do not tighten the
lambda sensor excessively. Never tighten the lambda sensor by the
shaft body.