------
t*rr.
,_
8ti,D
OVER
TO TOUCH
SHAFT
END
FLUSH
!VITH
FACE
OF
PULLEY
HU8
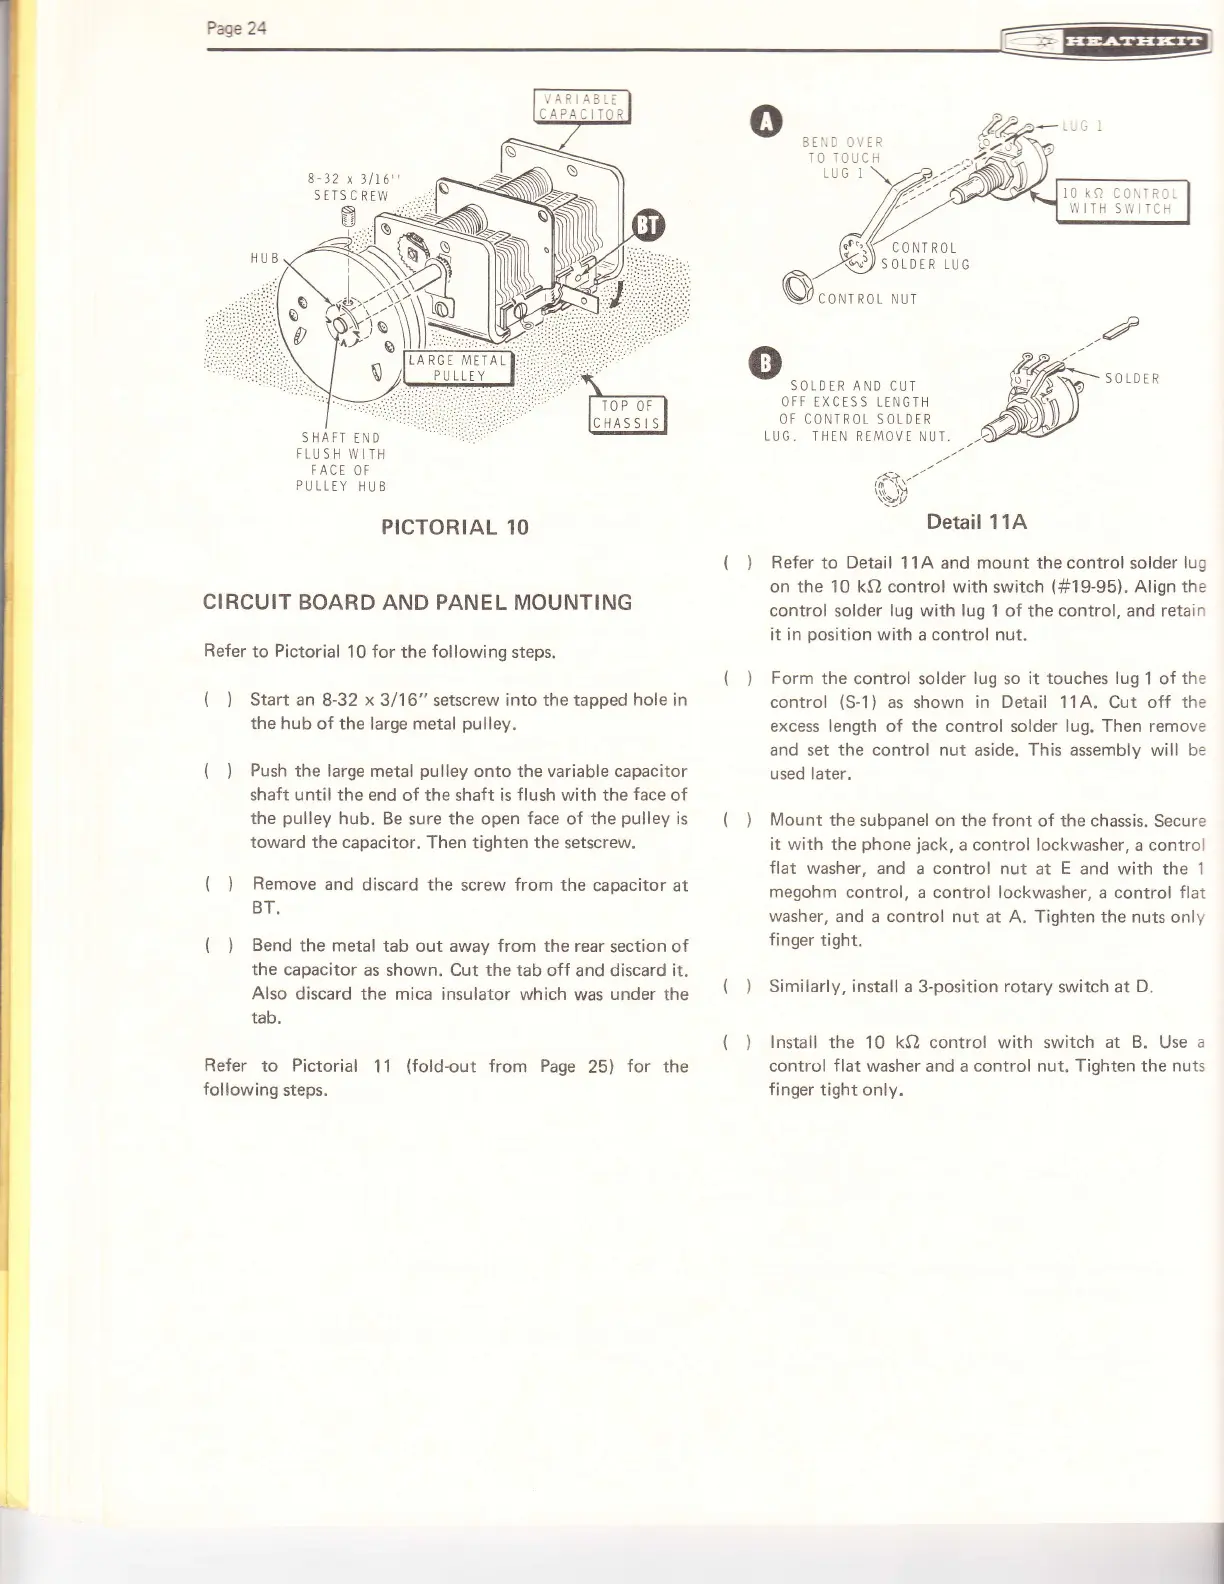
PICTORIAL 10
CIRCUIT
BOARD
AND
PANEL
MOUNTING
Refer
to
Pictorial
10 for
the
following
steps.
(
)
Start
an
8-32
x
3/1 6" setscrew into the tapped
hole in
the
hub of the large metal
pulley.
(
)
Push
the
large
metal
pulley
onto
the
variable capacitor
shaft until the end
of the shaft is
flush
with the
face
of
the
pulley
hub. Be sure the open
face
of the
pulley
is
toward the capacitor.
Then tighten the setscrew.
{ )
Remove
and
discard
the screw
from
the
caoacitor at
BT.
(
)
Bend
the metal
tab out away from the rear
section of
the capacitor
as shown. Cut the tab
off and discard it.
Also discard
the mica insulator
which was
under
the
tab.
Refer
to
Pictorial
11
(fold-out
from
Page
25)
for
the
following
steps.
()
()
()
()
()
I
LO
|(Q
CO\,TRC
!,iITH
S\'i IICh
CONTROL
SOLDER
LUG
-a
o
SOLDER AND CUT
OFF TXCESS TENGTH
OF CONIROL
SOTDER
LUG.
THEN RtM0Vt NUT..--
.;-+.-.
rft
i,'
'vt
Detail 11A
Refer
to
Detail
11A and mount the control
solder
lug
on the 10 kQ control with
switch
(#1
9-95).
Align
the
control
solder
lug with lug
1 of the control, and retain
it in
position
with
a
control nut.
Form
the control solder
lug
so
it touches lug
i of
the
control
(S-1)
as
shown
in Detail 11A.
Cut
off the
excess length of the control solder lug. Then remove
and
set
the
control
nut
aside.
This
assemblv will be
used later,
Mount
the
subpanel on the
front
of
the chassis.
Secure
it with the
phone
jack,
a control lockwasher,
a
control
flat
washer, and
a
control
nut at
E
and with
the
1
megohm
control,
a
control lockwasher,
a control
flat
washer,
and a control nut at A. Tighten the
nuts only
finger
tight.
Similarly, install
a 3-position
rotary
switch at
D.
Install
the 10 kQ control with switch
at B.
Use
a
control
flat
washer and a control nut.
Tighten
the
nuts
f
inger tight only.
 Loading...