8 30803 Rev X 08/04
CALIBER DIRECT VENT INSTALLATION INSTRUCTIONS
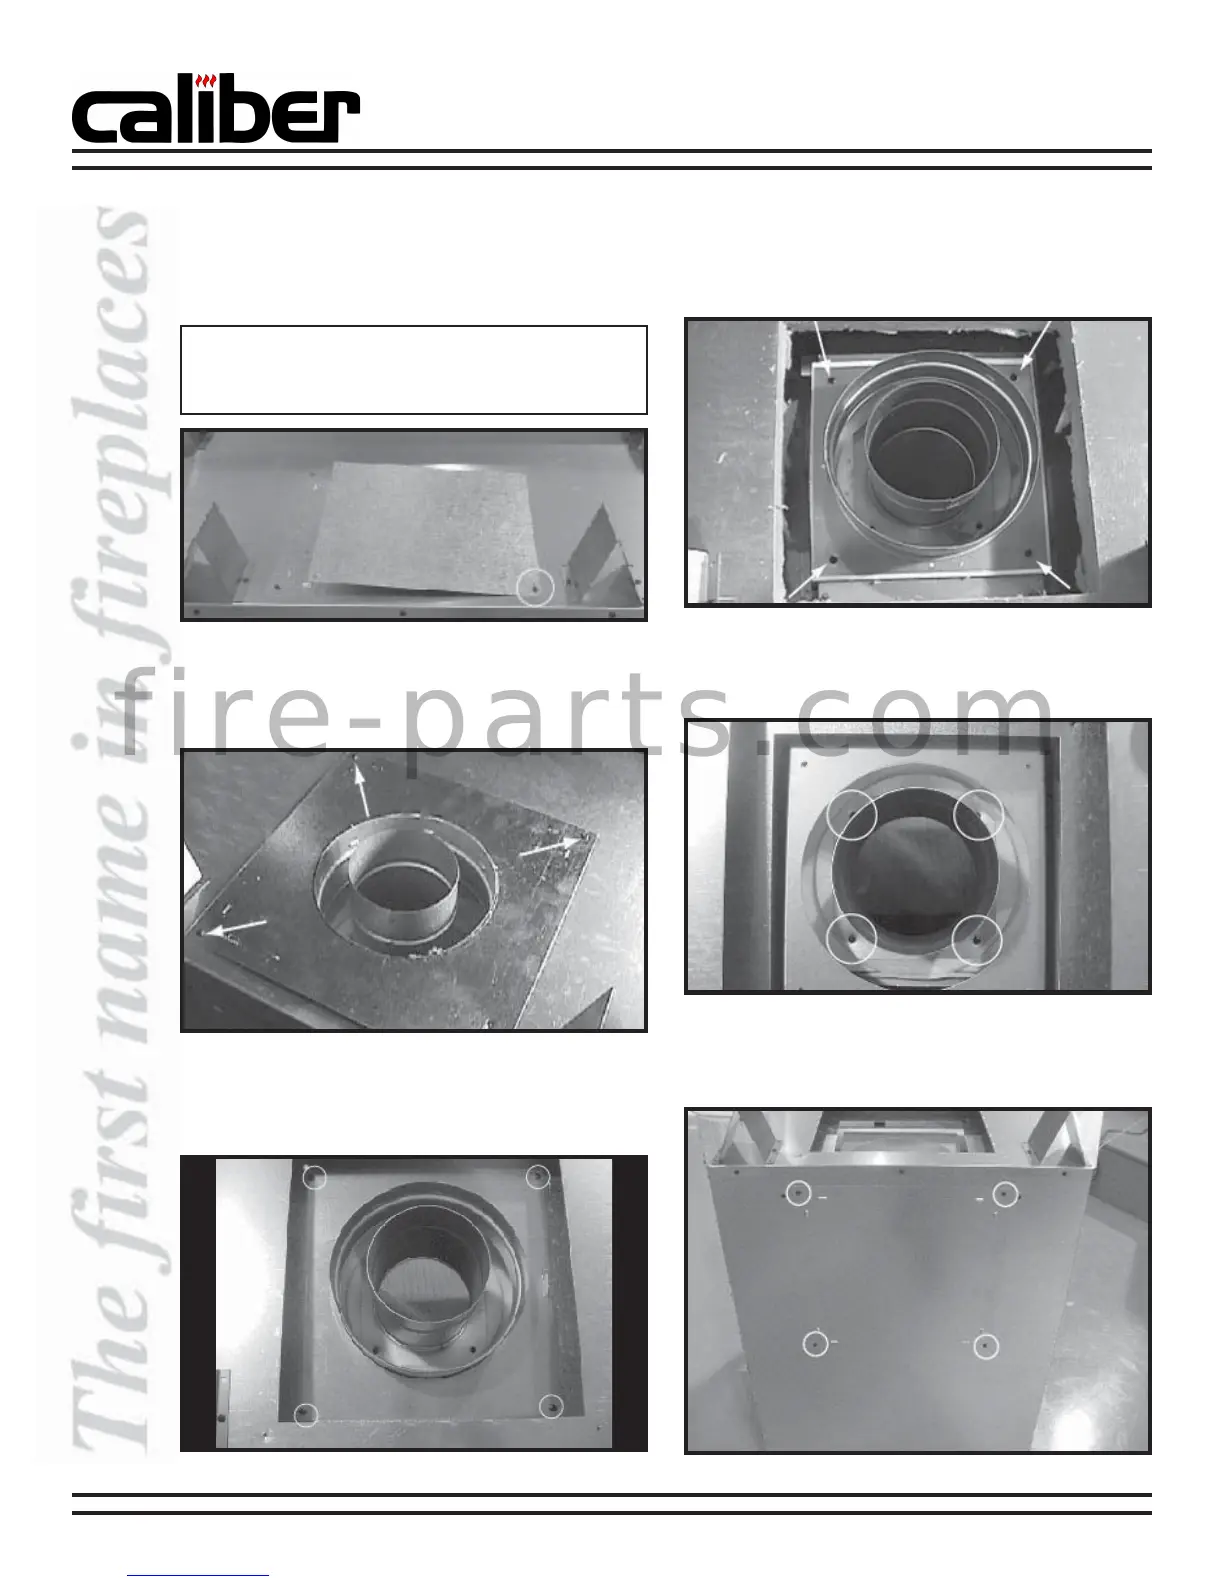
E. VENTING
a. Remove the screw holding the heat shield cover
plate to the top of the appliance and set aside.
See Figure 5.
b. Remove the three remaining screws holding the
plate surrounding the flue. See Figure 6. Remove
the plate and set aside.
Figure 6 - Remove Plate Screws
Figure 5 - Insulated Cover Plate, Top of Appliance
Note: If the appliance is to be top vented discard this
plate and replace the screw you removed. If the
appliance is to be rear vented, continue to Step b.
d. Remove the four screws holding the outer collar
to the appliance top. See Figure 8. Remove the
outer collar.
e. Remove the four screws holding the inner collar
to the appliance top. See Figure 9. Remove the
inner collar.
1. Conversion from Top Vent to Rear Vent
c. Remove the four screws holding the inner plate
surrounding the flue. See Figure 7. Remove the
inner plate and discard.
Figure 7 - Inner Plate, Top of Appliance
f. Remove the four screws holding the outer shell
cover. See Figure 10. Remove the outer shell cover
and set aside.
Figure 8 - Remove Four Screws from Outer Collar
Figure 9 - Remove Screws from Inner Collar
Figure 10 - Outer Shell Cover
f i r e - p a r t s . c o m