Quick Start Guide REX 300 17
4.3.1
Copy the conguration le provided by the myREX24 portal to a standard FAT-for-
mated USB ash drive. When the device is started up for the rst time, the le is
called myREX24.mbn, and all subsequent les edited for this router are generated as
myREX24.mbnx automatically. Never rename this le!
4.3.4
After an additional 10 seconds, the router will restart automatically and log in at the
portal with the conguration which was just loaded. The USB ash drive can now be
removed from the device.
4.3.5
Once the conguration le has been successfully transferred, the le on the USB
ash drive will be renamed „XmyREX24.mbn(x)“, making it impossible to reuse it a
second time accidentally.
4.3.2
Switch the device on and wait until the boot process is completed (RDY & ON LEDs
are lit continuously green).
4.3.3
Plug the USB ash drive into the corresponding USB port on your REX 300 unit.
- After approx. 5 seconds, the TxD and RxD LEDs will ash red. The device has
detected the conguration le.
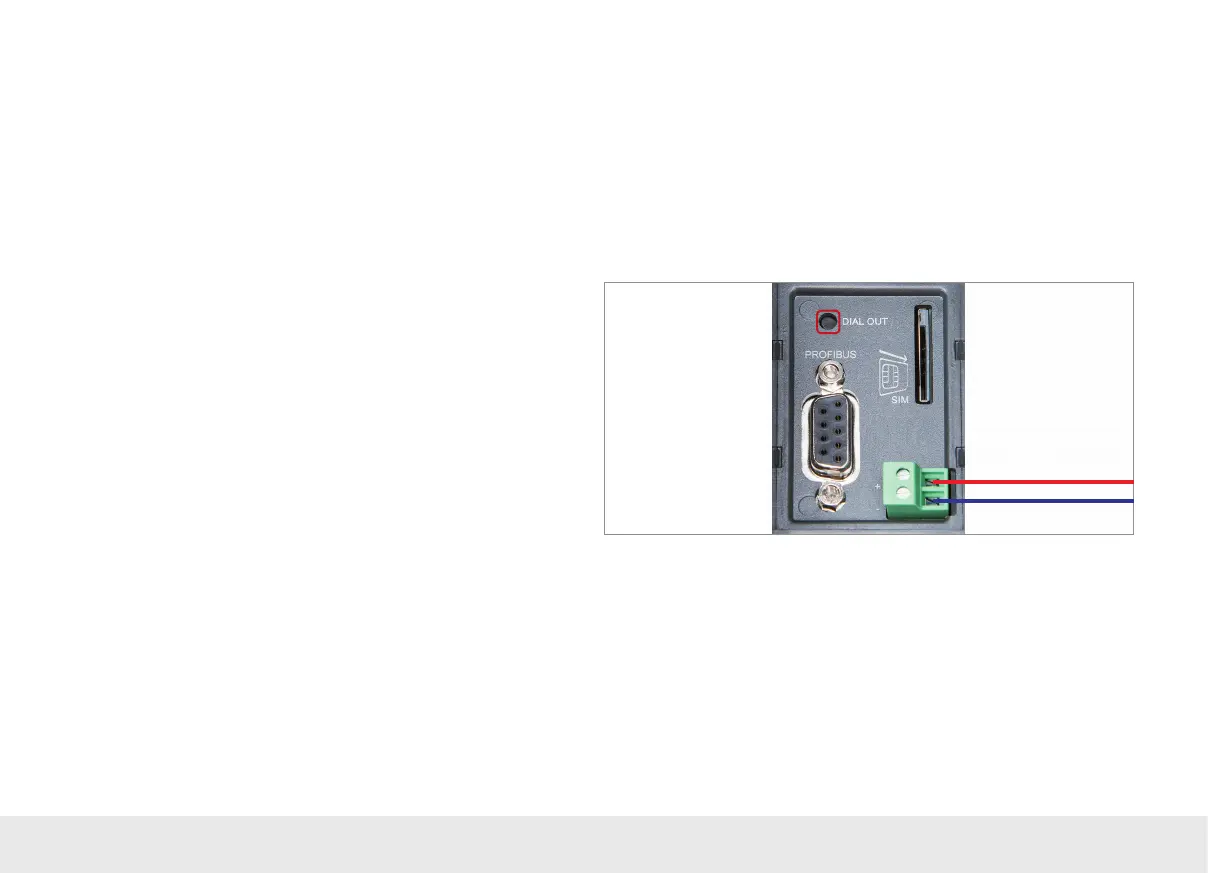
- Press the Dial Out button for approx. 1 second until the RxD LED ashes green. The
RxD LED will ash green while the conguration le is being transferred (approx.
20 seconds).