Quick Start Guide REX 300 7
1*
2*
3*
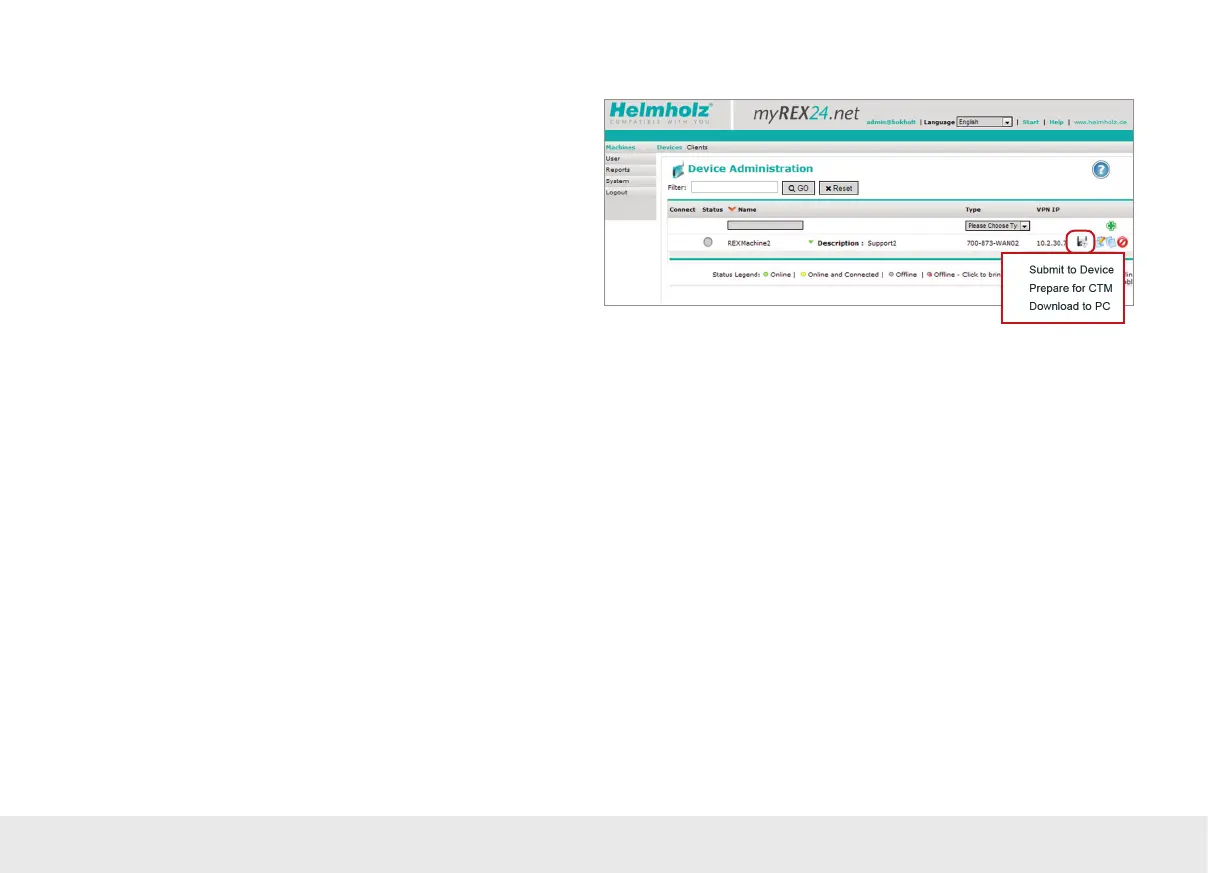
4. Transfer options of the router conguration
Once you have created a conguration, you can click the oppy disk icon in order to
select one of three transfer methods described here.
1* Submit to Device:
The conguration is transferred to the router on the local LAN connection of the PC
on which shDIALUP is running.
You can use this option if the REX 300 router can be reached directly through the
local network (LAN).
2* Prepare for CTM:
Used to download the conguration from the myREX24 portal using the REX 300
router's Internet connection (CTM = Conguration Transfer Manager; see page 9).
This Internet transfer method will become the default conguration option as soon
as the REX 300 router has established a connection to the myREX24 portal. Once the
REX 300 router has established a connection to the myREX24 portal, the CTM can be
automatically used for all additional conguration changes.
3* Download to PC:
Save the conguration le and then use a USB stick to transfer it to the REX 300 unit
(see page 16).
Choose this option if the REX 300 router cannot be reached through the local net-
work (LAN) or through the Internet when it is rst being set up.