(6) Second adjuster nut (7) Joint
(i) Decrease free play (ii) Increase free play
(i)
(ii)
6
B
4 7
16
•
Check brake cable for kinks or signs of wear
that could cause sticking or failure.
Other checks:
•
Make sure the brake arm spring and
fasteners are in good condition.
If proper adjustment cannot be obtained by
this method, visit your Authorised
Distributor/Dealer.
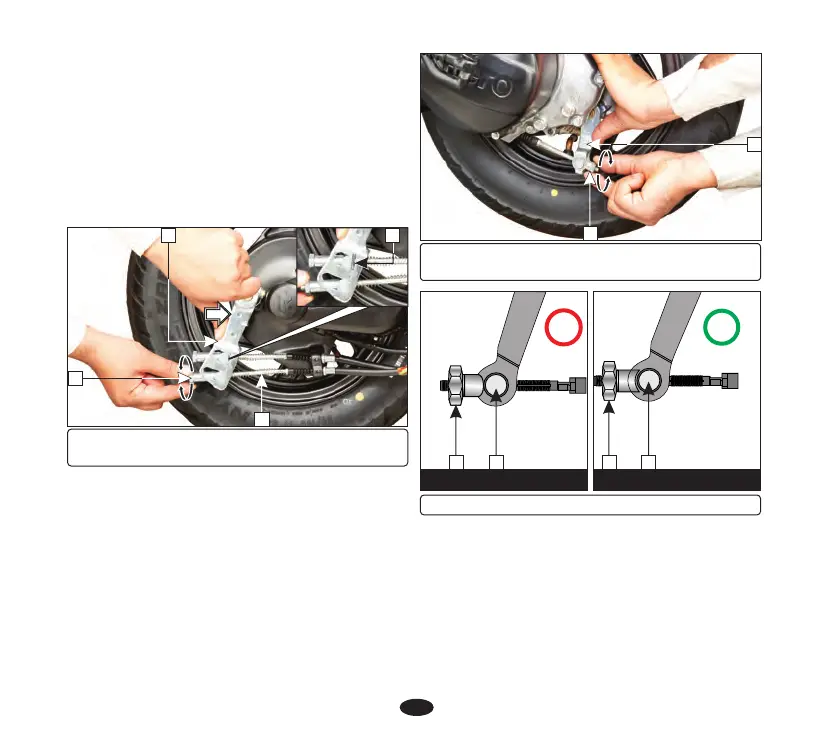
(3) Adjusting nut (4) Brake joint pin
Make sure the cut-out on the adjusting nut
(3) is seated on the brake joint pin (4) after
making final free play adjustment.
FREE PLAY: 10-20 mm
•
Make free play adjustment by turning the
adjuster nut (1) in the brake arm (2).
REAR BRAKE
•
Check the free play of integrated brake
lever.
•
If the free play is more than 20 mm further
turn the adjuster nut to obtain desired free
play.
(ii)
(i)
2
1
Left hand front brake cable (B) on “I” side
•
Turn the second adjuster nut (6) until a gap
is created between joint (7) and the slot on
the first side in integrated brake arm.
•
After ensuring the gap, turn the second
adjuster nut counterclockwise by half rotation.
•
Push the integrated brake arm (4) by hand
in the direction as shown.
Adjustment
(B) Cut-out seated
3
(A) Cut-out not seated
4
(1) Adjuster nut (2) Brake arm
(i) Decrease free play (ii) Increase free play
F
I
3
4