P3 DIMM W0
P3 DIMM W1
P3 DIMM V0
P3 DIMM V1
P3 DIMM U0
P3 DIMM U1
P2 DIMM T0 J11
J12
J9
J10
J7
J8
P2 DIMM T1
P2 DIMM S0
P2 DIMM S1
P2 DIMM R0
P2 DIMM R1
P2 DIMM N1 J2
J1
J4
J3
J6
J5
J23
J24
J21
J22
J19
J20
J14
J13
J16
J15
J18
J17
P2 DIMM N0
P2 DIMM P1
P2 DIMM P0
P2 DIMM Q1
P2 DIMM Q0
P0 DIMM F0
P0 DIMM F1
P0 DIMM E0
P0 DIMM E1
P0 DIMM D0
P0 DIMM D1
P0 DIMM A1
P0 DIMM A0
P0 DIMM B1
P0 DIMM B0
P0 DIMM C1
P0 DIMM C0
P3 DIMM X1
P3 DIMM X0
P3 DIMM Y1
P3 DIMM Y0
P3 DIMM Z1
P3 DIMM Z0
P1 DIMM J0
P1 DIMM J1
P1 DIMM H0
P1 DIMM H1
P1 DIMM G0
P1 DIMM G1
P1 DIMM K1
P1 DIMM K0
P1 DIMM L1
P1 DIMM L0
P1 DIMM M1
P1 DIMM M0
J29
J30
J55
J56
J51
J52
J36
J35
J42
J41
J48
J47
J27
J28
J53
J54
J49
J50
J34
J33
J40
J39
J46
J45
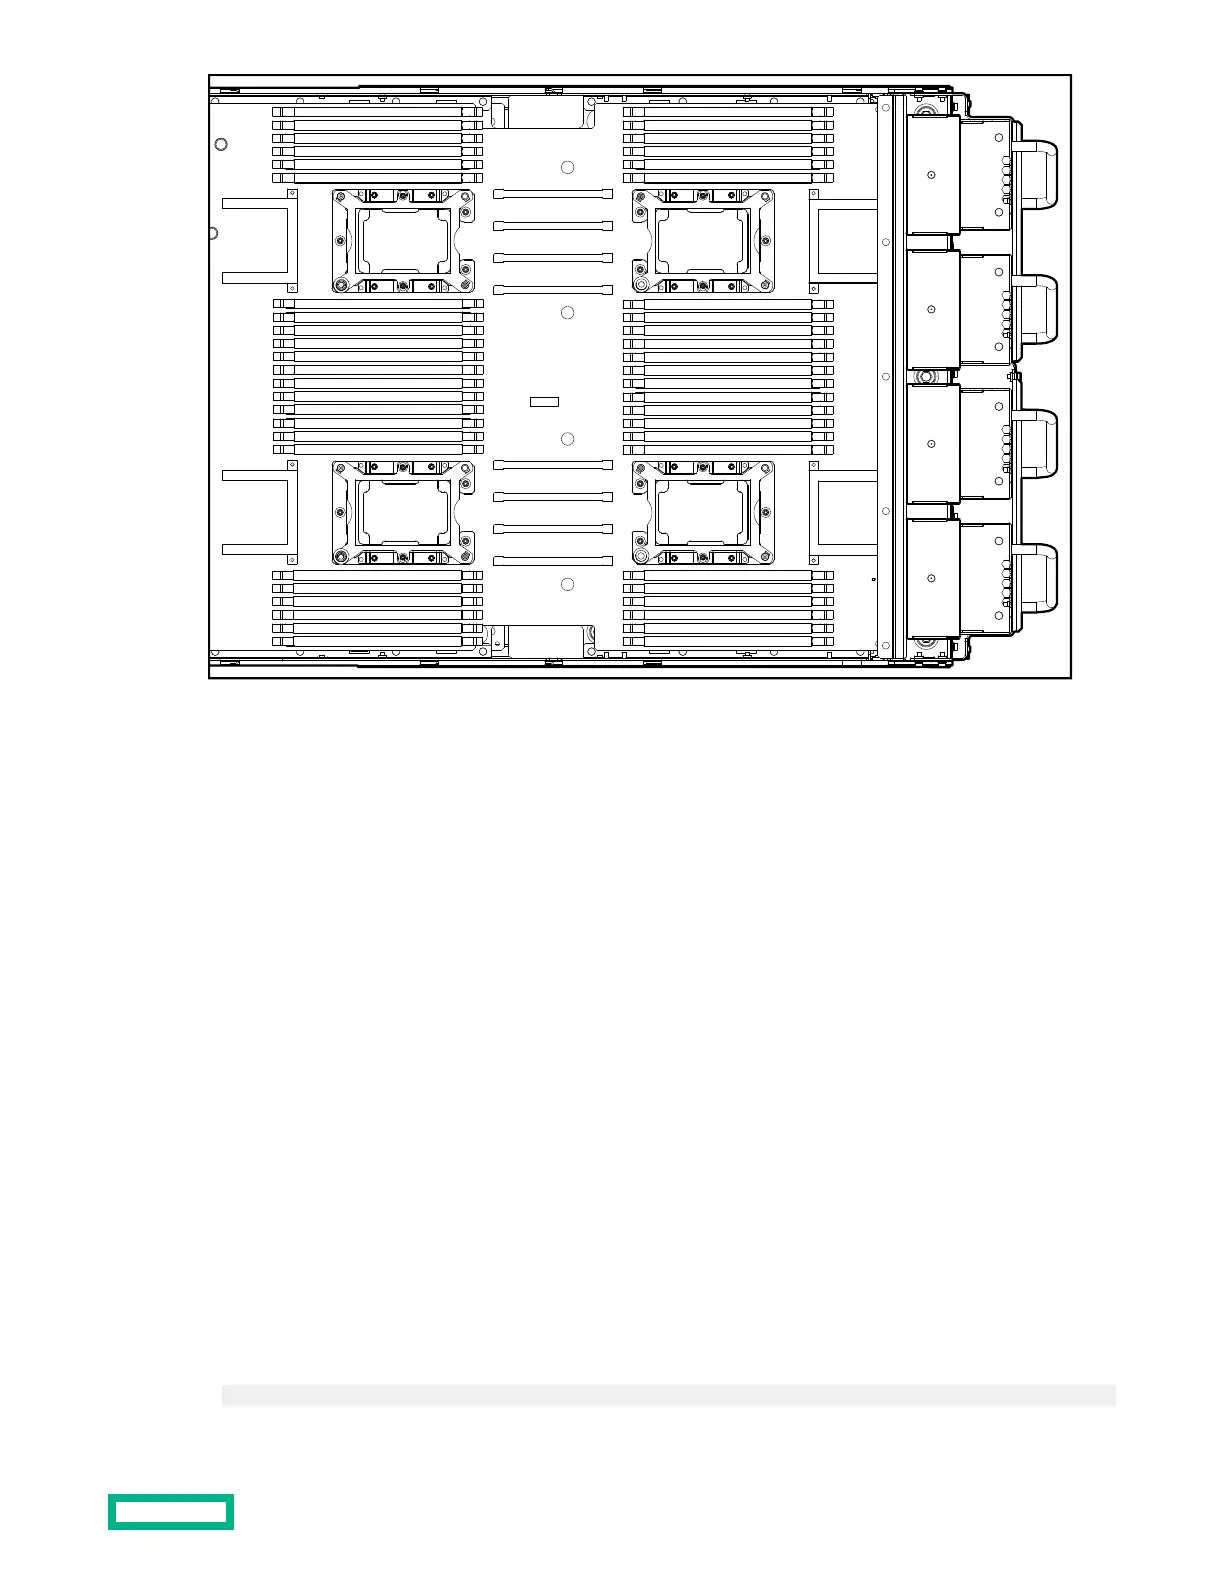
Figure 13: Memory DIMM locations
2.
If the DIMM is located under the front top cover, remove the front top cover and the front air bales.
If the DIMM is located under the rear top cover, remove the rear top cover and the rear air bales.
3.
Locate the DIMM, and press down on the DIMM latches.
4.
Remove the DIMM from the slot.
5.
Insert the replacement DIMM in the slot, and push it down until it snaps in place.
6.
Install the air bales.
7.
Install front or rear top cover.
After memory DIMM replacement
Procedure
1. Slide the chassis into the rack and reconnect the cables.
a. Connect the UPI cables to the front of the chassis.
b. Connect the I/O cables and power cords to the rear of the chassis.
2. Connect power to the system but do not power on the system.
3. To verify cabling, run test upi.
eRMC cli> test upi
Memory DIMM replacement
47


 To Next Page