Step3: click “default” button to resort default setting; click “apply” button to save the setting; click “exit”
button to exit current interface.
3.5.5 Alarm out
Alarm out includes three sub menus: alarm out, schedule and buzzer
① Alarm out
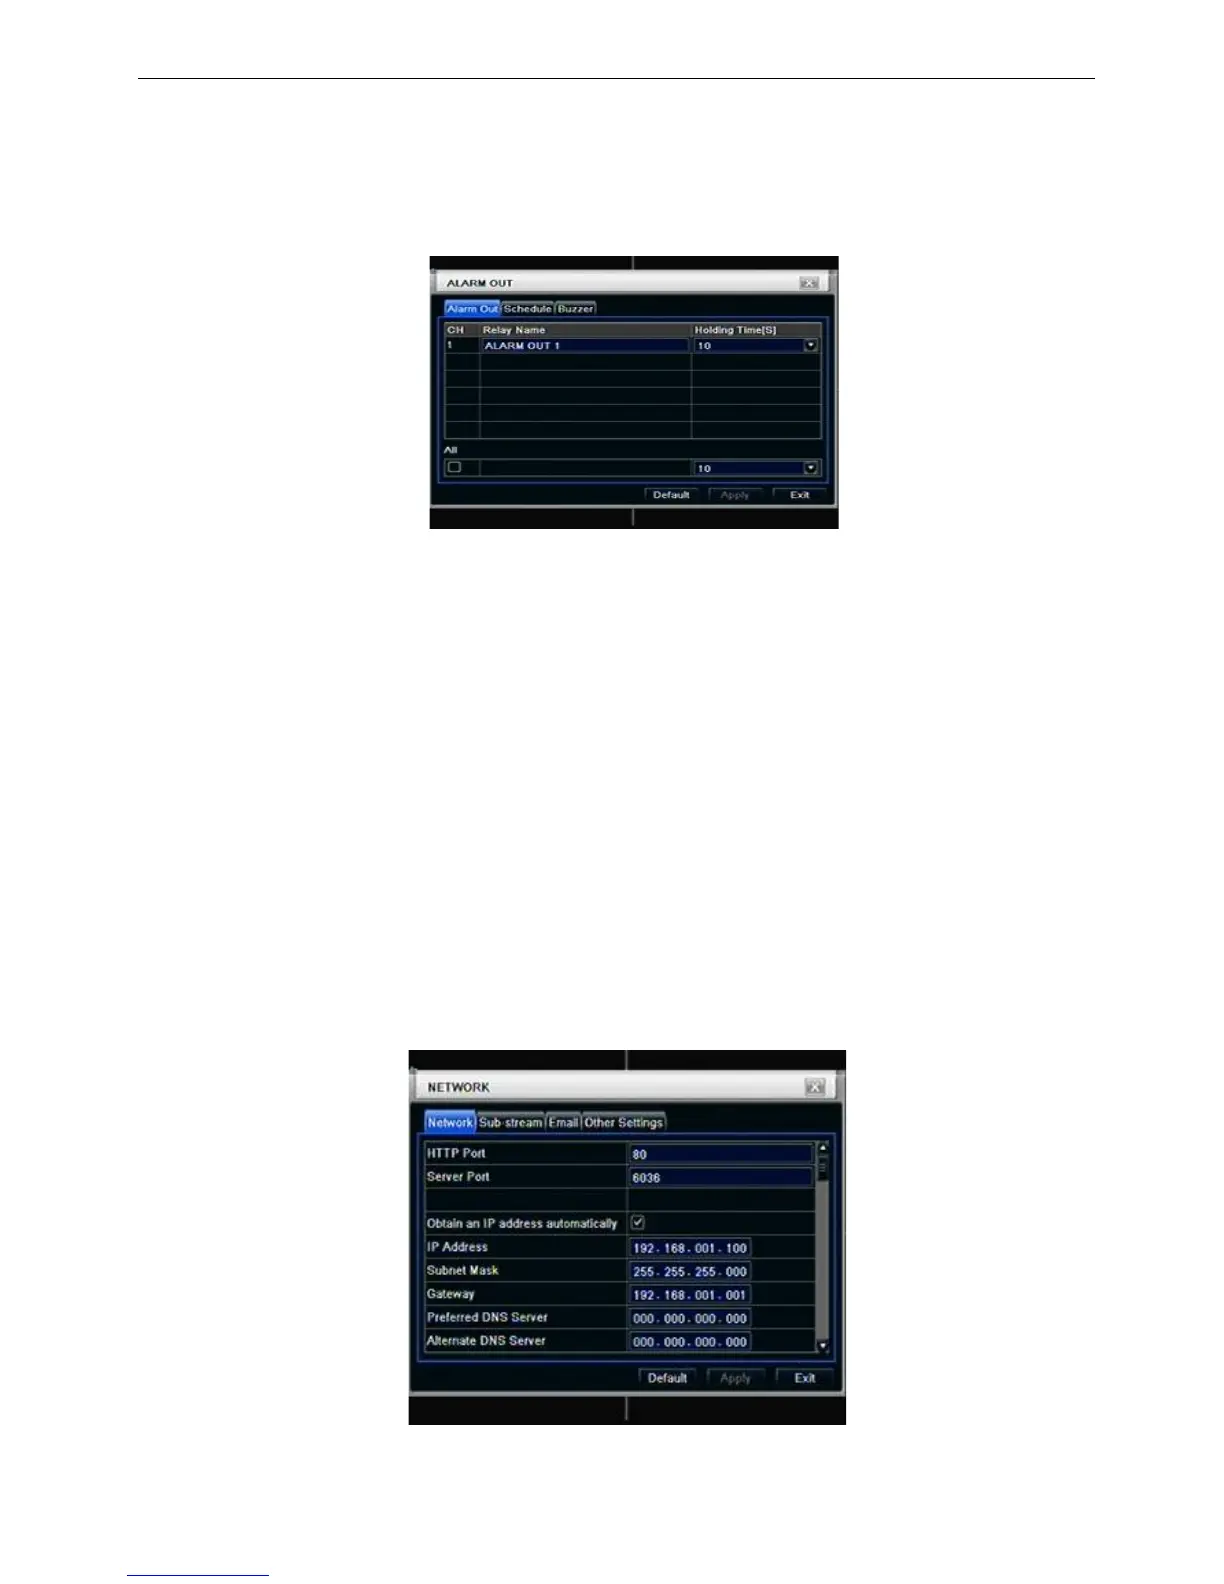
Step1: enter into system configurationalarm out; refer to Fig 4-27:
Fig 4-27 system configuration-alarm out
Step2: in this interface, set relay alarm out name, select hold time which means the interval time between
the two adjacent alarms.
Step3: user can setup all channels with same parameters, tick off “all”, then to do relevant setup.
Step4: click “default” button to resort default setting; click “apply” button to save the setting; click “exit”
button to exit current interface.
② Schedule
Step1: enter into system configurationschedule;
Step2: the setup steps of alarm out schedule are familiar with schedule; user can refer to 4.4.1 Schedule
for details.
Note: the default schedule of motion detection is full-selected, that is, the color of schedule setting
interface is blue.
③ Buzzer
Step1: enter into system configurationbuzzer; (if here sets is off, all event without buzzer)
Step2: tick off Buzzer, set buzzer alarm hold time
3.6 Network configuration
Network configuration includes two submenus: network and network stream.
3.6.1 Network
Step1: enter into system configurationnetwork configurationnetwork; refer to Fig4-28:
Fig 4-28 network configuration-network
Step2: HTTP port: the default value is 80. If the value changed, user needs to add the port number when
 Loading...