Step1: Input IP address, Subnet, Gateway gotten from your ISP. If using ADSL, please input user name and
password, and click OK. The DVR will connect the server and show “connection succeeds”.
Step2: The following steps are the same as STEP4-7 of the connection way above.
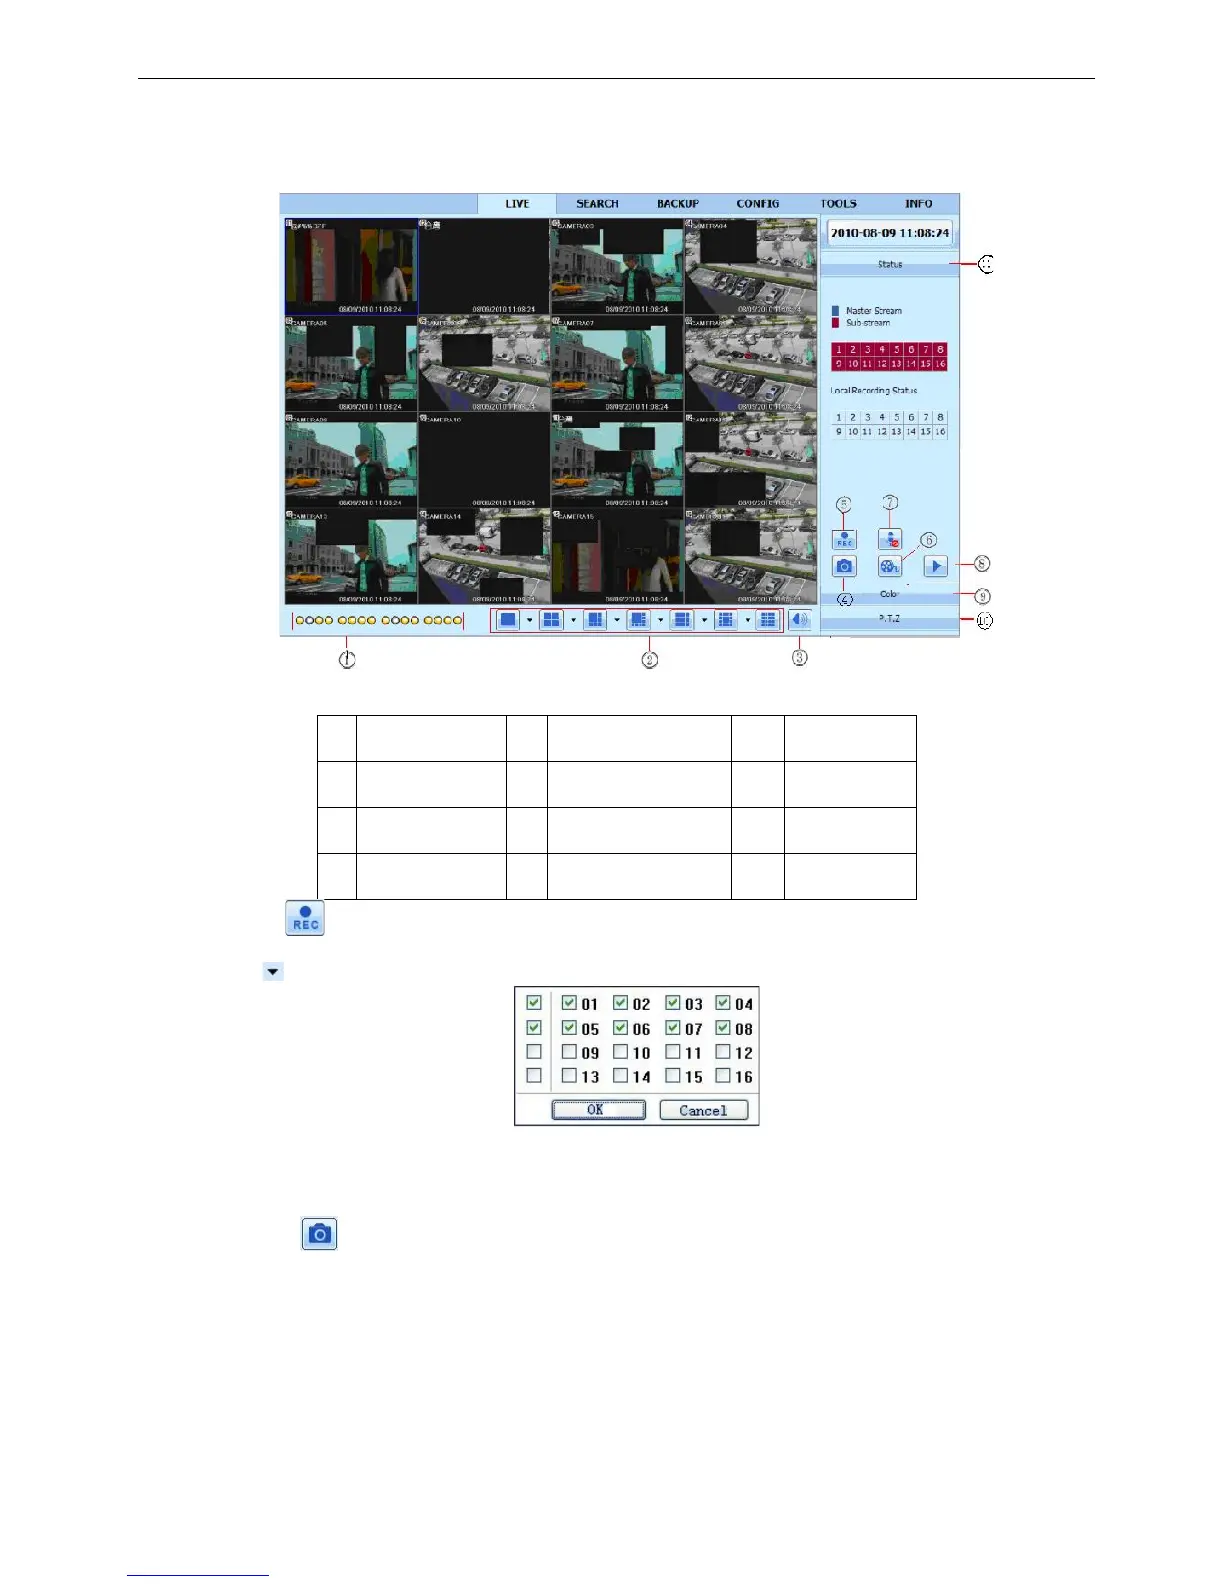
6.2 The remote live preview interface as below:
Fig 7-2 Remote live preview interface
Symbol and function Definitions:
Note: click button to record manual and the record file will be saved in user’s PC.
Screen display mode:
Click the icon beside the screen display mode, channel select dialog will appear as below:
Fig 7-3 Channel select dialog
Take 8-channel DVR for example: user can tick off channels form 1-ch to 16-ch at random to display the live
pictures, 8 channels can be selected at most. Then click OK button to confirm the setting.
Snap pictures
Click “Snap” icon, the system will automatically capture pictures and save those pictures in the
computer.
User should set up the save path for those picture in the Remote Preview interfaceConfigurationLocal
configuration.
Color adjustment:
Drag the slide bar to adjust Brightness, Contrast, Hue, and Saturation. Click Default to reset them to original
value.
 Loading...