BIOS Configuration Utility
3-5
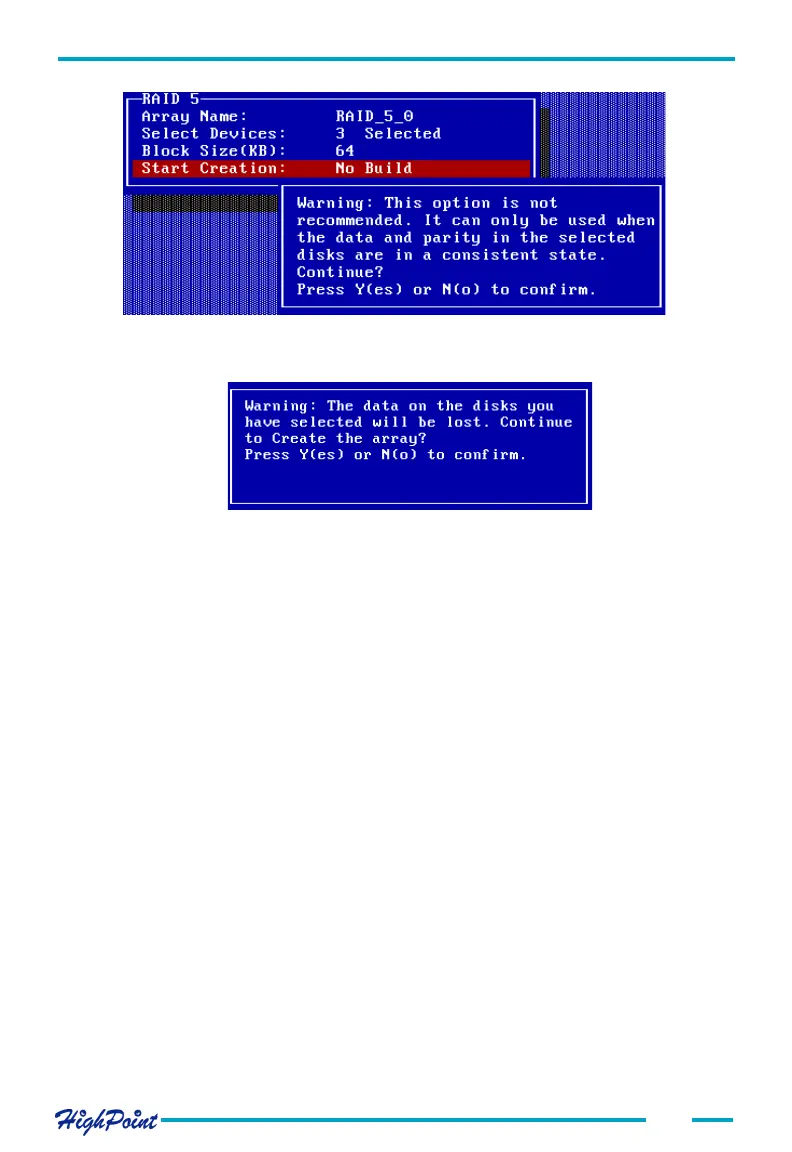
Select Y to create the array, and N to cancel.
Warning:
Please pay close attention when warning message are displayed during step 5. When
creating RAID 0, 5 and JBOD arrays, selecting Y will destroy all data on the selected
disks.
3.3 Deleting Disk Arrays
Follow these steps to delete a disk array:
1. Within the Menu column of the main interface, use the arrow key to highlight the
Delete option, and press ENTER. The Status column will be activated. See the
following page:
Please pay close attention to this warning. Press N to cancel, and press Y to continue.
If Y is selected, another warning message will be displayed. See the image below: