BIOS Configuration Utility
3-7
3.5 Settings
Follow these steps to set a disk or disk array:
1. Within the Menu column of the main interface, use the arrow key to highlight the
Select Settings option, and press ENTER. The following list will be displayed:
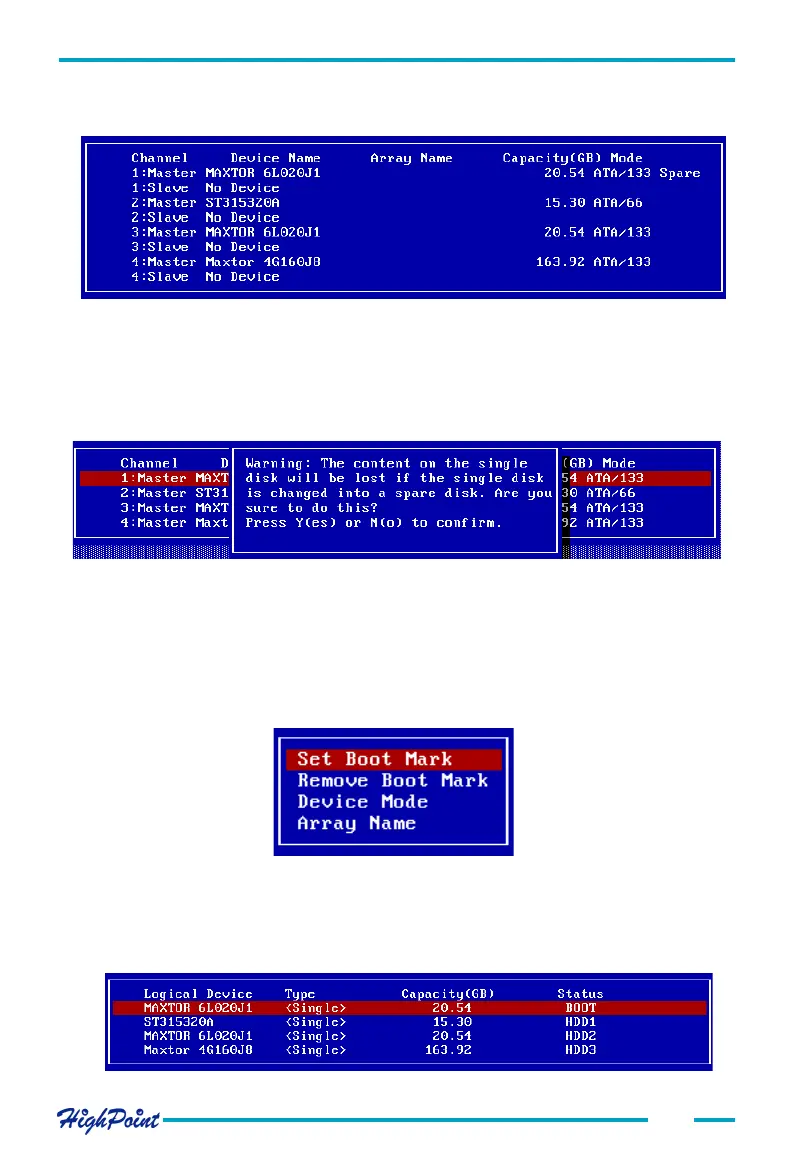
2. Use the arrow keys to select Set Boot Mark, and highlight the target disk or disk
array and press ENTER. This option will instruct this disk or array to act as the boot
unit, when motherboard has designated the RocketRAID 1640 to act as the boot
device.
Select Y to continue and N to cancel.
2. After a disk has been added to the spare pool, it's status will be marked as Spare.
See the image below:
3.Repeat step 1 to add to or remove any additional disks from the spare pool.
Warning:
Adding a disk to the spare pool will delete all data on that disk.
See the image below: