BIOS Configuration Utility
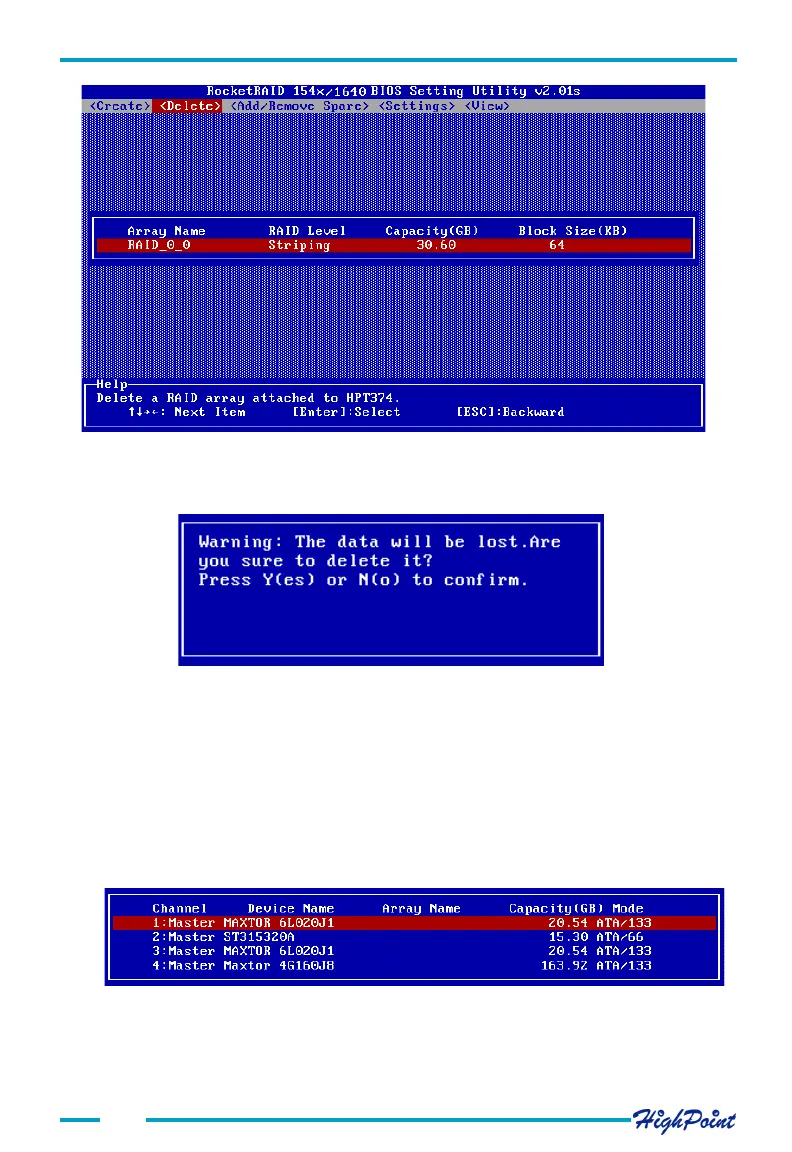
Pay close attention to this warning. Press Y to delete the selected array, or press N to
cancel.
3-6
3.4 Add/Remove Spare
Follow these steps to add spare or delete spare from spare pool:
1. Within the Menu column of the main interface, use the arrow key to highlight the
Add/Remove Spare option, and press ENTER. The Status column will be activated.
See the image below:
Highlight the target disk array, and press ENTER to delete it.
2. A warning message will then appear. See the image below
Use the arrow keys to highlight the target disk, and press ENTER to add it to the spare
pool. To remove a disk from the spare pool, highlight it and press ENTER.