8 S E T U P H I K - C O N N E C T P 2 P C L O U D S E R V I C E
NOTE: Ports 9010 and 9020 must not be blocked for the Hik-Connect Cloud service to work.
Use the Hik-Connect mobile app (from iOS App Store or Google Play) to create a Hik-Connect P2P Cloud
account to connect Hikvision devices over the Internet. You must create a Hik-Connect account so you can
associate your devices with your account. Please download ‘How To’ documentation about setting up your
Hik-Connect account from http://tech.hikvisionusa.com/. Remote access to the DVR from more than one
account can be enabled by setting up the sharing function which does require ports to be forwarded and
additional setup on the Hik-Connect app.
1. Enable Hik-Connect P2P on the DVR.
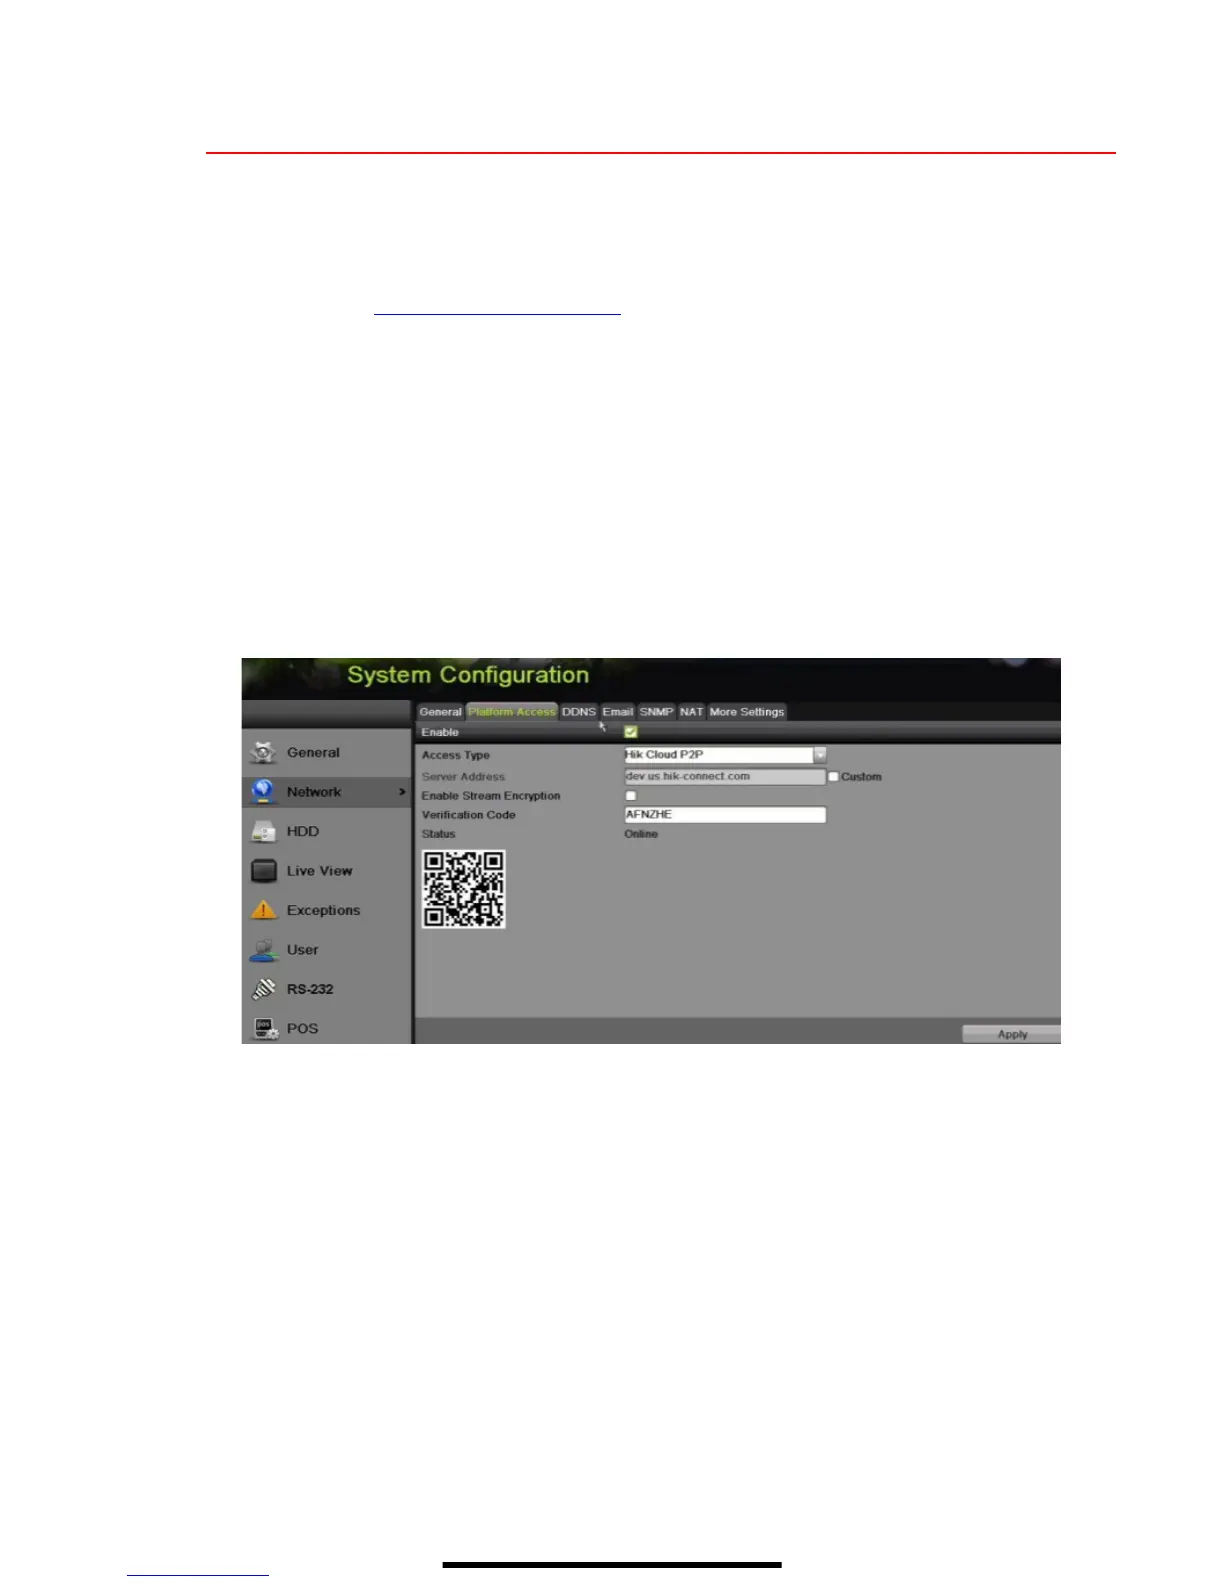
1) Go to Main Menu > System Configuration > Network > Platform Access.
2) Check the Enable checkbox.
3) Server Address must be “dev.hik-connect.com.” If not, check the Custom checkbox, and type
“dev.hik-connect.com.”
4) Click the Apply button. Status will change to “Online” (if all settings are correct).
5) Note the Serial Number and Verification Code shown here (for use when registering the DVR in
your Hik-Connect account) or use the QR code displayed.
2. To see a device’s video stream on the Hik-Connect or iVMS-4500 mobile app, add the device.
1) Login to Hik-Connect mobile app with your user name, e-mail, or mobile number and password.
2) On the Home screen, click the “+” button (upper right corner).
3) Enter the device’s information.
If you have the device’s QR Code: Use the QR Code Scanner to scan the device’s QR Code
If you do not have the device’s QR Code: Enter the device information manually:
a. Click the Edit (pencil) icon on top right corner.
b. Enter device serial number (device must be online), then click the OK button.
c. When the device appears on the “Results” screen, click the Add button.
d. Enter device’s 6-character Verification Code (all upper case), then click the OK button.
e. Click the Finish button.
 Loading...