defined. Press [A] key to clear all motion areas.
Setup multi areas: After you setup one motion area, press [EDIT] key, the
yellow pane will appear again, and then you can setup another motion area.
Clear part of motion area: Move the yellow pane to the start clear position of
motion area, press [EDIT], you will find the yellow pane is turned into black pane.
You can use [↓] [→] key to enlarge or shrink the blue area. Press [EDIT] key to clear
this part motion area.
Press [Enter] key to save and return “Image” menu. Press [ESC] to cancel.
Clear all motion areas: Press [A] key to clear all motion areas of this channel.
The keys used to setup motion areas are following:
[↑][↓][←][→]: Move yellow panel to any position;
[EDIT]:Yellow panel and red panel switch key:;
[→]: Right enlarge red pane;
[←]: Left shrink red pane;
[↓]: Down enlarge red pane;
[↑]: Up shrink red pane;
[PTZ]: Set whole screen as motion area;
[A]: Clear all motion areas;
[ENTER]: Save and return “Image Setup” menu;
[ESC]: Cancel setup and return “Image Setup” menu;
Step 5: Motion alarm policy: Move “Active Frame” to the corresponding
“Policy” button of motion detection alarm, press [ENTER] key to enter “Motion
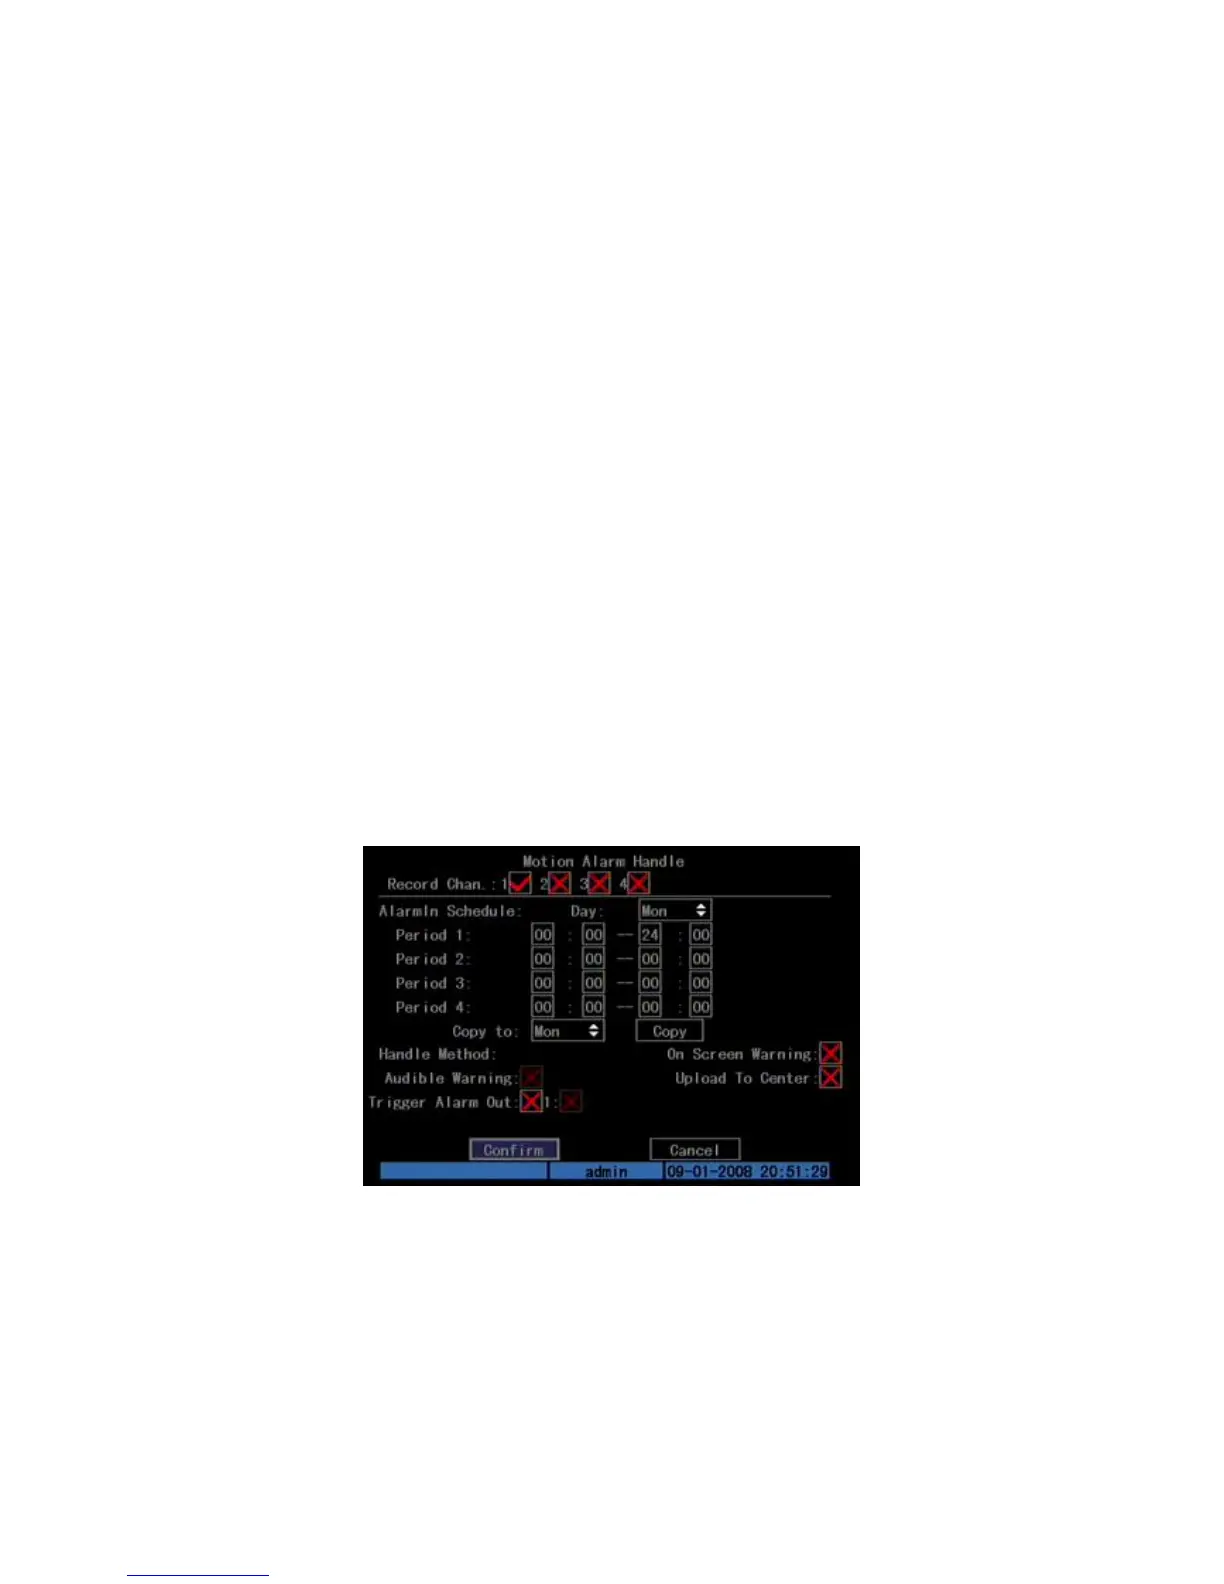
Alarm Handle” menu: Shown as Fig.5.19 below
Fig. 5.19 Motion alarm handle setup
Step 6: Motion alarm record channel setup: When there is motion alarm
happened, you can trigger related camera to start to record. In “Motion Alarm
Handle” menu, you can select one or more record channels. Please use [ENTER] or
[EDIT] key to enable the flag into “”.
Note: In order to make the cameras start recording, in “Recording” menu,
you must enable recording schedule and set “Rec Type” as “Motion Detection”
 Loading...