5.7 Mask Area Setup
In some cases, maybe you want to mask the sensitive area. This area will not
be previewed and recorded. The mask area setup steps are following:
Step 1: Enter “Camera” menu:
Step 2: Select one camera: You can use [] [] keys to select one camera.
Step 3: Enter “Advanced settings” enable the check box beside “Privacy Mask”
item, you can press [Enter] or [edit] key to change the flag into “”, and active
“Area” button. Move “Active Frame” to “Area” button on the right side of mask
check box, press[ENTER]key to enter mask area setup interface. Shown as Fig.5.14
below
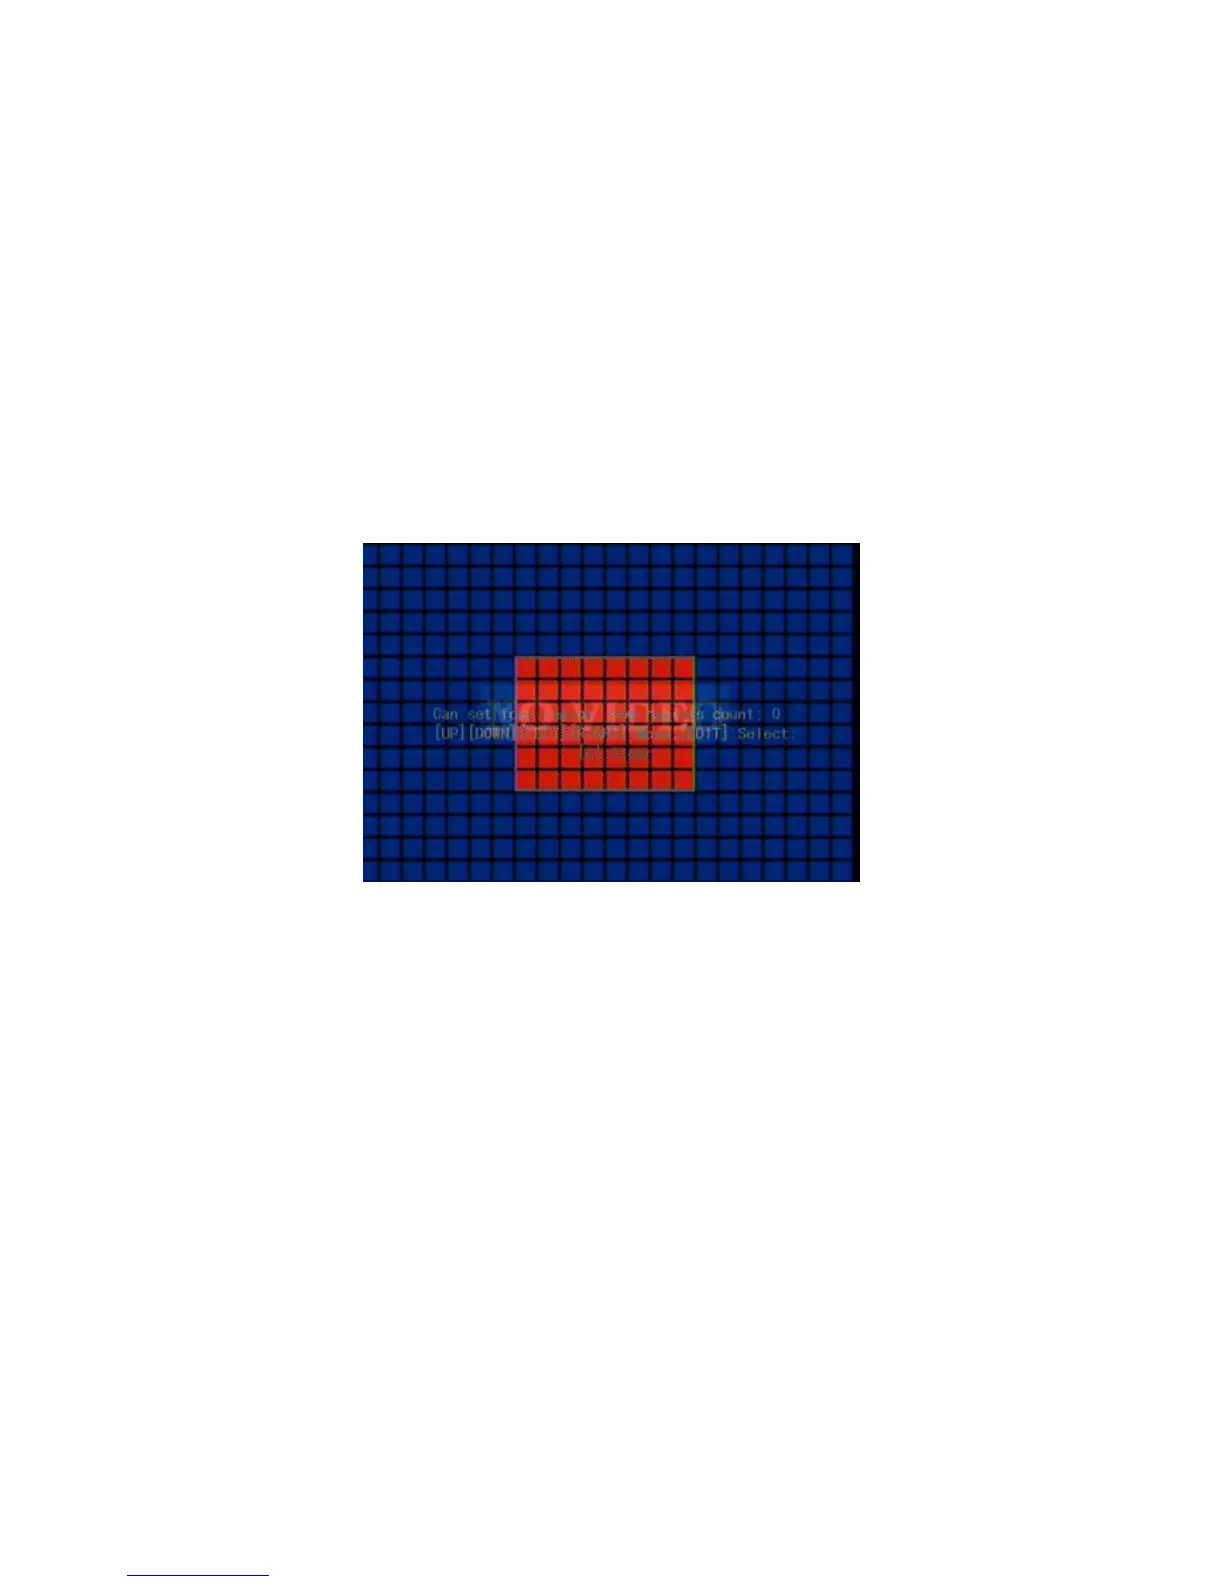
Fig. 5.14 Mask area setup
Step 4: Setup mask area: In the mask area setup interface, there is one small
yellow pane on the upper left side. For PAL camera, the whole screen is divided into
22*18 panes (22*15 for NTSC), you can use[↑][↓][→][←]keys to move the yellow
pane to your hope position and press[EDIT]key, the yellow pane will be turned into
red, then you can use[↑][↓][→]keys to extend the red pane and [←]key to shrink the
red pane. This red area is the mask area.
After the red mask area selected, press [EDIT] key to save the mask area. The
maximum mask area size is 8*8 panes and the minimum size is only one pane. You
can setup 4 mask areas at most.
After you finish setup, press [ENTER] key to return “Advanced settings” menu.
You can press [A] key to clear all mask areas.
Step 5: Save mask area: You can repeat step2, step3 and step4 to setup mask area
for other cameras. In “Advanced setting” menu, press “Confirm” button to save the
mask area, press “Cancel” button to abort.
 Loading...