“Utilities” menu. So the actual alarm output time is made up of alarm input time and
this delay time.
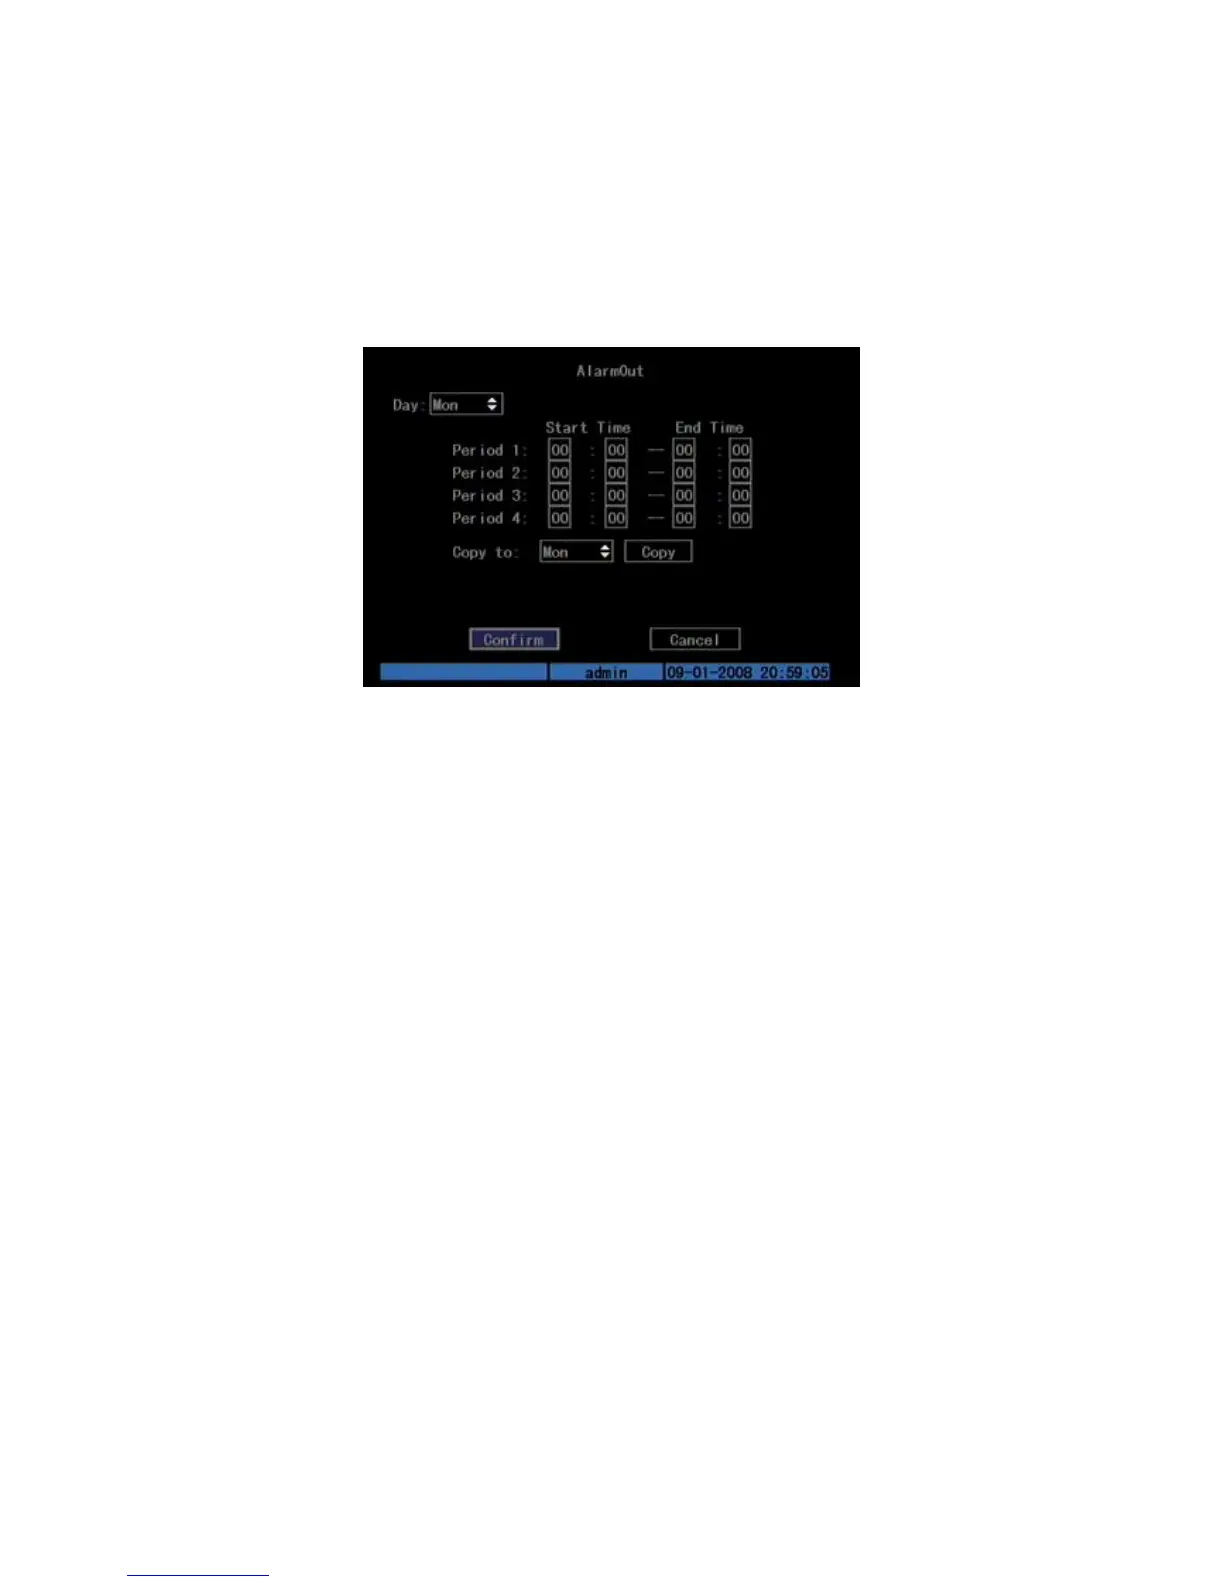
Step 3: Enter alarm out schedule
You can set the schedule to enable alarm output. Move “Active Frame” to
“Schedule” button on right side of “Alarm Out Time” item, press[ENTER]key to
enter the corresponding schedule menu: Shown as Fig.5.26 below
Fig. 5.26 Alarm out schedule
Step 4: Setup alarm out schedule
Like other schedule setup, you can set 4 time periods for one day and 7 days for
one week. When you finish setup, press “Confirm” button to return “Alarms” menu.
Step 5: Copy one alarm output parameters to other alarm output
In “Alarms” menu, you can copy parameters of current alarm output to other
alarm output.
Step 6: Save setup
When you finish setup, in “Alarms” menu, press “Confirm” button to save all
parameters.
Note: If any schedule is modified, you must reboot DVR to make it become
effective.
Exceptions
The exceptions can be handled at present include: hard disk full, hard disk error,
illegal access, IP address conflict, network failure, and NTSC/PAL differ.
Enter “Exceptions” menu: Shown as Fig.5.27 below
 Loading...