using direction keys (【↑】【↓】). When the “Active Frame” is located on one icon, you can press
【ENTER】key to enter into the sub menu. For example, move the “Active Frame” to “Image”
icon, press 【ENTER】to enter into the sub menu as following fig 3.4:
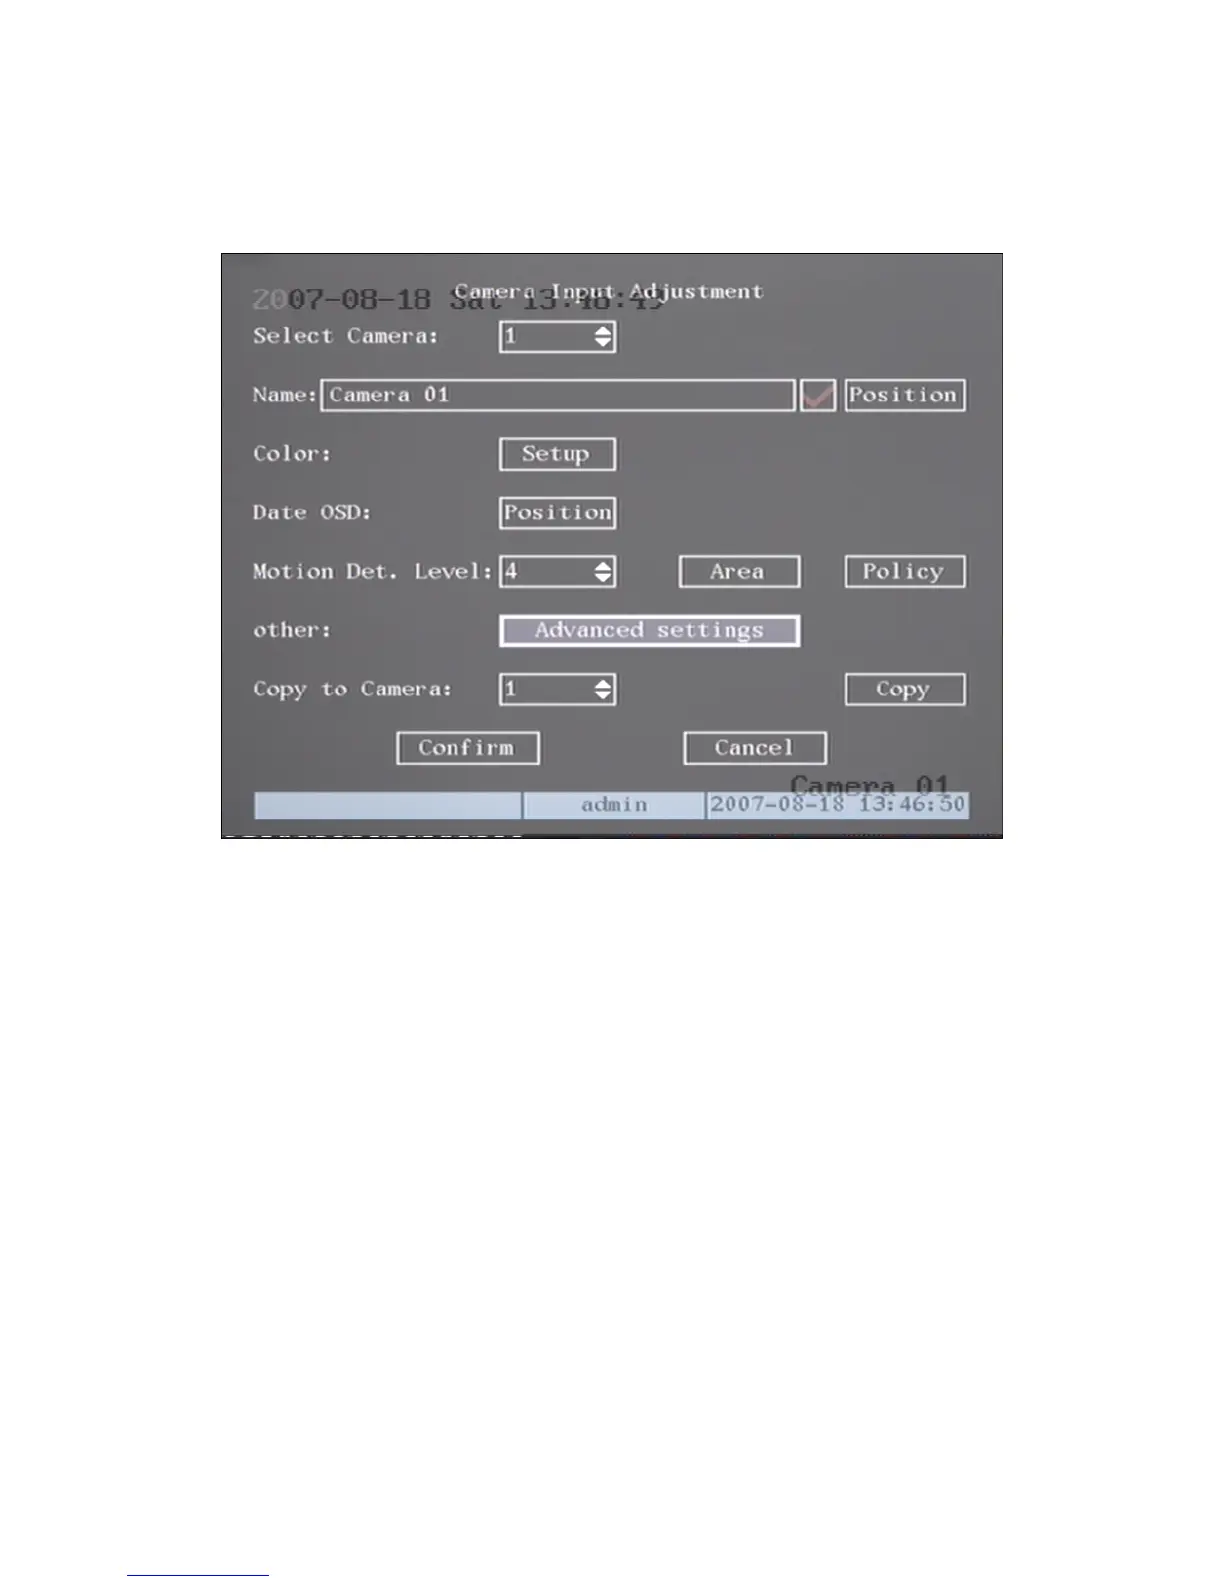
Fig 3.4 Camera input adjustment
Each menu contains different kinds of items. There is a small rectangular frame
name
: Provides two options, “9” means enable and “×” means
2. m can be
3. put characters. Press【EDIT】key to enter into
, upper case, lower case or symbols;
front of cursor;
aving.
4. mple,
d “Active Frame” which is pointing to the selected item. This “Active Frame”
can be moved by direction keys (【↑】【↓】【←】【→】). There are several kinds of menu
items as following:
1. Check Box
disable. You can use 【ENTER】or【EDIT】key to switch over.
List Box: Provide more than 2 options. However, only one of the
selected. After pressing 【EDIT】 you can use【↑】and【↓】to select one
option. For example, on the right side of “Select Camera”, there is a list box
for you to select one camera.
Edit Box: This is for you to in
edit status, you can input text here:
a) Press【A】key to select number
b) Use【→】and【←】keys to move cursor;
c) Use【EDIT】key to delete the character in
d) Press【ENTER】to save & exit or【ESC】to exit without s
Button: Trigger a special function or enter into next sub-menu. For exa
14
 Loading...