Figure 2-17 Incoming Call Linkage
2.
Enable and select triggers.
When the calling incoming, the alarm you linked will be triggered.
Relay
Click Relay. Select a relay and click " " and set the relay name and output delay
me. Click Save to save the sengs.
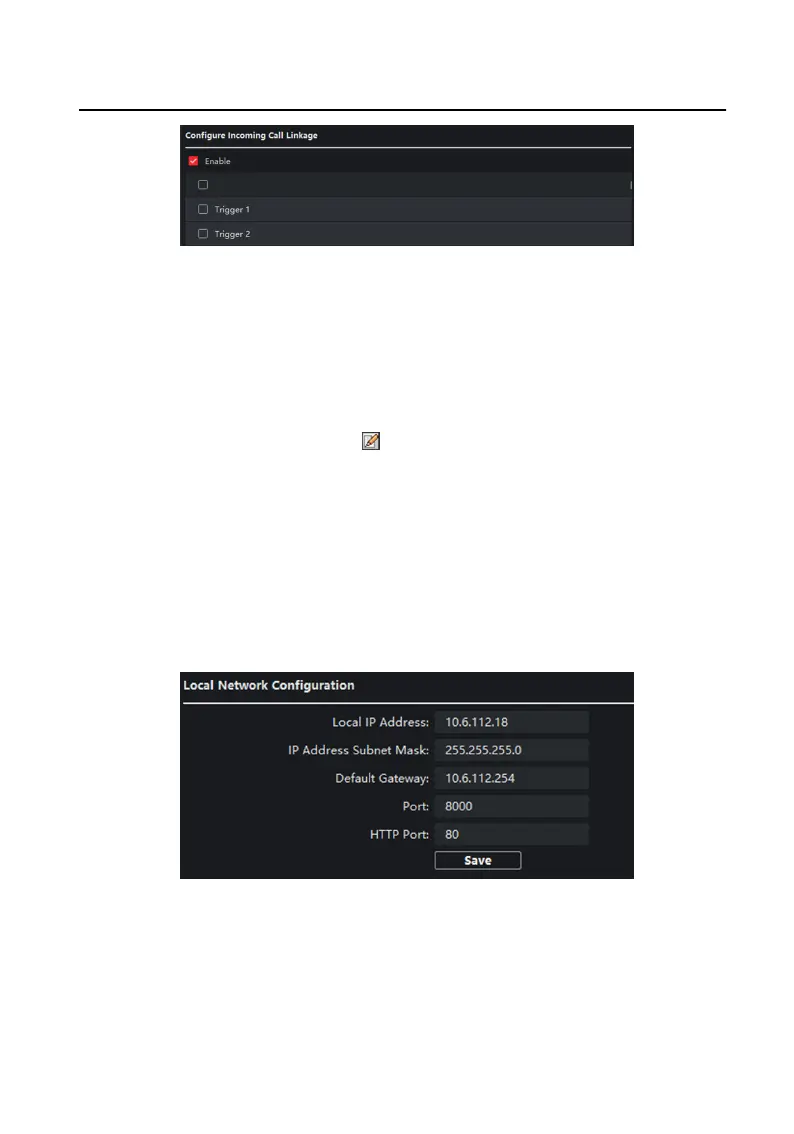
2.4.3 Network
Local Network Conguraon
Steps
1.
Click Local Network
Conguraon to enter local network conguraon page.
Figure 2-18 Local Network Conguraon
2.
Enter the local IP address, subnet mask, gateway address, and port No.
3.
Click Save to enable the sengs.
Network Indoor
Staon Conguraon Guide
32
 Loading...