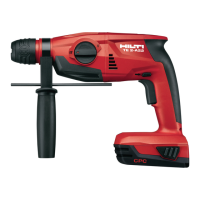
5
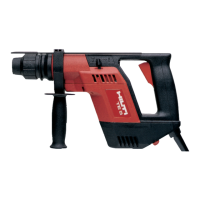
Assembly
It is essential that the safety precautions print-
ed in these operating instructions are read and observed.
The supply voltage must correspond to the infor-
mation on the type plate.
If extension cords are used: Only extension cords
of a type approved for the intended use and of adequate
cross section may be used. Failure to observe this point
may result in reduced performance of the tool and over-
heating of the cord. Damaged extension cords must be
replaced.
Conductor cross-section
mm
2
AWG
Voltage 1.5 2.0 2.5 3.5 14 12
110–120 V 20 m 30 m 40 m 50 m 75 ft 125 ft
Do not use 1.25 mm
2
and 16 AWG extension cords.
Use only insert tools with TE-C connection end.
Don’t exert excessive pressure on the tool. This will not
increase its hammering power.
At low temperatures: The tool requires to reach a mini-
mum operating temperature before the hammering
mechanism begins to operate. Switch on the tool and
position the tip of the drill bit on the work surface. While
the tool is running, apply light pressure briefly and repeat-
edly until the hammering mechanism begins to oper-
ate.
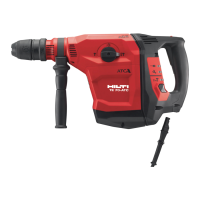
Operation
Inserting the insert tool
a) Unplug the supply cord from the electrical sock-
et to prevent unintentional starting.
b) Check that the connection end of the insert tool is
clean and lightly greased. Clean it and grease it if nec-
essary . Check that the sealing lip of the dust shield
is clean. Wipe it off if necessary. Take care to ensure
that no drilling dust finds its way into the interior of
the chuck. The dust shield must be replaced when
the sealing lip is damaged. Please refer to the section
on care and maintenance.
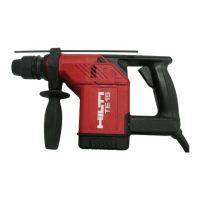
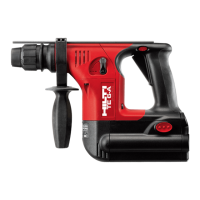
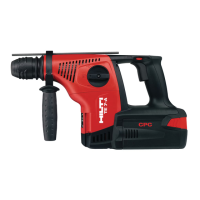
The tool is designed for the following uses:
Use Required insert tools Diameter range
TE2 / TE2-S / TE2-M:
Hammer drilling in concrete, Drill bits with TE-C connection end Drilling in concrete:
masonry and natural stone – Short hammer drillbits Anchor holes of 4–20 mm (
3
/
16
″–
3
/
4
″) dia.
– Long hamer drill bits Through holes of 4–20 mm (
3
/
16
″–
3
/
4
″) dia.
TE2-S / TE2-M:
Drilling with precision Drill bits with TE-C connection end Drilling in brittle materials:
hammering action in perforated – TE-CX hammer drill bits Anchor holes of 4–20 mm (
3
/
16
″–
3
/
4
″) dia.
brick, tiles and marble – Thin-barrel core bits Cutting sockels of 25–68 mm (1″–2
5
/
8
″) dia.
TE2 / TE2-S:
Drilling in wood, drywall panels Quick-release chuck
and metal with TE-C adaptor
for insert tools
with cylindrical shank or hexagonal shank
for rotary-only drilling
Wood drill bits 4–20 mm (
3
/
16
″–
3
/
4
″) dia.
Metal drill bits 3–13 mm (
3
/
16
″–
1
/
2
″) dia.
Hole saws 25–68 mm (1″–2
5
/
8
″) dia.
TE2-M:
Drilling in wood, drywall panels, Interchangeable quick-release chuck
tiles and metal for insert tools
with cylindrical shank or hexagonal
shank for rotary-only drilling:
Wood drill bits 4–10 mm (
3
/
16
″–
3
/
8
″) dia. in 2nd gear
10–20 mm (
3
/
8
″–
3
/
4
″) dia. in 1st gear
Metal/stepped drill bits 3– 8 mm (
3
/
16
″–
5
/
16
″) dia. in 2nd gear
8–13 mm (
5
/
16
″–
1
/
2
″) dia. in 1st gear
Thin-barrel core bits 25–68 mm (1″–2
5
/
8
″) dia. in 2nd gear
Hole saws 25–68 mm (1″–2
5
/
8
″) dia. in 2nd gear

 Loading...