17
● Do not clean the enclosure and cuff with strong alkali or acid or strong disinfectant.
● May use a mild detergent to clean the cuff, belt and bladder; alternatively, may also
wash them in a washing machine. Remove the bladder from the cuff before machine
washing. Wash them by using warm water and a mild detergent, then hang it for drying.
Any problem, please contact local distributors or Hingmed (see Chapter 8 for
information).
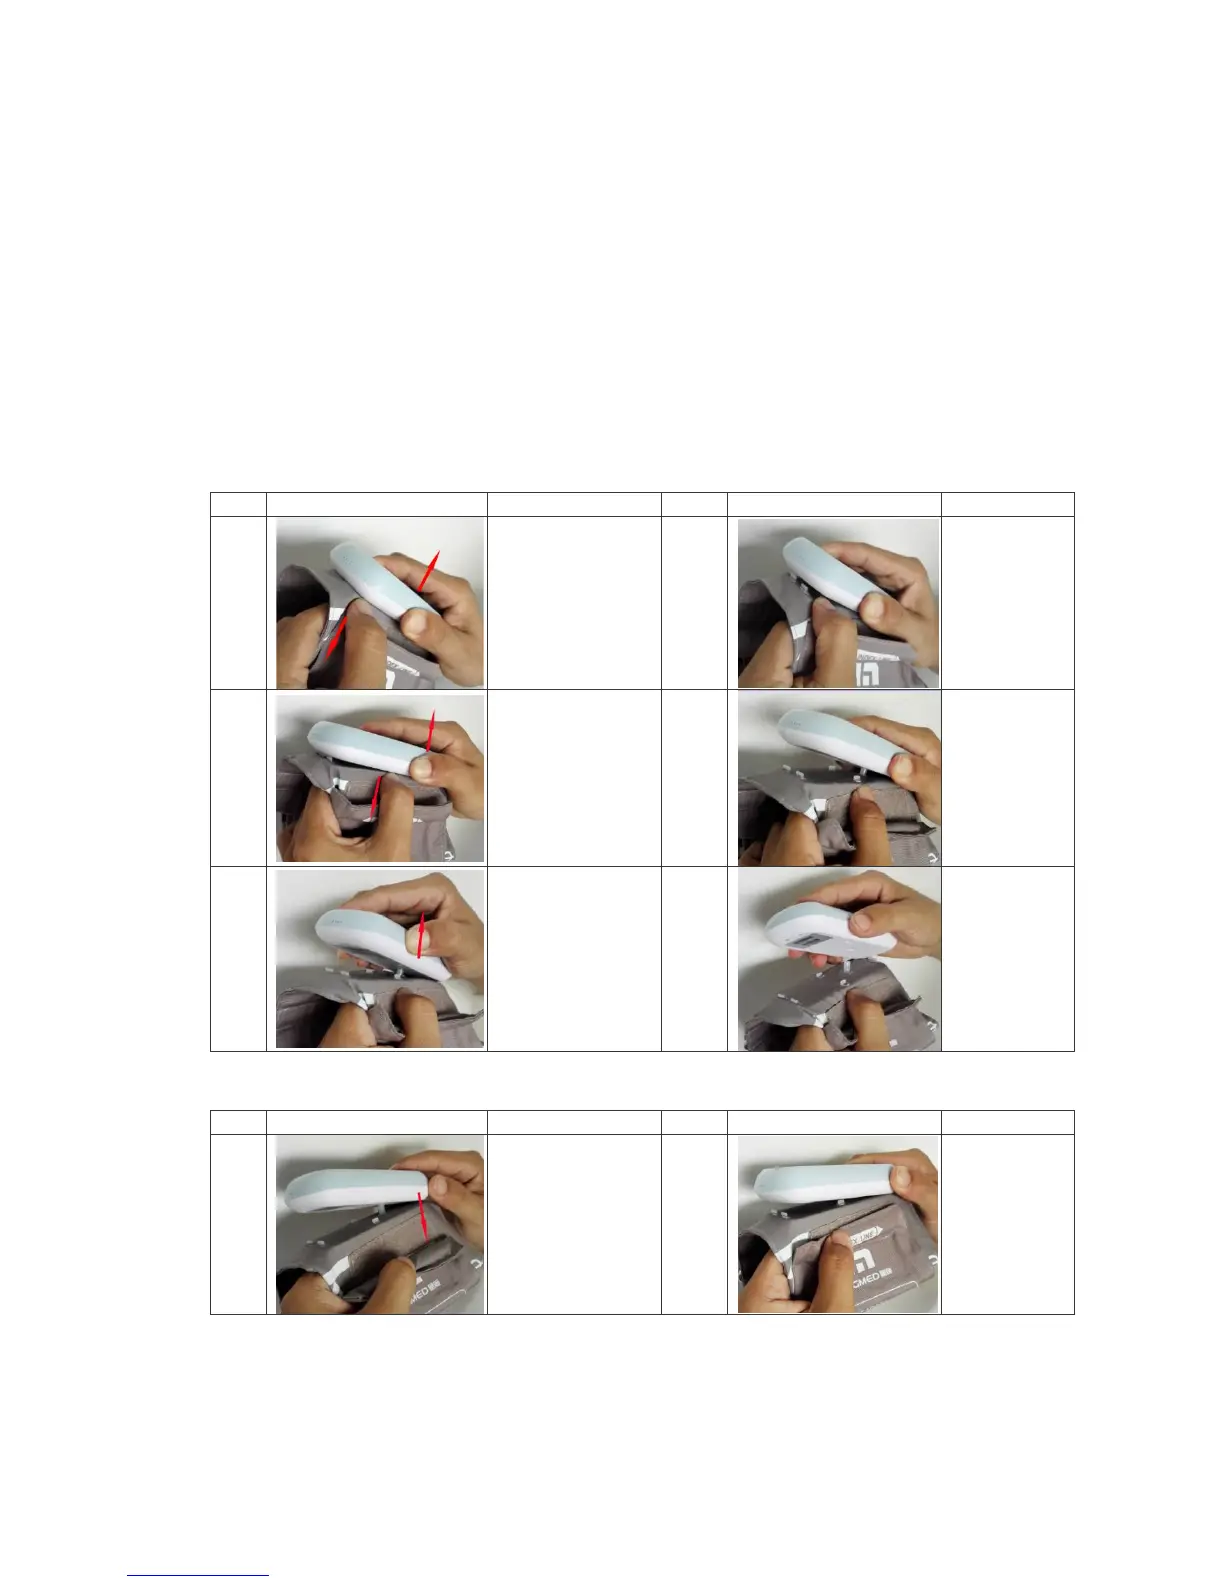
● Take down the monitor from the cuff, use a mild detergent to clean the cuff and bladder,
remove the bladder (with fixing board on it) from the cuff before washing, then hang them
for drying. After drying, put the bladder into the cuff, then install the monitor onto the cuff.
See the following steps to take down the cuff:
a) Dismantle
NO.