Measure the commercial power supply
8
The following explains the method of recording voltage waveform for a commer-
cial power supply of AC 100 V (50/60 Hz).
The method of saving the data after measuring will also be explained.
Here the level trigger is used to measure.
To measure repetitive waveforms such as commercial power supply, setting the
measurement start point as the standard level trigger level will make it easier to
observe the waveforms.
Measure the commercial power supply
1 Prepare for measurement
Required items:
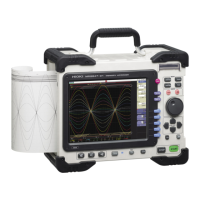
8847
8966 Analog Unit
L9198 Connection Cord
CF Card
"Measurement Prepara-
tions"( p.4)
Insert the CF card.
Connect to CH1.
Connect to the
measuring point.
Connect to the socket.
2 Set the measurement conditions and trigger conditions
Move
the cursor
Displays the Waveform
screen.
Displays the Trigger
settings window
([Analog Trig] sheet)
Displays the Channel
settings window
([Analog] sheet)
Carry out the following setting on the Waveform screen.
Deciding on the horizontal axis (time axis)
range
The horizontal axis (time axis) range is calculated
from the frequency and cycle.
f [Hz] =1/t [s] (f: frequency, t: cycle)
Example: When the measurement frequency is 50 Hz.
E.g. 1 cycle is t= 1/50 [s], i.e. 20 ms.
When the horizontal axis (time axis) is set to 20 ms/
div, exactly 1 cycle will be displayed in 1 division (1
square).
Vertical axis (Voltage axis) range
If you change the range during a measurement, the
measurement will restart.
Set the measurement conditions. (Channel settings window)
Setting for trigger conditions (Trigger settings window)
Select setting
items
Vertical axis (Voltage axis) range
Set the value for 1 div of vertical axis
Trigger type
Set to [Level].
Slope
Set to [↑].
Timebase
Set time for 1 div of horizontal axis.
3
1
2
 Loading...