-8-
MN1-5821 Rev. 4
3-2. Preparation for the biopsy attachment
3-2-1. Inspection for the biopsy Attachment
Visually inspect the biopsy attachment for any break, deformation, crack or denaturalization. If you nd any
damage, do not use them and contact our ofce written on the back cover.
3-2-2. Conrmation of the needle echo
Conduct the following procedure to conrm the needle echo before puncture. This conrmation should be done
before the sterilization of the probe and biopsy attachment.
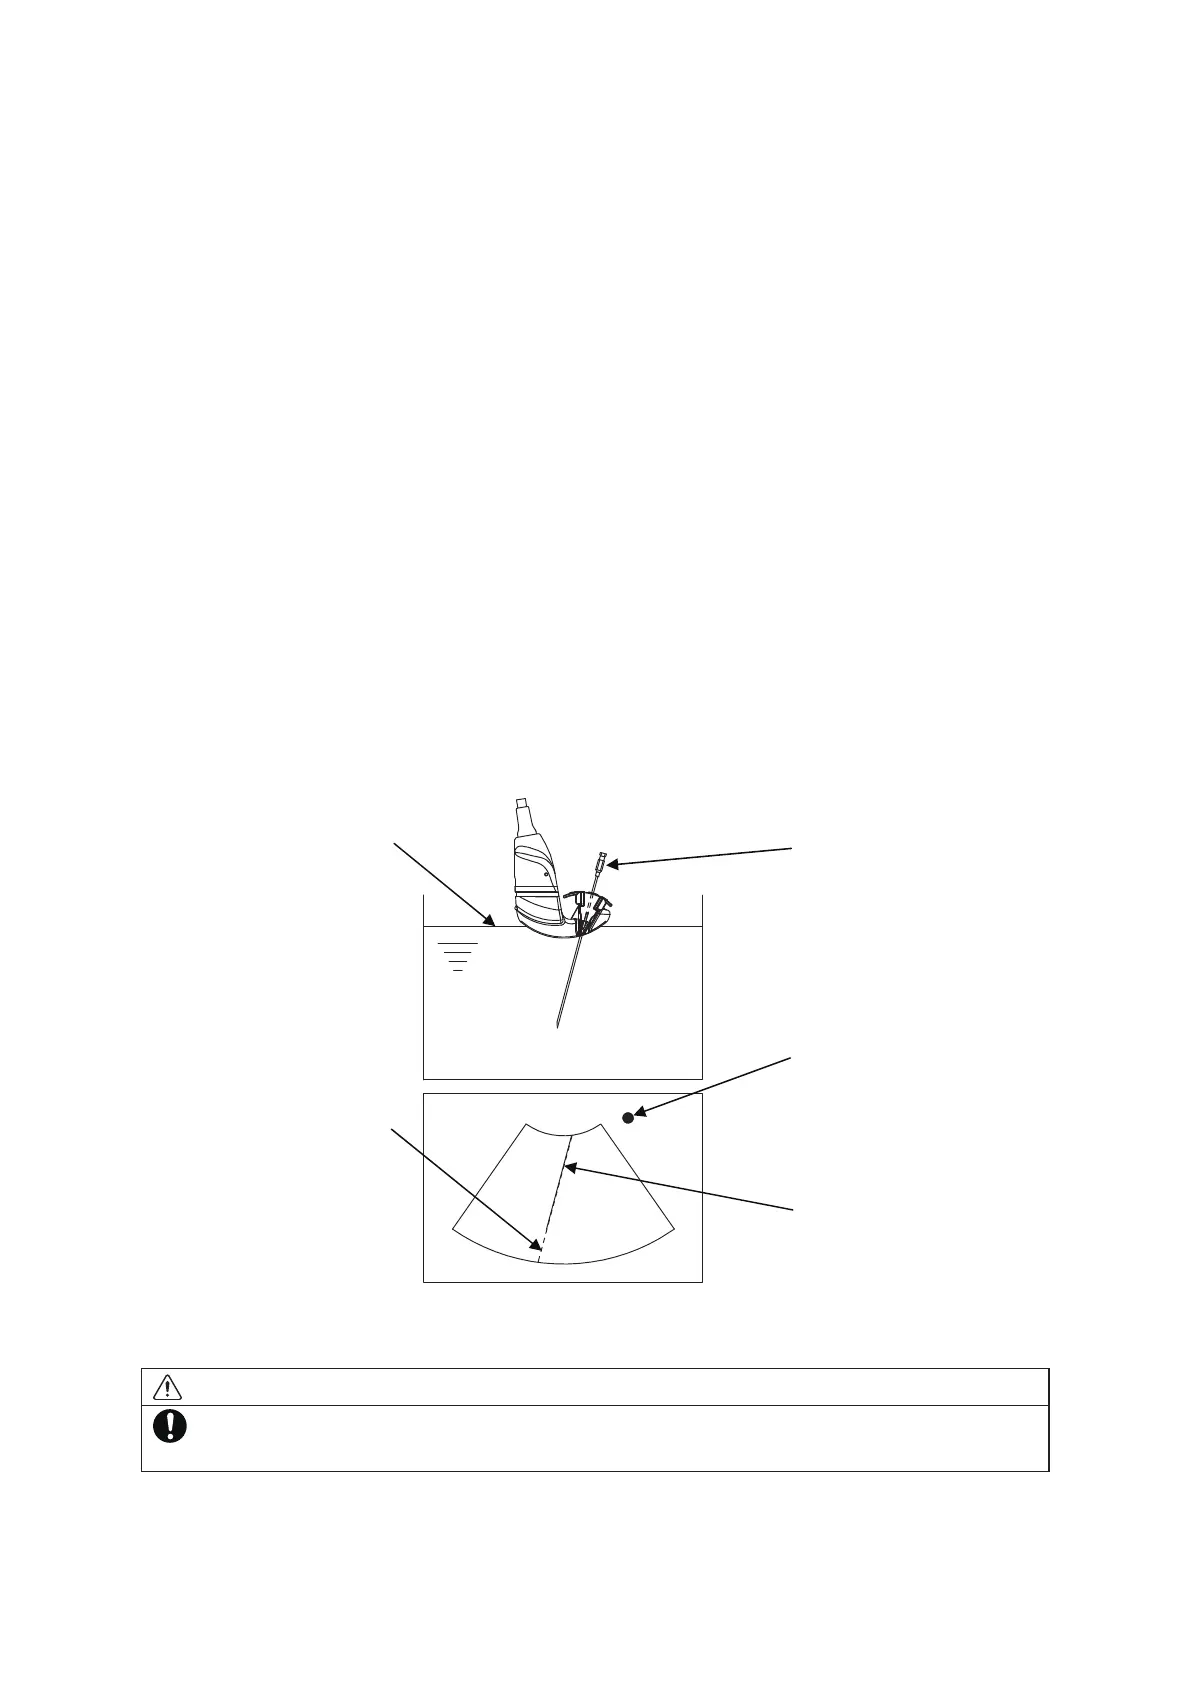
(1) Fill a tank with water at 40 degrees Celsius, and prepare a test needle for needle echo conrmation.
(2) Connect the probe to the ultrasound diagnostic instrument. Display the puncture guideline on the image.
Refer to the documentation supplied with the ultrasound diagnostic instrument for how to display the
puncture guideline.
(3) Attach the biopsy attachment to the probe according to 4-1. Insert the test needle into the needle insertion
groove. Conrm that the needle can be smoothly inserted.
(4) Put the probe in sterile water so that needle echo is displayed.
(5) Conrm that the needle echo at each angle overlaps with the correspondent puncture guideline. Refer to the
Figure 14 for the relationship between the puncture angle and the displayed puncture guideline.
Test needle
Needle echo
(Solid line)
Puncture guide line
(Dotted line)
Sterile water
Orientation mark
Figure 3 Conrmation of the needle echo
Caution
When a needle cannula for RFA is used, conrm that the needle cannula can be smoothly inserted to
the biopsy attachment without any damage, and operate it carefully.