Do you have a question about the Hitachi CM802ET and is the answer not in the manual?
Flat screen CRT, anti-glare, multi-scanning for clarity and versatility.
Adjust size, position, colour balance via digital controls, store settings.
Energy Star compliant low power mode and On Screen Display for easy operation.
Features for reducing screen interference and easy computer connection.
High voltage in rear cover; static discharge precautions for CRT surface.
Avoid magnetism, frequent power cycling, ensure safe cord connection.
Avoid direct light, clean screen with soft cloth, no abrasives.
Information on building installation protective devices for higher voltage operation.
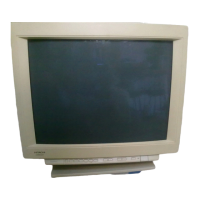
Instructions for installing the monitor on a horizontal base, with front/rear views.
Avoid rain, moisture, vibrations, dust, corrosive gases; ensure proper ventilation.
Keep magnets, speakers, etc., away to prevent display distortion.
Specifies correct power cord types, ratings, and grounding for safety.
Guidelines for UK plugs, fuse rating, and replacement.
Emphasizes the critical importance of earthing the monitor for safety.
Specifies the 13W3 Type D-Sub connector for the CM803ET model.
Steps for turning the monitor on and off, and initial power-on behaviour.
Specifies the D-Sub Mini 15-pin connector for CM802E/ET models.
Table indicating the priority for different sync signal types.
Recommended horizontal/vertical timing and notes on signal frequency.
Overview of control buttons, power on/off, and degaussing.
How to adjust contrast and brightness using select/adjust switches or EasyMenu.
Adjusting horizontal position and size of the display.
Adjusting vertical position and size of the display.
Adjusting image rotation, pincushion, and trapezoid effects.
Adjusting right-side pincushion and trapezoid distortion.
Recommended order for adjusting various image distortions.
Changing colour balance to preset modes (9300K, 6500K, 5000K, USER).
Fine-tuning Red, Green, and Blue colour components for balance.
Cancelling current colour adjustments and restoring previous settings.
Adjusting the horizontal moire changing circuit for pattern interference.
Adjusting the vertical moire changing circuit for pattern interference.
How to save adjusted settings and when they are automatically recalled.
Checking input signal conditions like horizontal and vertical frequency.
Resetting all stored data and adjustments to original factory settings.
EasyMenu messages for proper signal, no sync, or unstable sync.
Muting during signal changes to hide scrambled images.
Compliance with VESA, Energy Star; describes power states and consumption.
VESA DDC1/2B compliance for easy computer connection.
Details on CRT technology, video input signals, and synchronization.
Specifications for video clock, viewable image size, and area.
Colour temperature settings, warm-up time, and power consumption.
Physical dimensions, weight, and environmental operating conditions.
Contact information for Hitachi offices worldwide for sales and support.
| Display Type | CRT |
|---|---|
| Screen Size | 21 inches |
| Max Resolution | 1600 x 1200 |
| Max Refresh Rate | 85 Hz |
| Horizontal Refresh Rate | 30 - 107 kHz |
| Vertical Refresh Rate | 50 - 160 Hz |
| Input Signal | Analog RGB |
| Aspect Ratio | 4:3 |